
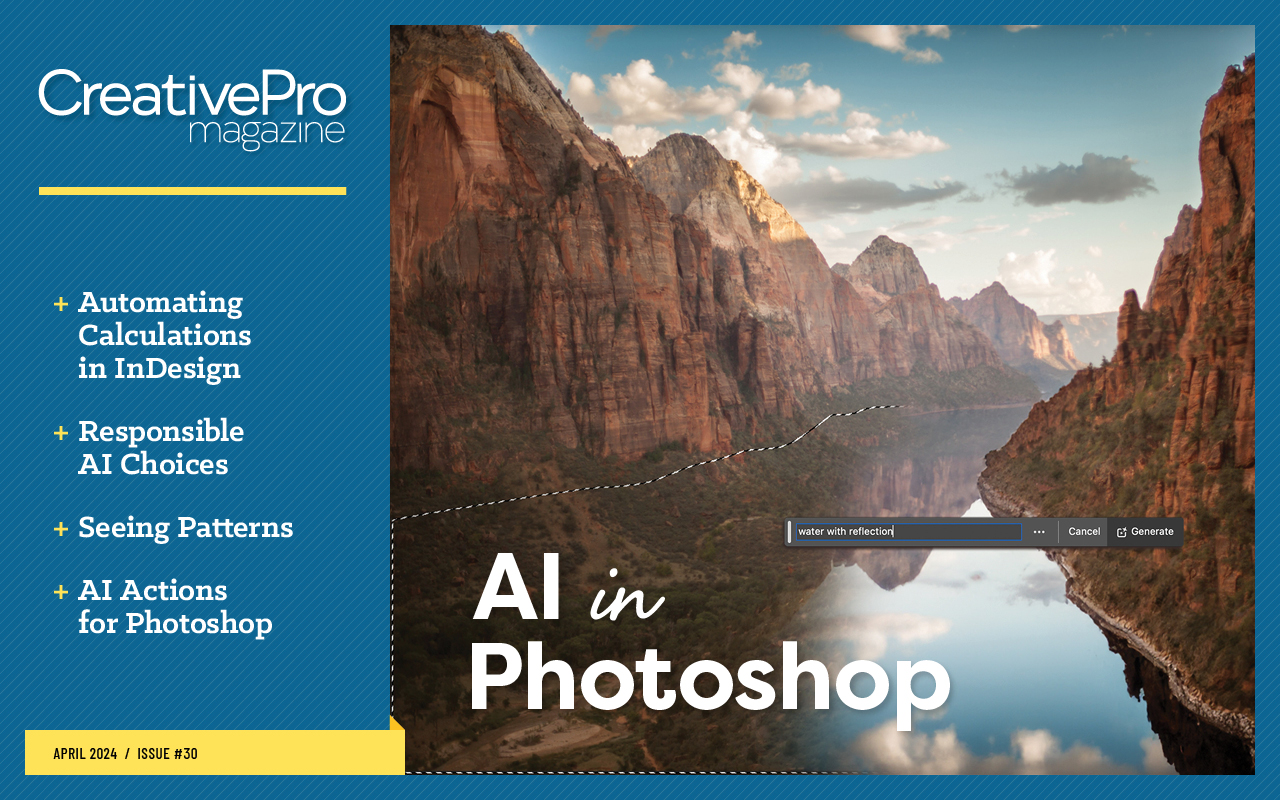
7 Great Ways to Use AI in Photoshop
Intelligent features take the pain out of common image-editing tasks.

This article appears in Issue 30 of CreativePro Magazine.
Of all the Adobe Creative Cloud apps, I think Photoshop is the most fun to use. That’s why I wrote a book about it! But, even in Photoshop, certain tasks are no fun at all. I’m thinking of things like:
- Fussing with the Clone Stamp tool to remove unwanted objects
- Combining elements from various sources into a seamless composition
- Creating and editing reflections
Yuck, right? But I’m here to tell you that the new Generative AI features in Photoshop can make these jobs go much faster and easier. Plus, you can use those same features to create amazing graphic effects in no time. In this article, I’ll show you seven ways to use GenAI to have more fun and less drudgery in Photoshop.
Generative Expand with the Crop Tool
You probably know the drill: You have a portrait photo, but you need to use it in landscape orientation for a magazine or website. You probably also know your two basic options. You could crop the photo and, unfortunately, lose a large part of it, or you could enlarge the canvas to a landscape size and add new information to the empty areas. Previously, filling in those newly expanded areas meant spending serious time with Content Aware Fill or the Clone Stamp tool—and frequently failing to achieve the desired results.
Now the process is tremendously easier thanks to Generative Expand, which enables you to add extra information to the photo with the help of Generative AI (Adobe Firefly). Whereas Content Aware Fill and the Clone Stamp tool re-use information from the original photo, Generative Expand comes up with new information based on what it learns from the surrounding image and an optional text prompt from you. Follow
these steps to try it yourself:
Select the Crop tool (Figure 1).

Figure 1. Select the Crop tool.
Enlarge the canvas (Figure 2).

Figure 2. Enlarge the canvas.
If you want to add specific information, enter a prompt in the prompt field to describe what you want to generate. (In most cases, leaving this blank works fine.) Click Generate to tell Photoshop to add new information based on the original photo.
Photoshop generates three variations of the expanded photo. Click the arrows in the Contextual Taskbar to navigate through your choices. You can also see and select the variations in the Properties panel (Figure 3).
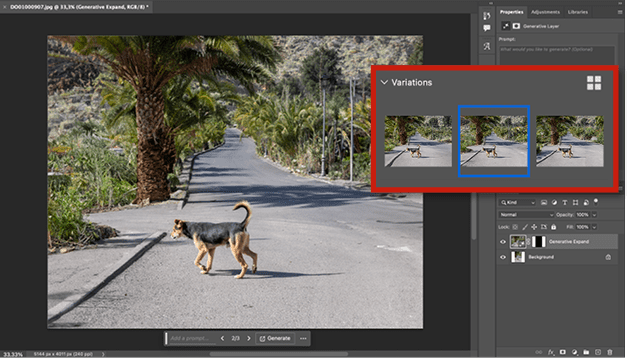
Figure 3. Click Generate, and review the generated results.
Not happy? Click Generate again to generate new variations.
Composite Elements Seamlessly with Backgrounds Using Generative Fill
As you’ve probably seen before, Generative Fill enables you to add objects to your Photoshop document based on a selection and a prompt. In addition, if you select an object and click Generate without a prompt, Photoshop will try to make the object disappear. But, did you know that you can blend elements seamlessly into the background by using Generative Fill? You can! Before I explain how, let’s review a few image-blending basics.
Imagine compositing an elephant from one photo with different background image. You would add the elephant photo as a new layer above the background photo, select the elephant, and then add a layer mask to hide everything outside the selection.
You would also immediately see a problem: The colors match up quite nicely, but the elephant seems to be floating. To try to make the elephant blend more with the background, you probably would then copy some grass from another part of the photo and paste it over the elephant’s legs, or you could use a grass brush instead. Adding some shadow might help, but maybe not because the lighting is quite soft without a direct hard light source in the background image.
Sounds like a lot of work, doesn’t it? That’s because it is! Fortunately, Generative Fill offers a better and faster way. To blend layers together, follow these steps:
Add an elephant layer above a background image (Figure 4).

Figure 4. Add the elephant photo to the background image.
Select it (for example, with the Select Object tool), and add a layer mask to hide the elephant’s original background (Figure 5).

Figure 5. Make a selection, and add a layer mask to isolate the elephant.
Select the area you want to blend. I made a rectangular selection around the bottom of the feet and part of the grass. Don’t make the area too large. Everything within the selection will be replaced when you use Generative Fill (Figure 6).

Figure 6. Make a selection around the area you want to blend, and use Generative Fill without typing a prompt.
Click Generative Fill, then click Generate.
Choose the best variation (Figure 7).

Figure 7. Choose the best variation. So much easier!
Amazing, isn’t it? Because you selected the overlapping area between the elephant layer and the original background photo, Photoshop tries to make that area blend as naturally as possible.
What’s a Generative Fill Layer, and How Do You Move It?
Generative Fill seems quite magical, but now it’s time to look behind the curtain to discover what a Generative Fill layer actually is. The more you know about this great and powerful feature, the more you can accomplish with it, such as moving generated content to another place.
Let’s build on the previous example and place a wooden cabin for wildlife viewing next to the elephant.
Create a lasso selection with the rough shape of the cottage you want to generate (Figure 8).

Figure 8. Create a selection.
Click Generative Fill, enter something like wooden cabin in the prompt field, and click Generate (Figure 9).
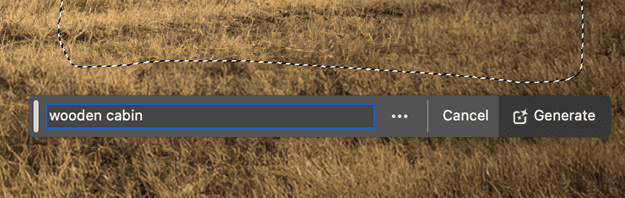
Figure 9. Fill in a prompt, and click Generate.
Choose your preferred variation (Figure 10).

Figure 10. Choose the best variation.
Now try to move your beautiful cabin a bit closer to the elephant. It doesn’t work, does it? All the generated content within the original lasso selection moves with it (Figure 11).

Figure 11. Moving this cabin to another place doesn’t work.
There are multiple ways to solve this, You could, for instance, adjust the layer mask of the Generative Fill layer, but I always find that quite a hassle. Fortunately, a Generative Fill layer is basically a Photoshop Smart Object that contains three layers (one for each variation generated). Because you can convert Smart Objects to layers, you can also convert a Generative Fill layer to layers. Here’s how to do it:
Right-click the layer name of the Generative Fill layer in the Layers panel and choose Convert to Layers (Figure 12). Photoshop unpacks that layer and turns it into a layer group, and you can see all the variations in it as separate layers (Figure 13). On the canvas, however, only the selected variation layer is visible.

Figure 12. Right-click and choose Convert to Layers to convert the Generative Fill layer to layers.

Figure 13. This is what’s actually inside a Generative Fill layer.
Drag the variation you like most out of the layer group, and hide the layer group by clicking on the corresponding Visibility (eyeball) icon (Figure 14). You now have a block-shaped layer, which you can manipulate like any other layer.

Figure 14. Drag your preferred layer out of the Generative Fill group.
Select the cabin with your favorite selection tool (Figure 15). I used the Object Selection tool.

Figure 15. Make a selection of your object, and add a layer mask.
Create a layer mask to hide the area around the cabin.
Move the cabin to your preferred location (Figure 16). Cool!

Figure 16. You can now move the object to another place, but it doesn’t blend well.
Notice that there’s still one problem: The cabin doesn’t blend well into the background. But now you know a solution for that!
Drag a lasso selection around the bottom of the cabin and a part of the surrounding grass (Figure 17).

Figure 17. Make a lasso selection around the bottom of the house and the grass, click Generative Fill, and then click Generate.
Click Generative Fill, then click Generate.
Voilà—the result looks amazing (Figure 18)!

Figure 18. The house now blends nicely into the background again!
Removing Unwanted Elements with the Remove Tool
One of the newest additions to Photoshop, the Remove tool is based on artificial intelligence but runs entirely on your own device. That means that you don’t need an internet connection to use it. As you’d guess, the Remove tool is very good at removing objects. It combines the best aspects of the Spot Healing Brush, the Clone Stamp tool, and Content Aware Fill, and these days I use it for almost all object-removal jobs. If the situation gets too complex, then I use Generative Fill in combination with a lasso selection and an empty prompt field.
Remember, however, no tool is perfect. Because Generative Fill and the Remove tool are still relatively new, your results may be a bit hit or miss. Also, because the Remove tool performs all its AI calculations on your local device, the tool can be very slow on older, slower computers. If that describes your device, try the Spot Healing Brush as a second choice.
Let’s give the Remove tool a test drive.
Select the Remove tool in the toolbar (Figure 19).

Figure 19. Select the Remove tool.
In the Options bar, turn on Sample All Layers so you can work on a new, empty layer. If you don’t enable this option, you can work on the original layer only. I think it’s always better to work nondestructively on a new layer (Figure 20).

Figure 20. Check Sample All Layers to be able to work on a new layer.
Create a new, empty layer in the Layers panel (Figure 21).

Figure 21. Add a new layer.
Paint over the objects you want to remove (Figure 22). You might need to change the brush size. You can do this with your preferred shortcuts, or in the Options bar. This works just like the Spot Healing Brush.

Figure 22. Paint over the objects you want to remove.
Release your brush, and the object is gone (Figure 23).

Figure 23. Gone!
I’m always amazed at the great results possible with this tool. And the coolest thing is that the tool is constantly being improved with each Photoshop update, so it’s only going to get better.
The Remove tool also has a nice but somewhat hidden feature, named the Brasso, a portmanteau of brush and lasso. If you make your brush size smaller, you can draw a lasso around the objects you want to remove. The Remove tool then fills the lasso and removes everything inside it. This is very useful, and above all, often faster than drawing all over the object.
Let’s try the Brasso.
Make the brush size smaller and draw a lasso around the objects you want to remove (Figure 24).

Figure 24. Use the Brasso, a brush lasso, to paint a lasso around objects you want to remove.
When you complete the lasso, Photoshop will fill it with the magenta Remove tool overlay (Figure 25).

Figure 25. The Remove tool fills the Brasso and removes the objects in it
Release the tool to remove the object (Figure 26).

Figure 26. Gone!
Avoiding Crazy Results with Generative Fill
If you’ve ever tried to remove objects with Generative Fill, you may have gotten some bizarre results. In the steps below, I’ll show you what usually causes these and how you can avoid them.
Create a selection around the subject you want to remove. In this example, I chose Select Subject from the Contextual Taskbar, because I wanted to remove the woman in the photo. Select Subject is the quickest way to make this selection (Figure 27).

Figure 27. Make a selection around the object you want to remove. I used Select Subject in the Contextual Taskbar.
To make sure everything will be removed, expand the selection with 50 pixels. In the Contextual Taskbar, click the Modify selection button and choose Expand Selection (Figure 28), enter 50 in the Expand By field, and click OK (Figure 29).

Figure 28. Go to Expand Selection.

Figure 29. Expand the selection by 50 pixels.
Click Generative Fill, leave the prompt field empty, and click Generate (Figure 30).

Figure 30. Click Generative Fill, and click Generate.
Although Photoshop completely removes the woman, the AI algorithm adds all sorts of crazy elements to each variation as well (Figures 31 to 33).

Figure 31. Strange result 1

Figure 32. Even weirder result 2

Figure 33. Are those panic buttons in result 3?
Let’s go back a few steps to see what caused this: Undo until you see the expanded selection again.
Notice the shadows of the woman on the wall (Figure 34). Because those shadows are not included in the selection, Photoshop generates objects that belong to those shadows—not what you want. The solution is to add the shadows to the selection.

Figure 34. The original selection did not include the shadow.
Select the Lasso tool, hold Shift, and draw a selection around the shadows to add them to the current selection (Figure 35).

Figure 35. Add the shadow to the selection with the Lasso tool.
Click Generative Fill and then Generate again to create three perfect variations (Figure 36).
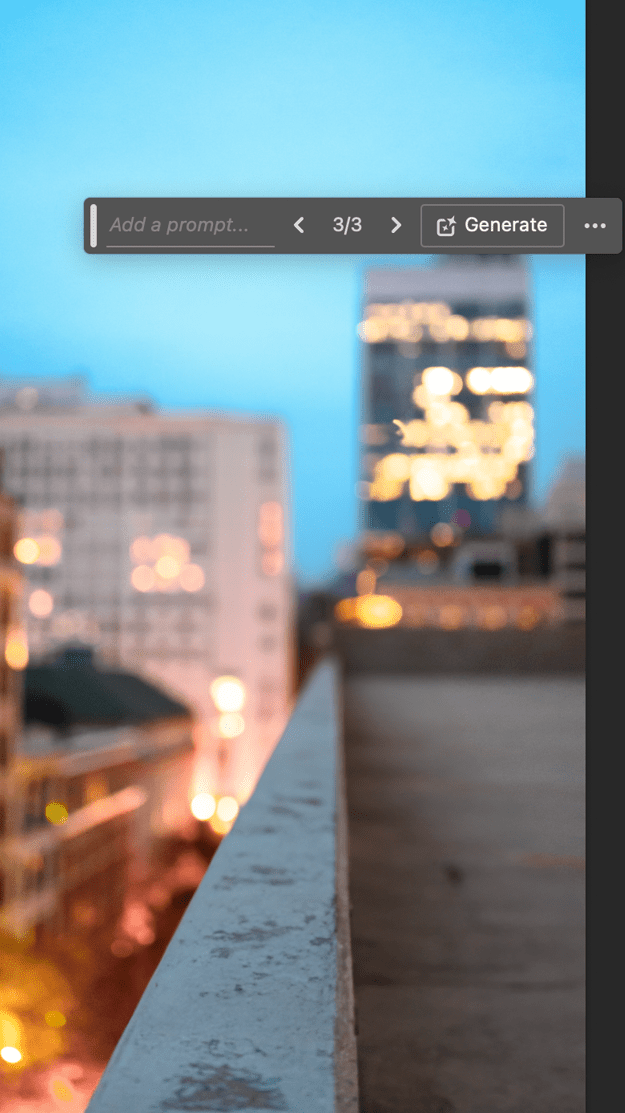
Figure 36. Generate again—much better!
If you want to avoid crazy results, make sure that all shadows and other elements related to the object you’re removing are included in your selection. Sometimes a very small, almost invisible shadow can throw a spanner in the works when using Generative Fill.
Creating Generative Fill Reflections
Creating reflections in Photoshop used to be frustrating. I don’t know about you, but I was rarely satisfied with my results—even after a hefty investment of time and effort. But that was before Generative Fill. Now we can easily create reflections, and here’s how:
Select the area where you’d like to generate the reflection. I usually use the Lasso tool (Figure 37).

Figure 37. Create a selection with, for example, the Lasso tool.
Click Generative Fill, and enter a description like water with reflection in the prompt field (Figure 38).

Figure 38. Add a prompt in the prompt field, and click Generate.
Click Generate.
That’s it—amazing results from three easy steps (Figure 39)!

Figure 39. Three beautiful reflection variations
Creating Watercolor or Other Artistic Effects with Generative Fill
Because Generative Fill is still such a new feature, it contains a lot of hidden gems. For example, you can use partially transparent selections to turn your photo into a watercolor painting. Here’s how:
Open a photo you’d like to turn into a watercolor painting (Figure 40).

Figure 40. The original photo
Press Q to enter Quick Mask mode, or click the Quick Mask button in the toolbar (Figure 41). In Quick Mask mode, you can make all kinds of selections, including transparent ones.

Figure 41. Select Quick Mask mode.
In the next steps, we’ll create a semi-transparent selection around the entire canvas edge by filling the whole canvas with a gray value. In Quick Mask mode, 100% black creates a selection with 100% opacity, 0% black creates a selection with 0% opacity, and all in-between values are semi-transparent. I’ll explain why this is important in a bit.
Choose Edit > Fill (Figure 42).

Figure 42. Choose Edit > Fill.
Choose Color in the Contents list to open the Color Picker.
Specify a 30% Brightness value by filling in the following HSB values: H: 0%, S:0%, and B: 30% (Figure 43).
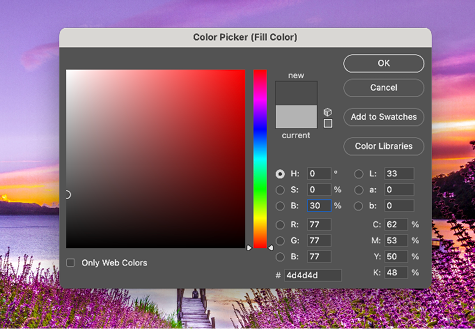
Figure 43. Choose a value of 30% B.
Click OK to close the Color Picker, and click OK again to close the Fill dialog. You just created a full canvas selection with 30% opacity. Note: Because the selection opacity is so low, Photoshop doesn’t show the marching ants you usually see when you create a selection.
Exit Photoshop Quick Mask mode by pressing Q or clicking the Quick Mask button in the toolbar.
Click Generative Fill, and type a prompt like watercolor painting (Figure 44).

Figure 44. Type a prompt like watercolor painting in the prompt field.
Press Return/Enter, or click Generate (Figure 45).
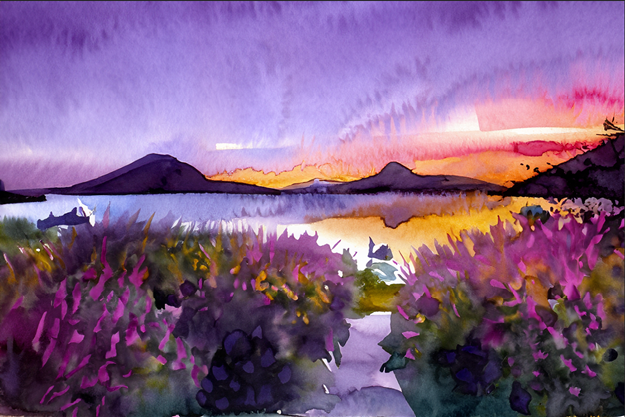
Figure 45. The end result
You can also use this semi-transparent selection technique for lots of other special effects, too. So, how does it work? If you create a selection with 30% opacity, Photoshop still “sees” 70% of the underlying image (your photo). If you then add a Generative Fill prompt such as watercolor painting or oil painting, Photoshop will also keep 70% of that underlying image and turn 30% of it into a watercolor painting. You can compare it to a mix slider or mix ratio. This means that the watercolor painting will look a lot like the underlying image. I’ve found that a value around 30% opacity works best for this type of effect.
If, for example, you added a 70% opacity selection, Photoshop would “see” only 30% of the underlying image and change 70% of it. The watercolor image would barely resemble the original image. And if you just added a rectangular marquee selection around the canvas, it would always be a 100% opacity selection. Photoshop would use nothing of the original image and just create a random watercolor image without even looking at the underlying image.
Scratching the Surface
While features like Generative Fill are still in their infancy, they already offer us relief from boring, difficult tasks, as well as new creative avenues to explore. Just imagine where we might be in a few years and all the hidden gems we’ll uncover on the way! In the meantime, enjoy the process of discovering what these tools can do for you.
Commenting is easier and faster when you're logged in!

Recommended for you

Quick Tips for Better Composites and Adjustments in Photoshop
Learn tricks to color correct an image in Photoshop using curves by redefining t...

How to Adjust Image Scale and Crop in Illustrator
Learn some quick tricks for re-sizing and cropping images in Illustrator, includ...

How to Use Photoshop’s New Harmonize Tool
Match your object with the background scene's lighting and shadows using Photosh...