


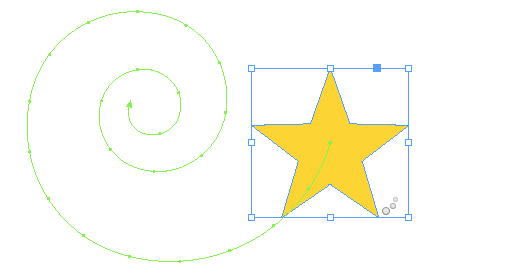
One of the coolest ways to customize animations in InDesign is to use any path in your document as a motion path. You can use any non-compound path to make things move.
For example, select an object and apply an animation like Fly In From Top, and then click on the motion path with the Direct Selection tool to change its shape. Use the Pen tool to add or remove anchor points and change the shapes of path segments.

That way you can make a feather gently float downward instead of dropping like a rock.

You can also bring in a path from another application, like Adobe Illustrator (via copy and paste) and then make it into a motion path by selecting it and the object you want to animate. Then go to the Animation panel menu and choose: Convert to Motion Path.

This article was last modified on January 12, 2026
This article was first published on November 18, 2014
Commenting is easier and faster when you're logged in!

Recommended for you

This Week in InDesign Articles, Number 56
Sorry it's been so long! I've gathered a lot of good stuff in the meantime...
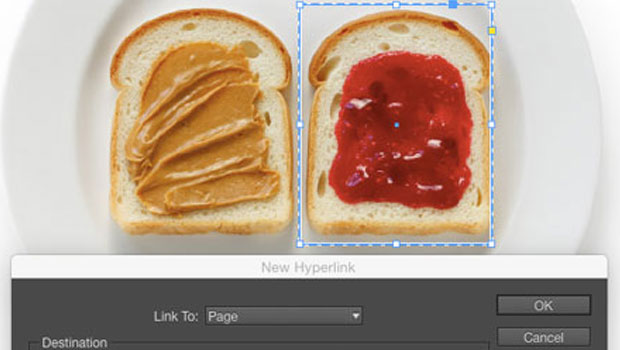
Linking to a Page in Another InDesign Document
Learn a quick trick for interactive PDFs: how to make a hyperlink to another InD...

CreativePro Conference Speaker Spotlight: Jesús Ramirez, the YouTube Photoshop King
Welcome to our new series of posts called Speaker Spotlight, designed to highlig...