
InDesign How-To: Designing with Data
Michael Murphy shows you how to take a bone-dry spread- sheet and turn it into a gorgeous layout.

This article appears in Issue 42 of InDesign Magazine.
Data and design might seem like strange bedfellows, but with a little InDesign know-how, you can combine the two to achieve layouts that are effective and informative… and do so surprisingly fast. For example, I recently used InDesign’s built-in Data Merge to bring a modest spreadsheet to visual life (and get around the limitations of Table and Cell Styles), saving a tremendous amount of time in the process.
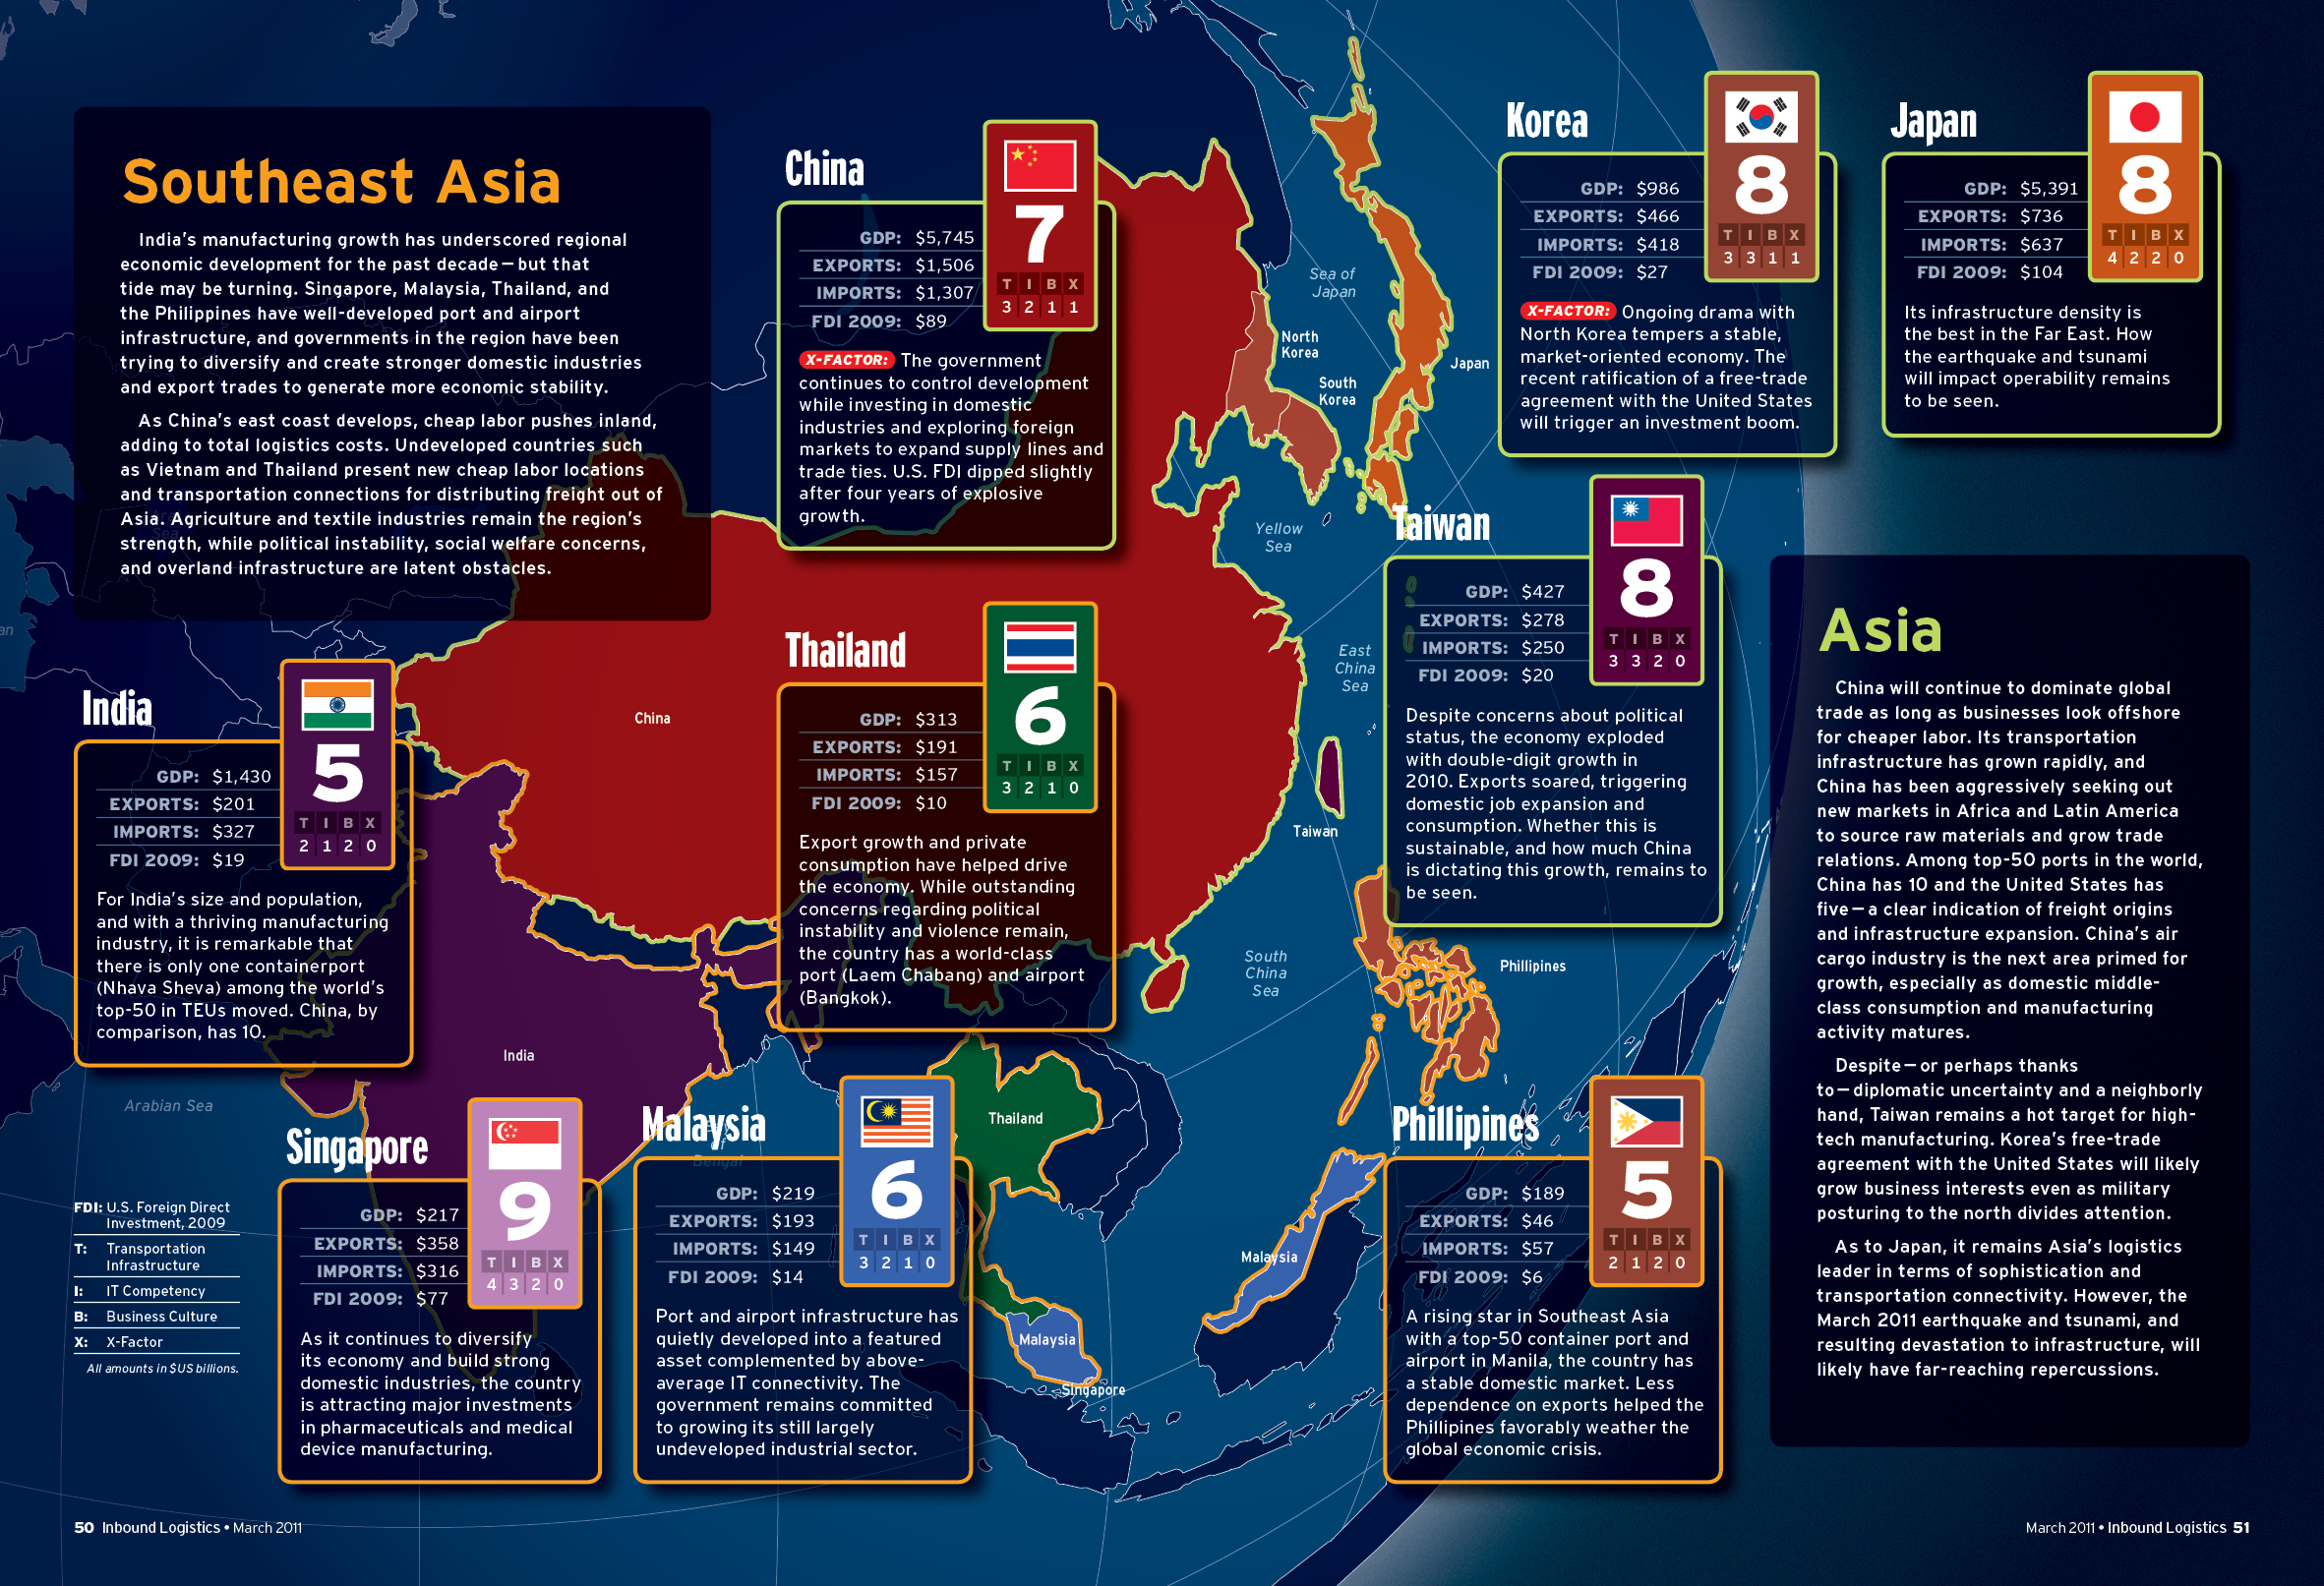
This layout, which I created for Inbound Logistics magazine, originated as a spreadsheet of data compiled about the strengths and weaknesses of locations around the world for companies to consider setting up logistics operations. The spreadsheet (Figure 1) contained valuable, well-researched information that warranted a presentation more interesting than a mere table. Instead, I chose to produce individual tables for each country, including an image of its flag, and distribute those tables across several spreads against a map backdrop (Figure 2).

Although the end results were impressive, the Data Merge part didn’t vary at all from any textbook Data Merge. Let’s take a high-level look at that process.
Step 1. Understand the Components
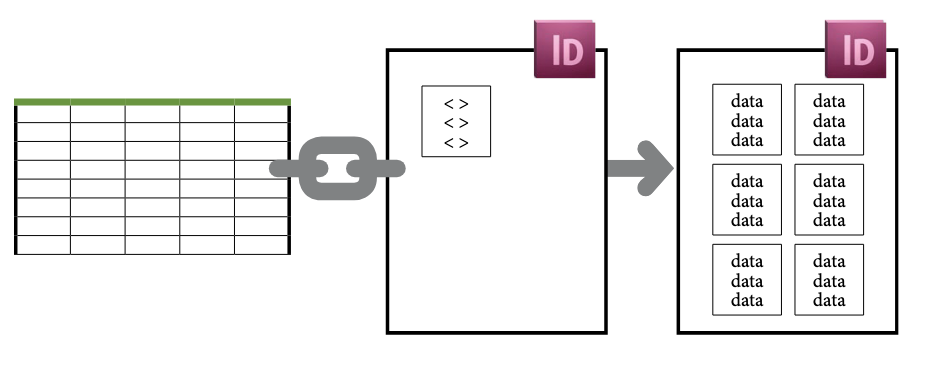
There are two things you need for an InDesign data merge: an InDesign document, and a data source file. The InDesign document is where you design static page elements and establish data placeholders in preparation for the merge. The data source is a tab- or comma-delimited file (most commonly saved from a spreadsheet application like Microsoft Excel or from a database). From these two, a new “merged” InDesign document is produced that incorporates the information from your data source into your design (Figure 3).
Step 2. Plan, Design, and Decide
This isn’t, technically, an InDesign step. It’s a combination of sketching, trial-and-error, problem-solving, and decision-making that gives you a concrete goal to shoot for. What matters most is that you have a final design planned out and a data merge source that is ready to generate multiple iterations exactly the way you want. After you’ve run the data merge, any adjustments you make will need to be done object-by-object. You want to avoid that additional work, or keep it to a minimum. So it’s worth taking a step back to be sure everything’s thought through before you start.
In my layout, each country’s data was presented in a complex table that included other tables anchored within it as anchored objects, as well as anchored text frames and images, and multiple paragraph styles. The tables were so precisely formatted that they were beyond the practical capabilities of InDesign’s Table and Cell Styles feature, so I opted to create one “perfect” table as a basis for the others (Figure 4).

Step 3. Start with the Data
You can’t put data placeholders into your InDesign document unless you have a data source, so let’s start there. I’ll assume you received an Excel document as your data source. Excel is the ideal environment for sorting and organizing data until you’re ready to hand it off to InDesign. There are only two absolute rules you must follow to make a data source InDesign-ready:
- It must have a header row.
- All image files the data source refers to (see step 4) must be at their specified location.
Beyond that, InDesign is pretty flexible. For example, you’re not required to use all the data in the source file. You may link to data from a 20-column spreadsheet, but if there are columns of data you don’t need, just don’t create placeholders for that data in your layout. Also, your spreadsheet can contain blank cells (a.k.a. empty fields) if there’s no relevant data for any one item. InDesign even offers options for handling empty fields (see step 10).
Step 4. Identify your Image References
InDesign’s Data Merge isn’t just a mail merge with better typography. You can also use it to include any type of image you could manually place in a layout. All you need to do is identify the full path to the image file in your data source. On the Mac, this could be something like Macintosh HD:userfolder:Projects:Client Name:Images:imagename.psd. Windows users should replace the colons in that example with backslashes (i.e.,C:userfolderProjectsClientNameImagesimagename.psd).
To tell InDesign that a column contains image references, add the @ symbol at the beginning of the column header (e.g., @photo). Unfortunately, if you type this in Excel, it will think you’re creating a formula (and complain that you’re doing it wrong), so you need to type an apostrophe (‘) before the @ symbol. When you hit Enter, or tab out of that cell, the apostrophe won’t be visible, but Excel will accept the @ in the header cell, and InDesign will have what it’s looking for as an identifier of image references (Figure 5).

Step 5. Save as Tab- or Comma-Delimited
Before a spreadsheet can be used by InDesign, it needs to be saved as either a tab-delimited (.txt) or comma-delimited (.csv) file. You can save a tab-delimited version from Excel by choosing Save As… , then selecting Text (Tab delimited) from the Format pull-down menu in the Save As dialog, but you’ll be confronted by up to 8 export dialogs and cautionary alerts. I prefer a quicker method: Select all of the data from your Excel spreadsheet (including the column headers), copy it, paste it into any plain-text editor, and save it as a “.txt” file. If you need or prefer to go the CSV route (it makes no difference to InDesign), choose Save As… in Excel, then CSV (comma-delimited) from the Format pull-down.
Step 6. Link Your InDesign Document to Your Data
Once your data’s in one of those Data Merge-friendly formats, you need to connect it to your InDesign file. With your InDesign data template file open, go to Window > Utilities > Data Merge (CS5 and 5.5) or Window > Automation > Data Merge (CS4 and earlier) to access the Data Merge panel.
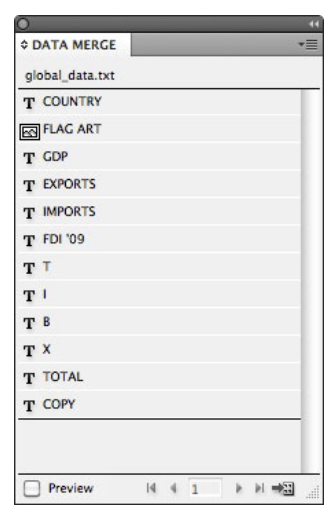
From the panel’s flyout menu, choose Select Data Source, then navigate to and select the tab- or comma-delimited file you created in the previous step. Once imported, your data source file’s column headers appear as a list in the Data Merge panel (Figure 6). Text-based data appears with a “T” icon next to the header name, and image references (any column beginning with the @ symbol) have a picture icon next to them.
Step 7. Add Data Placeholders
In your layout, replace any temporary text you may have used in your “template” with a placeholder from the Data Merge panel (Figure 7). To do this, either select a column header name from the Data Merge panel and drag it into a text or graphic frame, or put your cursor in the appropriate place in a frame, then click on the column header name in the Data Merge panel. Placeholders appear as the data source’s column header name, surrounded by pairs of angle brackets, in whatever style you’ve applied in your layout.

Step 8. Clear the Decks
InDesign can do a single-record or multiple-record data merge. The former creates a new page for each record in the data source file; the latter fits as many records as it can on one page before creating another page.
To be able to produce a multiple-record layout, you must follow a few rules about how you set up your “interim” InDesign document for the merge:
- A multiple-record data merge can only be produced from a single-page InDesign document. Having two or more pages restricts data merge to single-record mode.
- Everything on the document page—even if it has no data placeholders in it—will be duplicated in the merge process. If the other objects on your page prevent more than one record from fitting (such as a big background image), Data Merge will behave as if it’s producing a single-record layout because the document can’t accommodate more than one record per page. So, If there are page elements you want on the page that don’t need to be part of the merge, move them to the master page.
Step 9. Preview Your Results
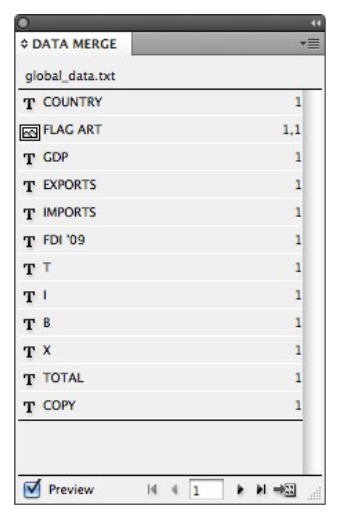
To test your success with the set-up process, check the Preview box at the bottom of the Data Merge panel (Figure 8). InDesign then temporarily replaces the placeholders you added with the information from the first record (row) in your data source. You can click the forward and back arrows at the bottom of the Data Merge panel to preview each record (Figure 9) and check for problems, copyfitting issues, etc. This is particularly important in a table-based layout like this because overset text in a table just disappears. Since data length can vary, you want to be sure that a table-based design will accommodate the longest possible instance of any data element.

If you plan to create multiple records per page, as I did, you’ll need to go beyond the Preview checkbox and choose Create Merged Document from the panel menu. In the Records Tab of the Create Merged Document dialog (Figure 10), change the default from Single Record to Multiple Records, and select the Preview Multiple Record Layout checkbox.

If the multiple record layout needs tweaking—to fit more records on a page, add or remove space between records, etc.—switch to the Multiple Record Layout tab. There, you can adjust margins, space between columns, space between rows, and indicate whether the layout builds Rows First (across, then down) or Columns First (down, then across). By adjusting my margins and column spacing (Figure 11), I was able to fit nine country tables on a page instead of six. I ultimately moved them around in a more free-form fashion in the final layout, but for something like a yearbook where the number and arrangement of records per page is essential, these controls make adjustments simple and immediate.

Step 10. Set Additional Options
The Options tab of the Create Merged Document dialog allows you to establish frame fitting and centering options for the images imported during the merge (Figure 12). You can also opt to have InDesign remove blank lines where there’s a placeholder, but no data (a blank cell) for that placeholder in a given record. There’s also an option for setting a cap on the number of records the merged document can contain. Once that limit’s reached, additional documents will be created containing the remaining records up to that per-document limit. So, if your data source contains 200 records, and you set a 50-record limit, four merged documents will be created.

Step 11. Create the Merged Document
Clicking OK in the Create Merged Document dialog both commits your settings and produces the final InDesign document (as “yourfilename-1.indd”). Unless you need to run the merge again, you’re finished working with the “interim” document where you did all of your set-up. (It’s a good idea to save that file, though, in case the data changes and you need to merge again.) In the new, merged document, there is no longer a link to the data source file. All of the data brought in during the merge process becomes static text within the InDesign file.
If your design calls for each record to appear on a defined grid, you’re done. However, for this project, Data Merge was the most efficient way to create 24 complex, identically structured and formatted tables, which I then manually moved around in a layout with map backgrounds. As a final step, I customized some table attributes individually to better connect them to the maps, and I added introductory text for each region (Figure 13). But that was all fine-tuning, and I could spend the time doing that because using Data Merge for the heavy lifting saved me hours of potentially painstaking work.

Everywhere you look, there’s no escaping how data-driven our world is becoming. All that data, in theory, is making our lives easier, more informed, and everything more immediate. But data is only as good as how you present it. Using InDesign’s Data Merge, you can take advantage of all of the benefits of structured data and transform into great-looking layouts.
This article was last modified on December 1, 2025
This article was first published on September 8, 2011
Commenting is easier and faster when you're logged in!

Recommended for you
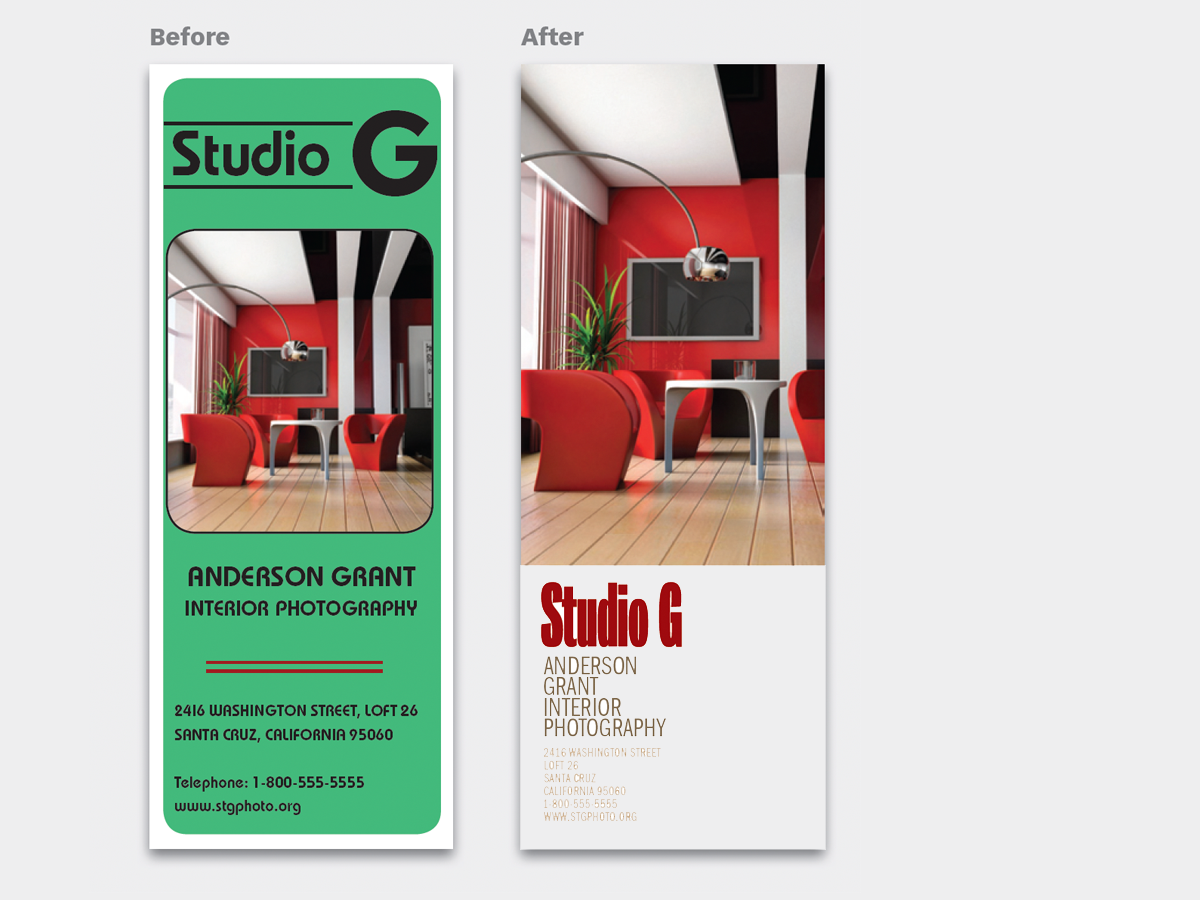
Before&After: Design Like a Lazy Person
Design is easier if you segregate your page into two zones—image here, type ther...

The Friendly Alien Easter Egg in InDesign
Back in the day, just about every major desktop publishing and design program ha...

Limited Edition Stock Photos Starring Vince Vaughn and Friends
Getty Images’ iStock is promoting Twentieth Century Fox’s upcoming V...