In an earlier article, I wrote about how to import lots of images into InDesign at the same time. Later someone asked me how to import a folder of images so that each image shows up on a different page — much like the PDFplacer script (or PlaceMultiPagePDF.jsx script) splits up pages of a PDF so that each page shows up on its own InDesign page.
Here’s a pretty quick two-step process for how to import all a whole folder of images into InDesign quickly, using two features which sound advanced but are really pretty easy.
Setup
Before you start, though, you need to download and install a script called ImagesToCSV.jsx (written by Loic Aigon). If you don’t know how, then here’s how to install a script in InDesign.
Also, you should open a new InDesign document and create a graphic frame on the first page. This can be any size; it is the “template” into which all your images will get placed (one on each page). You might want to create and apply an object style to this frame in the Object Styles panel. (That way, you could edit that object style later and all the image frames throughout the document would get updated at the same time.)
1. Create the List of Images
When you double-click on the ImagesToCSV.jsx script inside the Scripts panel, it’ll ask you to select a folder. Navigate into the folder (so that you can see a grayed out list of the images you want to import) and then click the Open button. It will seem like nothing happened, but the script very quickly writes a csv file (“comma separated” text, similar to what you might export from Excel or a database) which contains a list of all the names of the files and their paths. The path describes where InDesign can find those images — what folder they’re in.
2. Import with Data Merge
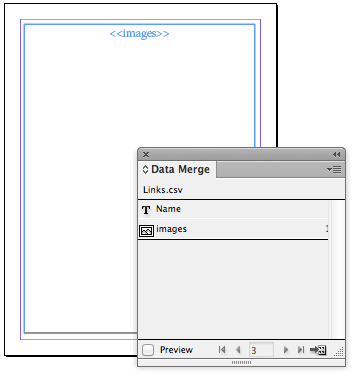
Next, open the Data Merge panel (Window > Utilities > Data Merge), choose Select Data Source from the panel menu, and choose that CSV file (it’s in the same folder as the images you want to import).
Select the graphic frame you created on the page, and then click on the word “images” in the Data Merge panel. That tags the frame with that data “label.”

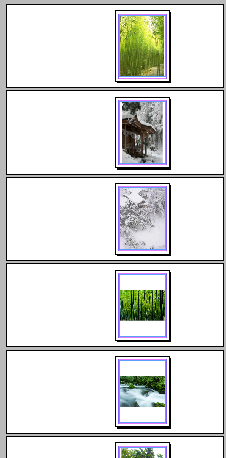
Finally, select Create Merged Document from the Data Merge panel menu (or click the button at the bottom right of the panel). The Create Merged Document dialog box lets you specify which images you want to import (for example, you might want to try importing just 10 out of 1000, just to make sure it’s working correctly).

If you click the Options tab, you can tell InDesign how to fit the images into the frame. If you want to ensure the image is completely visible on the page (so that no part gets cropped out), choose Fit Images Proportionally from the Fitting pop-up menu.

When you’re ready, click OK and InDesign creates a new document with the images!

This sounds like a long process, but believe me, after you do it once or twice it goes extremely quickly and you can import hundreds of images in less than a minute.
Of course, if you need labels with the images, you could use Data Merge for that, too, or (probably easier) use the Live Captions feature. Just set all that up in the original template document.
This article was last modified on December 1, 2025
This article was first published on June 10, 2013
Commenting is easier and faster when you're logged in!
Recommended for you

Making Heat Maps with GREP and Data Merge
With this scripted technique for creating heat maps in InDesign, you can craft s...

Using Data Merge to Create a Table for a Directory
This amazing free script lets you do something you've never been able to do in I...

Exploring Color Combinations with Data Merge
Learn the clever trick for showing all possible permutations of colors in a logo...


