How to Quickly Place Many Images into Your InDesign Document
So you have 300 images to import quickly? Here are some quick ways to do it.

Diane wrote:
I have 300 headshots to put into a program. There has to be an easy way to do this, right?
Sure! Here are several ways to import all the images into your InDesign document. Most of these require that you put your images into a single folder on disk.
Frames on Master Page
You could place a bunch of empty graphic frames on a master page, arrange them the way you want, and even use Object > Fitting > Frame Fitting Options (while the frames are selected) to ensure that the images fill the frame when you place them.

Then, return to your document page, choose File > Place, select all the images in the Place dialog box (click on the first, then Shift-click on the last), and click Open. InDesign loads all the images into the Place cursor.

Now you can click. And click. And click. Add new pages as necessary. 300 images, 300 clicks.
There has to be a faster way, right? Yup.
Use Gridify or Contact Sheet Keyboard Shortcuts
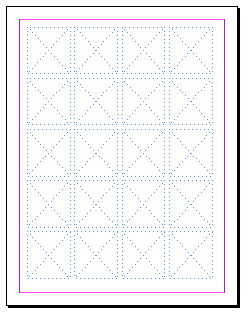
Start with a blank page. Use File > Place to import all the images. Now you can use one of two different keyboard shortcuts to create a grid.
Gridify: You can start dragging the Place cursor (as though you were making a new frame) and, while the mouse button is held down, press the up arrow on your keyboard to add a new row, or the right arrow to add a new column. Add as many as you want. When you let go of the mouse button, InDesign creates all the frames and places images into them. Whatever images are left over remain “in” the cursor, so you can jump to the next page (or add pages) and repeat. But don’t repeat! Instead use?
Contact Sheet: You get the same grid effect by holding down Command-Shift (or Ctrl-Shift) and dragging. This time you don’t have to press the arrow keys because (whew!) InDesign remembers how many columns and rows you made the last time you used the Gridify effect. In other words, use the Gridify feature above to do the first page, and then use this Contact Sheet feature for all the subsequent pages.
One of the main problems with either of these techniques is that the frame size may be inconsistent if you don’t start and end dragging in exactly the same place on every page. For that sake, it’s usually a good idea to have guides on the pages (or master pages) to indicate where you should drag.
Gutter size: Many people ask how to control the size of the gutter (the space) between the frames. By default, it’s based on the gutter width set in the Layout > Margins and Columns dialog box. But you can override it by holding down the Command/Ctrl key and pressing the arrow keys on your keyboard. For example, Command/Ctrl-Up arrow increases the size between each column in the grid. Yes, you have to do this while you’re still holding down the mouse button.
Anne-Marie added some good tips here, too. And we have a video cast version here.
Use Data Merge
One of my favorite methods of importing images into InDesign is called Data Merge. However, it takes some setup, so it’s not really attractive unless you have hundreds or thousands of images. We have a number of articles on data merge on the site, but here’s the most relevant one to start with. And once you’ve digested that, check out this script for making data merge flow your images as anchored objects in a story. Wicked cool!
Use a Script
There are a number of free or low-cost scripts that let you import all your images onto a bunch of pages. But you already have one and may not even know it. See this article about the ImageCatalog script.
(A quick review of the web also finds these two Applescripts: InDesign Contact Sheet, and ID Image Catalog.)
This article was last modified on December 30, 2021
This article was first published on May 27, 2013
Commenting is easier and faster when you're logged in!
Recommended for you

The quickest way to create a series of threaded text frames
Imagine you want four columns of text on a page, and want to do this with 4 thre...

How to Place a Grid of Images in InDesign
Learn how to place a grid of images into an InDesign file and adjust the gaps in...

Make a Font “Contact Sheet” in InDesign
Need a specimen sheet for a font? Or a catalog of all your font characters? Chec...


