
Formatting in a Flash
How do you take 50 unstyled, manually formatted Word files and turn them into a styled InDesign document—and keep the Word files dynamically linked and updatable?


This article appears in Issue 2 of CreativePro Magazine.
As designers, many of us work with collaborators whose primary role is writing, not copy editing. These folks produce the all-important text, but they never format it with styles (gasp!). Instead, they simply apply manual formatting as they deem necessary. This presents us with a choice: We could try to educate and persuade them to be diligent about using styles, or we could let them focus on what they do well—creating content—and accept that the formatting and layout is up to us. You pick your battles. Admittedly, it can be daunting when you’re facing a pressing deadline and receive a boat load of text content that is entirely unstyled (but has plenty of manual formatting). This scenario happened to me recently. My client delivered more than 50 Word files that had to be flowed into an InDesign template and styled. The good news: The Word files were consistently formatted. The bad news: The Word users did not use any paragraph or character styles. None. All the formatting was manually applied on top of Word’s Normal style. To further complicate matters, my client wanted to continue managing the Word content in place (meaning, they did not want me to fix the Word files by applying styles to the text, nor was training the collaborators to do so an option). And the client wanted to have the text linked to their unstyled Word files after it had been flowed into InDesign, so they could dynamically update everything. Other solutions that might have helped, like InCopy or WordsFlow, weren’t on the table. But I love a challenge, and I love efficiency, so I persevered. Let me walk you through how I tackled this project, in case you’re faced with a similar scenario.
Determine What You Have
First, look at what
you have to work with. In my example, each Word file contained text with four distinctly different font appearances plus two additional direct formatting styles (bold and italic) within the Normal style—all of which needed to be formatted with paragraph or character styles (Figure 1).
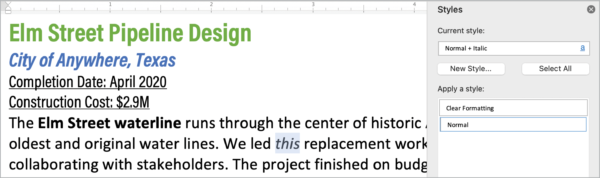
Figure 1. Although the Word file looks like it has styled text, it’s all manually formatted.
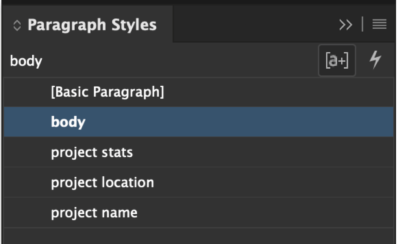
Figure 2. In InDesign, four paragraph styles are ready for this project.
Prepare to Link Word Files
Because you want the files to be dynamically linked, you need to enable an option in InDesign’s preferences before placing the files. With your styled InDesign file open (so this preference change will affect that file only), choose InDesign > Preferences > File Handling (macOS) or Edit > Preferences > File Handling (Windows). Under Links, enable Create Links When Pasting Text and Spreadsheet Files (Figure 3).

Figure 3. Take great care with this one. I only make this preference change with a document open, understanding that every time a link updates, any edits in InDesign, including formatting, will be reset to the way it was when the file was placed.
Map Your Style
With the file handling preference set, try placing a Word file to ensure you get the desired results. Choose File > Place (Command/Ctrl+D) and navigate to one of the Word files; for the example, I selected a file called Elm Street Design. Shift-click Open to see Word’s Import Options. Select Preserve Styles and Formatting from Text and Table, as well as Customize Style Import. Click the Style Mapping button (Figure 4).

Figure 4. Style mapping, found at the bottom of the Microsoft Word Import Options dialog box, is extraordinarily powerful. It allows you to map Word’s styles to your InDesign styles.

Figure 5. Save your mapping preset for next time.
![Multiple spans of text highlighted in green, with Paragraph Styles panel showing "body" selected. Symbol [a+] highlighted in top right of panel.](https://creativepro.com/wp-content/uploads/2021/12/formatting-fig06-1-e1639008195718.png)
Figure 6. With style overrides turned on (the [a+] icon in the Paragraph Styles panel), you can see that Normal came in as body, but everything else is a style override.
Create Find/Change Queries
The Find/Change feature of InDesign is one of my favorite tools. While many people use it only to find and replace a word here or there, it can do so much more! Check out this video about the awesome features of Find/Change. To open Find/Change, choose Edit > Find/Change (Command/Ctrl+F). For this task, you’re going to search for specific formatting and change it to the desired paragraph style, starting with the project name. Leave the Find What and Change To fields blank and navigate to the bottom half of the dialog box. In Find Format, click the search button to the right of the box (). Navigate to Basic Character Formats on the left and select Acumin Pro Condensed, Bold, and 18 pt. (You could also include the color, but I like to select as few options as possible to achieve the same outcome.) In Change Format, click the search button and choose the project name paragraph style (Figure 7).

Figure 7. The Find Format and Change Format part of the Find/Change dialog box allows you to search based on formatting and apply a paragraph or character style.
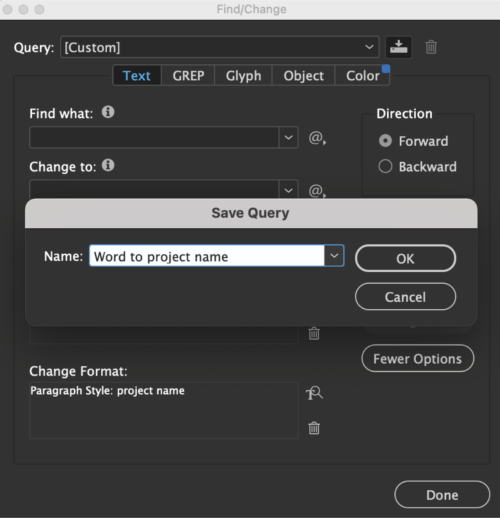
Figure 8. Save your queries so you don’t have to remember them next time.
Use Multi-Find/Change
A simple Google search for Find/Change scripts in InDesign will result in a wealth of free options, but Multi-Find/Change by Automatication is my favorite and completely worth the low price if you find yourself repeating find/change queries. Many other users agree; Multi-Find/Change won the reader’s poll for Most Valuable Plug-in in Issue #137 of InDesign Magazine. What makes Multi-Find/Change so great is that it allows you to create sets of queries and run them in a sequence. In this case, you can make a new set called Project Sheets from Word and add the three paragraph style queries you saved earlier. Create a second set called Bold and Italic Character Styles (because it’s useful for lots of other projects) and add the two character style queries that you just made (Figure 9).

Figure 9. You can create multiple sets of queries to really speed up your workflow.
And Now for the Magic…
For my client’s project, I had a folder with five Word documents that I needed to place into my layout. Although Peter Kahrel has a great script to add them all at once in a single story, I wanted them to be individual, linked stories (because that’s how my client would update them) in this styled document, so I added them the old-fashioned way. Here’s how: Choose File > Place and select all five files. Be sure to hold down Shift as you click Open to get the Word Import Options dialog box. Choose the Normal to body preset (you can even set it as the Default to save some clicks later), and click OK. Repeat this step four more times with the other Word documents. Now, with your cursor loaded, place the text into the layout. Once added, note that Normal is in the body style, but the top few lines of each project are style overrides (as expected), as are the bold and italic characters throughout the body style text. All five Word files are in the Links panel, from your earlier preferences setting. Open the Multi-Find/Change panel from Window > Multi-Find/Change. (Better yet, add it to your workspace, so it’s always at your fingertips—you won’t regret it! See Issue #136 of InDesign Magazine for all the details on creating custom workspaces.) Choose the paragraph style set, make sure Document is selected from the menu for choosing the scope of the operation, and click Change All. Repeat for the character style set (Figure 10).

Figure 10. No overrides! The Multi-Find/Change script makes quick work of your formatting and reformatting with link updates.
Commenting is easier and faster when you're logged in!

Recommended for you

Cleaning Up White Space Problems in Word Files
Proven methods for removing messy white space characters that can cause trouble...


Almost Automatic End Marks
You know what end marks are, right? Maybe you call them by another name, but we...