
Fixing Photos with AI in Photoshop
Apply fast and creative solutions to common problems with the latest intelligent tools.

This article appears in Issue 48 of CreativePro Magazine.
Picture this: You’re working to a tight deadline and need to remove an unwanted object from a client’s photo. Or you’re compositing elements for a campaign, and the technical work is taking longer than the creative thinking. Sound familiar?
When such frustrations strike, turn to the latest AI tools in Photoshop. They take the heavy lifting out of such tasks as tedious sampling, complex color matching, and precise selections, leaving you more time for the fun, creative decisions. And you’ll be happy to hear that the AI technology is now much smarter at eradicating what you want gone.
As you’ll see, the new intelligent tools work with just a few clicks, saving you time while opening new creative possibilities. Follow me, I’ll show you.
Remove Tools Master Class
Photoshop now offers three distinct approaches to removing unwanted elements, each optimized for different situations. Understanding when to use each one will speed up your workflow a lot. Let’s take a closer look.
The Remove tool: your new best friend
The Remove tool recently received a major upgrade with a completely new algorithm that combines on-device processing with cloud AI automatically. You’ll find the tool grouped with the Spot Healing Brush in the toolbar.
Here’s how to use it effectively:
- Select the Remove tool from the toolbar.
- Create a new empty layer for nondestructive editing.
- In the Options bar, turn on the Sample All Layers option so Photoshop can reference the content below the new layer.
- Still in the Options bar, choose Mode > Auto (May Use Generative AI).
- Paint over objects you want to remove by reducing the brush size and drawing a lasso around objects
(Figure 1). Photoshop will handle the heavy lifting (Figure 2).


When you set the Mode option to Auto, the Remove tool will automatically decide whether to process the removal on your device or to use cloud AI. If Photoshop detects that you want to remove a difficult or large area, it automatically will switch to Generative AI in the cloud for better performance. You could choose Mode > Generative AI Off instead, but I don’t recommend it. The Remove tool and the Remove button never use generative credits, and the latest Remove tool is much faster than the previous remove algorithms.
Even better, the new algorithms focus on actually removing what you select, rather than trying to complete the scene by inventing new objects. In older Photoshop versions, accidentally leaving a shadow out of your selection would cause Photoshop to generate a random chair or a scary person to match that shadow. (Case in point: At CreativePro Week 2025, a fluffy pink guinea pig appeared on screen during my live demo!) With the new Remove tool behavior, you might see a leftover shadow after removal, but you can simply paint over it with the Remove tool to clean it up.
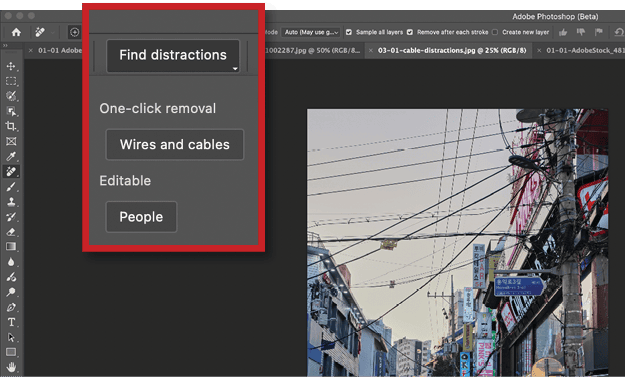
Find distractions: people, wires, and cables
For complex removals involving people or wires, try the Find Distractions menu in the Options bar. Select People from the menu, and Photoshop will automatically detect and highlight all nonessential people in your photo (Figure 3). If you want to remove accidentally selected people, just hold Option (macOS) or Alt (Windows) and paint over them. To remove all selected people, press Return (macOS) or Enter (Windows).

If, instead, your image is cluttered with unsightly wires, select the Wires and Cables option. With that one click, Photoshop will find and remove all the wires and cables in your image (Figures 4 and 5).

The Remove button: smart selection integration
The Remove button works hand-in-hand with Photoshop’s selection tools and uses the latest Remove tool Generative AI algorithm. The workflow is simple:
- Make a selection using any selection tool (Object Selection tool, Selection Brush tool, Select Subject, and so on).
- Click Remove in the Contextual Task Bar, and Photoshop will create a new layer with the removed content.
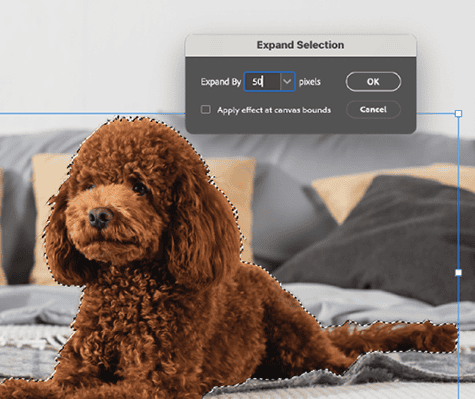
This new method works great with Select Subject or the Selection Brush. Figures 6–10, illustrate a typical workflow: You want the dog off the bed. Select the dog with Select Subject, use Modify Selection to expand the selection by 50 pixels to catch shadows and edges, and then click Remove. See you later, puppy!


I find the Remove button really useful for larger objects. You can quickly make a selection with the Selection Brush tool, and then click Remove. For smaller details that need multiple touches, the Remove tool from the toolbar works better because you can paint directly and quickly over problem areas.
If you’ve worked with the Remove tool before, you’ll notice these results are much cleaner and faster than the older algorithms provided.
When to use Generative Fill for removal
Although the Remove tool and Remove button handle most situations, Generative Fill still has its place for complex removals.
The Remove button actually receives three variations from the server, but you’ll see only one because Photoshop works behind the scenes to select the best variation and place it as a layer automatically.
Use Generative Fill when you want to choose from multiple variations yourself. Select an area, click Generative Fill in the Contextual Task Bar, leave the prompt field empty, and click Generate to see three removal approaches.
The key difference? Generative Fill uses your Creative Cloud credits (1 credit at a time) and gives you three variations, while the Remove tool and button are faster and credit-free.
Tip: Generative Fill doesn’t use the new Remove algorithm, so make sure to include shadows and reflections in your selection.
Smart Selection Workflows
The foundation of great image editing is accurate selections, and the AI selection tools in Photoshop have become really good.
Cloud-based Select Subject
To unlock the full power of AI selections, enable the new cloud processing:
- Choose Photoshop > Settings > Image Processing (macOS) or Edit > Preferences > Image Processing (Windows).
- Choose Select Subject and Remove Background > Cloud (Detailed Results) (Figure 11).
- Click OK.
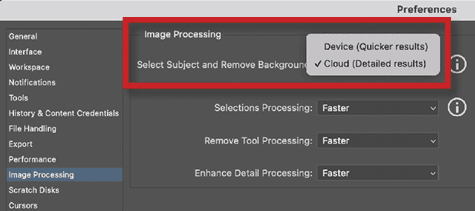
Now when you use Select Subject or Remove Background in the Contextual Task Bar, you’ll get dramatically better results, especially for complex details like bike spokes and hair.
Remove Background: One-click magic
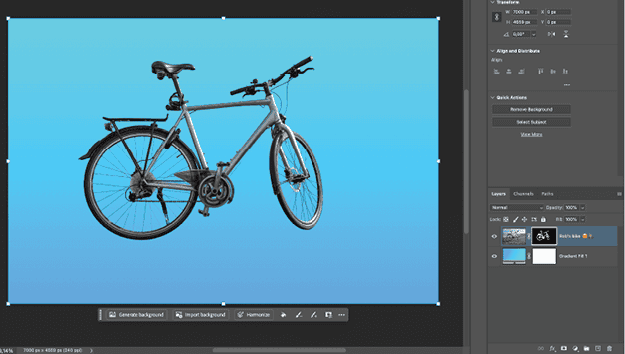
With cloud processing enabled, Remove Background becomes a one-click solution for most isolation needs. Simply select your layer, and click Remove Background in the Contextual Task Bar. The results are often so good that you won’t need any manual cleanup.
I recently tested Remove Background with a complex photo of my bicycle. Photoshop selected the spokes perfectly (Figures 12–14). Zoom in to check the details around tricky areas—you’ll be impressed.


Select Details for precise editing
The Object Selection tool now includes a powerful Select People feature that is perfect for selecting people and all their details, such as clothing and body parts. Give it a try:
- Use the Object Selection tool on a photo with people.
- Click Select People in the Options bar.
- Choose Details to edit specific body parts or clothing items (Figure 15).
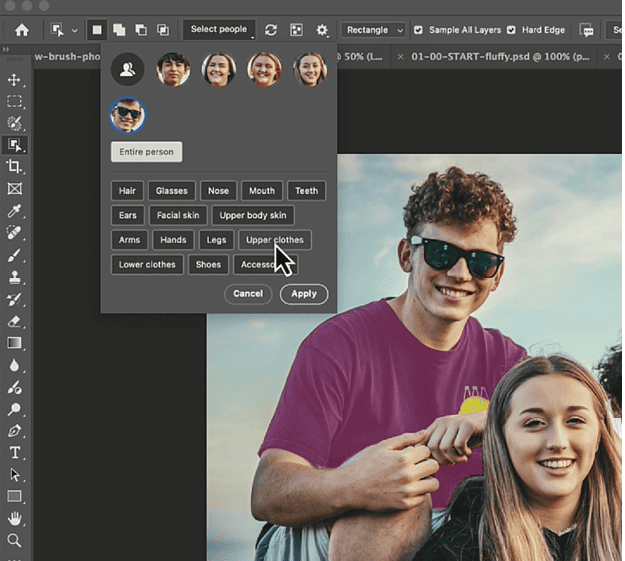
You can now do everything you would normally do with a selection. For instance, you can change the clothing with Generative Fill:
- Click a person in the Select People list, then select Upper Clothes.
- Click Apply, then extend the selection a bit in the Expand Selection dialog box (Select > Modify > Expand). You can start with 20px, but use a higher number when your image is larger.
- Use Generative Fill with a prompt like Green T-shirt to change colors instantly (Figure 16).

This workflow opens up endless possibilities for targeted adjustments without complex masking.
Seamless Blending with Harmonize
Perhaps the most impressive new photo-fix feature is Harmonize, which automatically matches lighting, color, shadows, and tone between composite elements. This is true one-click intelligence at its finest. Here’s the optimal workflow:
- Open a background image.
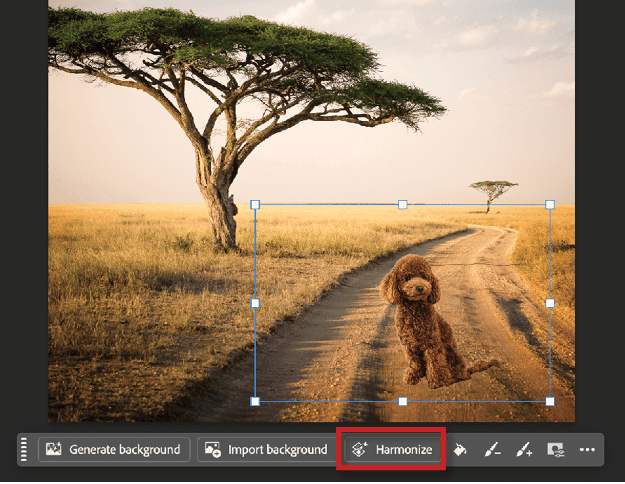
- Paste a photo with a subject you’d like to add, creating a new layer. Remove its background. In Figure 17, the dog is now the subject layer atop the background.
- With the subject layer selected, click Harmonize in the Contextual Task Bar.
- Choose your favorite from the generated variations (Figure 18).

Note: Harmonize doesn’t just adjust colors. It intelligently creates shadows, adjusts lighting direction, and even generates reflections when appropriate.
Camera Raw AI Power
Adobe has brought powerful AI directly into Camera Raw (and Lightroom) with two features that address common shooting problems.
Reflection removal
Unwanted reflections in windows or glossy surfaces can ruin an otherwise perfect shot. Camera Raw’s new AI-powered reflection removal handles this automatically:
- Open your image in Camera Raw (Filter > Camera Raw Filter).
- Click the Remove tool (eraser icon) in the right toolbar.
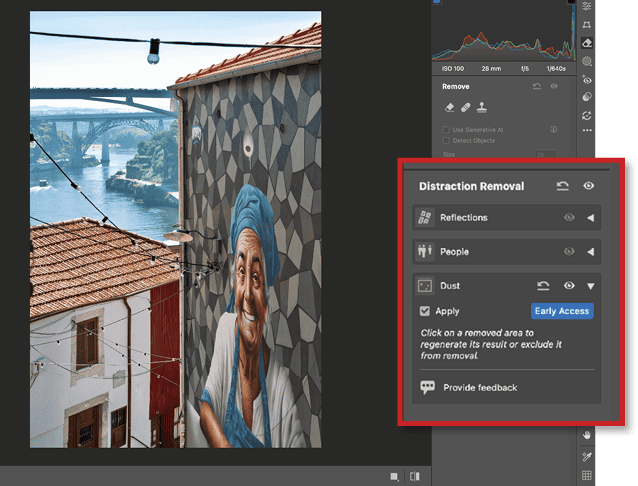
- In the Distraction Removal panel, expand the Reflections section (Figure 19), and select Apply.
- Choose your Quality setting (Preview, Standard, or Best), and review the result (Figure 20).
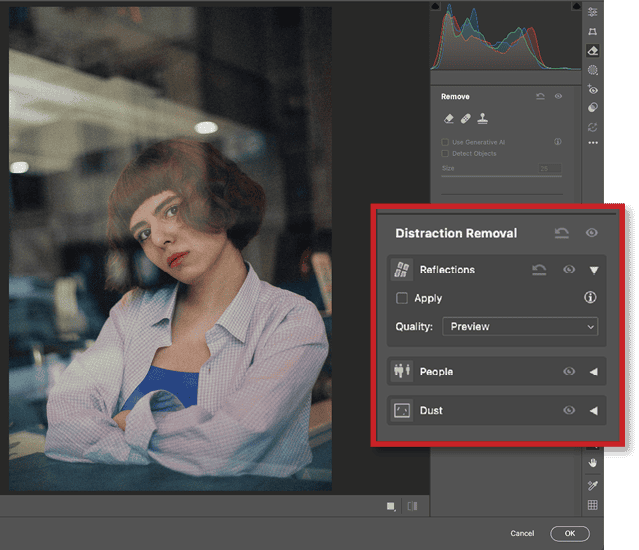

The AI analyzes the image and removes reflections while preserving underlying details. You can adjust the intensity by dragging the Intensity slider.
Dust removal
Sensor and lens dust spots are every photographer’s bane, but AI can now automatically detect and remove them:
- Open your image in Photoshop, and choose Filter > Camera Raw Filter.
- In the Distraction Removal panel, expand the Dust section (Figure 21) and select Apply to activate automatic dust detection.
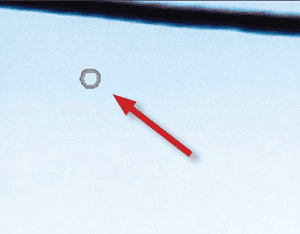
- Hover over your image to see detected dust spots highlighted. You’ll only see a highlighted circle where the dust spot has already been removed (Figure 22).
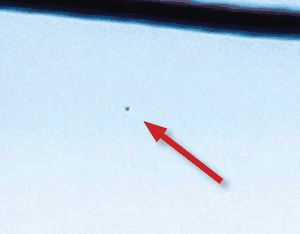
- Click the Visibility icon (the eye) next to Dust to toggle between before and after views. In the before view (Figure 23), you’ll see the dust spot.
Even on images where I couldn’t see dust spots with my naked eye, AI found them and cleaned them up.
Generative Upscaling
When you need to enlarge images beyond their original resolution, try the new Generative Upscale feature, which uses AI to intelligently reconstruct detail rather than simply interpolate pixels. The process is straightforward:
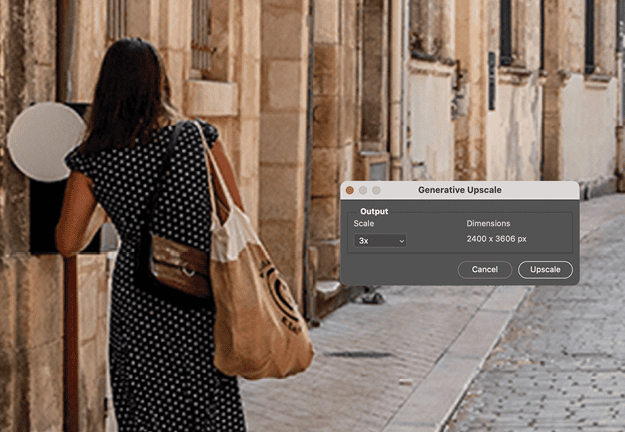
- Choose Image > Generative Upscale.
- In the resulting dialog box, choose your scale factor (up to 8 megapixels total, at the moment).
- Click Upscale.
I tested this with a heavily compressed 800-pixel-wide image (Figure 24). After 3x upscaling, the result (Figure 25) was notably better than traditional upscaling methods, although I did notice some softness in fine details. The current beta version has a 4096-pixel limit on any single dimension, but this will likely increase in future updates.

The feature is still evolving, but it already produces better results than traditional methods, especially for images with fine details and textures.
Creating Atmospheric Effects with Firefly
Sometimes the most compelling photo effects come not from adjusting what’s already there but from adding something entirely new. A new creative workflow combines the precision of hand-drawn composition with the power of AI generation to create atmospheric elements that would be nearly impossible to capture naturally.
Suppose you have a dramatic castle photograph (Figure 26), but you want to add a smoky effect that transforms into a ghostly shape (Figure 27). Rather than searching for the perfect stock photo (which probably doesn’t exist), you can create exactly what you envision using your own drawing and Firefly’s composition and style reference features.


Start with a simple sketch
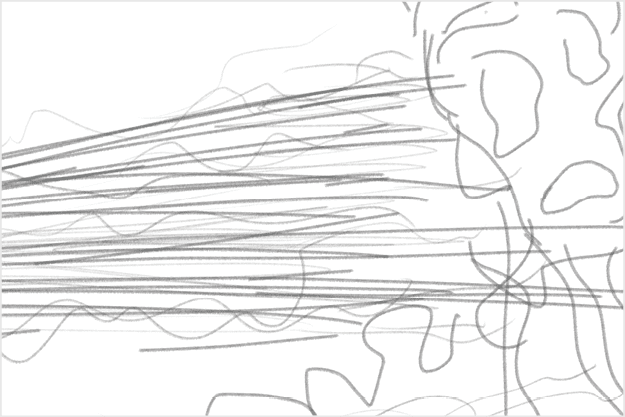
This technique works great with even rough sketches. Open a new document in Photoshop, and create a quick drawing on a white background showing where you want your smoke to flow and how it should transform into your ghost shape (Figure 28). Think of it as a roadmap for the AI.
Save this sketch, and head over to Adobe Firefly web app (firefly.adobe.com).
Set up Firefly for the best results
The next step is to give Firefly the parameters and reference images it needs to generate the results you envision:
- In Firefly, go to the Text To Image section.
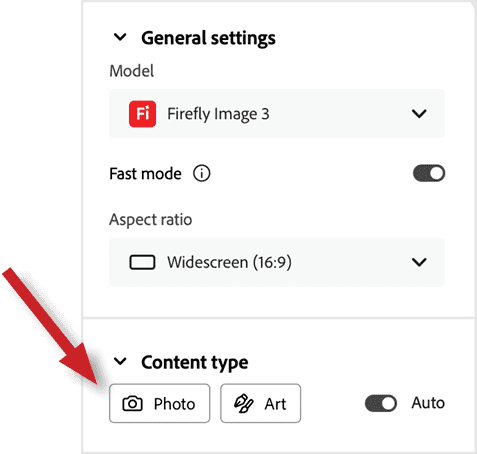
- Set Model to Firefly Image 3.
- Choose the appropriate aspect ratio for your image (Widescreen 16:9 for the example).
- Set Content Type to Photo (Figure 29).
- To provide a reference, drag your sketch into the Reference section of the Composition panel, or click the Upload Image button there.
- The Strength slider will appear. Move it all the way to full intensity.
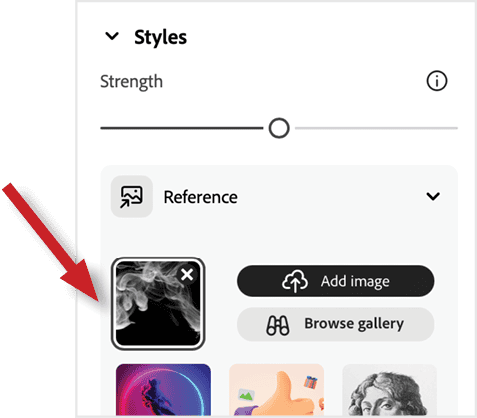
- Add a photo of dramatic smoke on a black background from the Reference section in the Style panel (Figure 30).
Generate your smoke effect
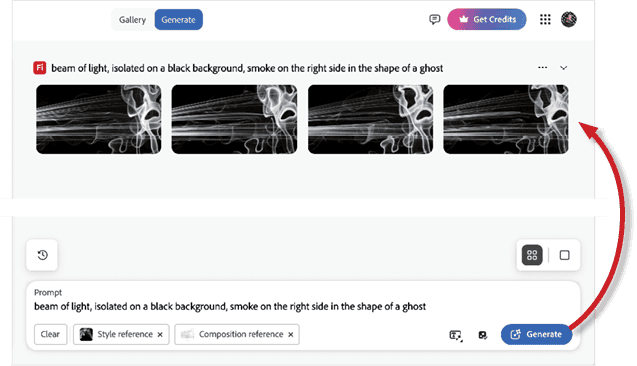
Type your prompt for Firefly, such as: Smoky beam of light, isolated on a black background, smoke on the right side, in the shape of a ghost.
Click Generate, and upscale your favorite result (Figure 31).
Bring it into Photoshop
Now you’re ready to put it all together. Back in Photoshop:
- Place the generated smoke over your castle image.
- Set the blending mode to Screen to hide all the blacks (Figure 32).
- Adjust the opacity until it looks natural.
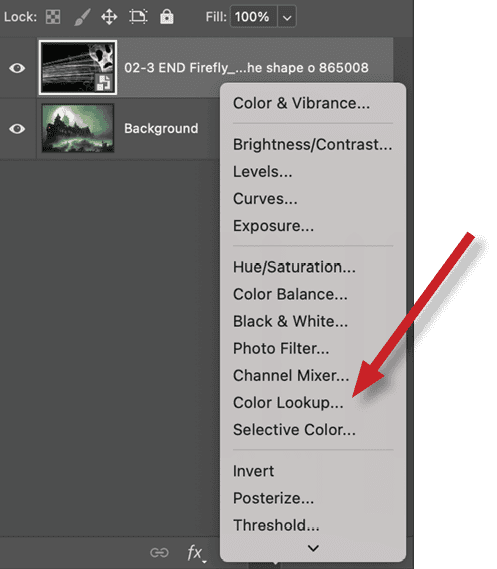
- Add a Color Lookup adjustment (Figure 33) layer, and choose Moonlight.3DL from the 3D LUT menu in the Properties panel.
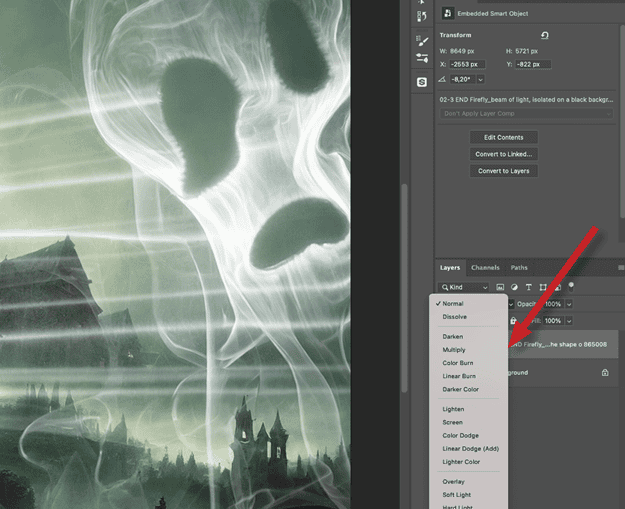
The result? A really cool, completely custom atmospheric effect!
The Future Is Context-Aware Design
What excites me most about these new AI tools isn’t just their individual capabilities, it’s how they work together to create seamless workflows. You can select a subject, remove its background, add new elements, harmonize them into the scene, and upscale the final result, all with single clicks.
But this is just the beginning. I think design software like Photoshop will become increasingly context-aware. Instead of hunting through menus for the right tool, the software will understand what you’re trying to achieve and present exactly what you need at the right moment.
Imagine Photoshop recognizing that you’re working on a composite and automatically suggesting Harmonize, or detecting that you’re retouching and offering the most relevant removal tools. The software won’t get in your way; it will actively help you reach your creative goals.
Combined with tools like Remove Background, Harmonize, and the Remove tool, all the new and older puzzle pieces will eventually fall into place, creating entirely new workflows. We’ll probably see a mix of prompting (for executing multiple tasks simultaneously) and traditional tools working together intelligently.
The future of photo editing isn’t about your becoming a better technician; it’s about becoming a better creative director while the software anticipates your next move and handles the execution.
And honestly? That sounds like way more fun!
Commenting is easier and faster when you're logged in!

Recommended for you

Interview with Melissa Piccone, Multi-Disciplinary Trainer and Certified Expert
Q&A with Melissa Piccone, who is presenting at the 2026 Design + AI Summit for C...
Batch Processing Images with AI-Powered Actions in Photoshop
Here’s how to automate edits in Photoshop by combining the Object Selectio...
How to Use Illustrator’s New Turntable Feature
Tilt and turn your artwork with the Turntable feature in the Illustrator Beta ap...