Create an Animated Zoom Effect in PowerPoint
We always recommend keeping the content on any slide to an amount that can read at a glance by an audience so that they can return their attention to you, the speaker. But occasionally, you do need to show an actual document or even a detailed table in a live presentation. Here’s a simple technique to do just that while zooming in and highlighting the most important part of that item.
I’ll show you how to do this in PowerPoint, but the same technique can be used in Keynote using the Magic Move transition.
You’ll first want your document to be an actual image. If you have a big native table or other block of text in PowerPoint, you can copy it, choose Edit > Paste Special, and paste it as an image.

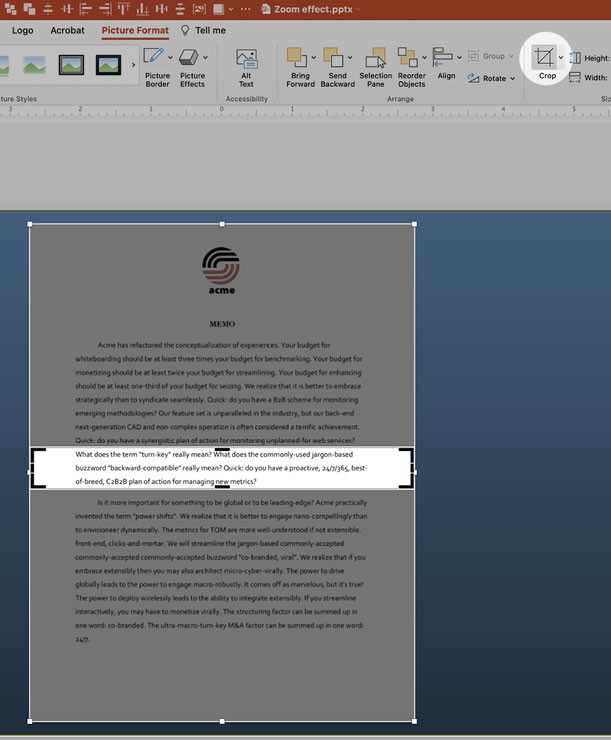
Once you have your image on the slide, duplicate it using Command/Ctrl+D (or any other method) and layer the second image directly on top of the first. Using the Crop tool, crop the topmost image to reveal just the part that you want to highlight.

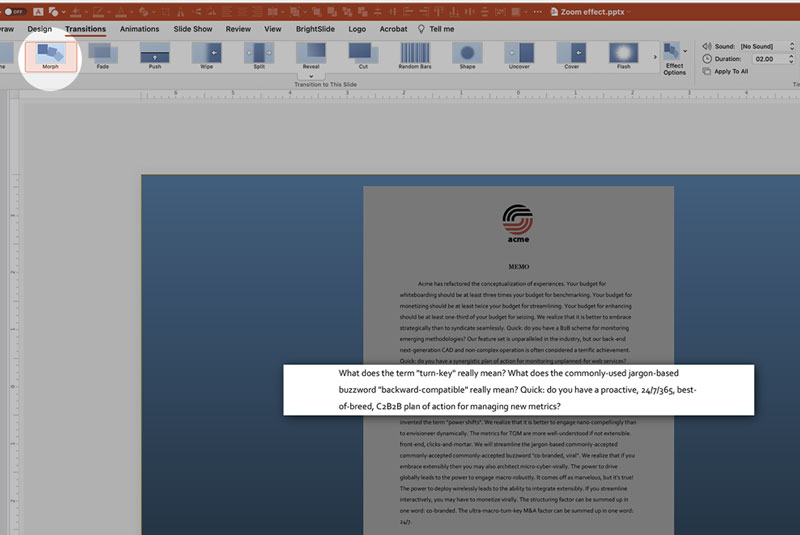
Duplicate the entire slide and then on the second slide, apply a large drop shadow to the cropped image and enlarge it. Select the bottom image and lower the brightness using the Format Picture tools to de-emphasize it.

You’ve got only one more click at this point, and that is to apply the Morph transition to the second slide. Sit back and watch PowerPoint take over and provide the zoom-in effect without any blurring or pixelization.

If you want to “un-zoom,” just place a duplicate of the first slide after the animation and apply another Morph transition.
Using this technique, you could choose to zoom in on a specific row or cell from a table, a portion of a map or detail on just about any other image. Your cropped highlight area can also be a circle or any other shape by using “crop to shape.”
And if you ever run into an issue where PowerPoint morphs between the wrong objects across slides (it happens), use this layer naming trick in the Selection Pane to fix things.
And that’s it!

More Resources To Master Presentation Design
CreativePro Week is the essential HOW-TO conference for creative professionals who design, create, or edit in Adobe InDesign, Photoshop, Illustrator, Acrobat, and Microsoft PowerPoint.
Featuring over 30 expert speakers and 75 sessions, CreativePro Week offers five days of in-depth training and inspiration, all in one place. No matter your skill level, you’ll learn techniques and best practices you can start using immediately to improve your productivity.
Members get a special discount on registration! Sign up today.


