


As I always say, PowerPoint is way more powerful with far more hidden tools and features than 99% of its users realize. In this article we’re going to look at one of my favorite little-known PowerPoint tools: The Selection Pane.
PowerPoint is no Photoshop, but there’s one thing it does share with its Adobe friends: layers. That’s right, every single element on a PowerPoint slide is its own layer, and the Selection Pane is where you can manage these layers and your slide content like a pro.
You can find the Selection Pane on the Home Tab at the very bottom of the Arrange pull down menu. (You might also want to add it to your Quick Access Toolbar.)

Selecting Hard-to-Select Items
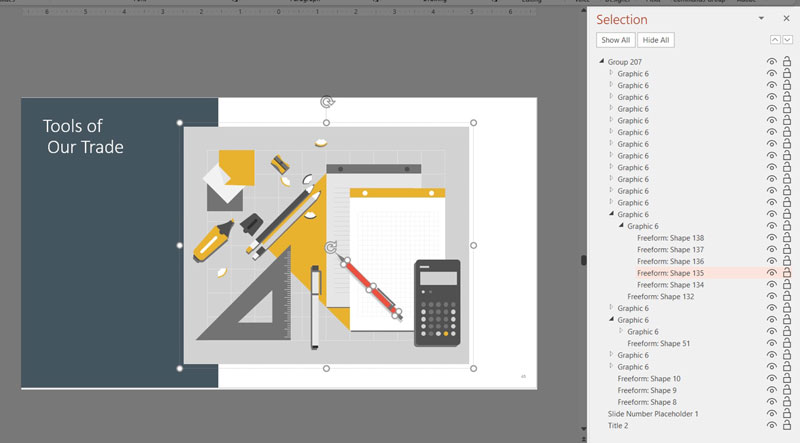
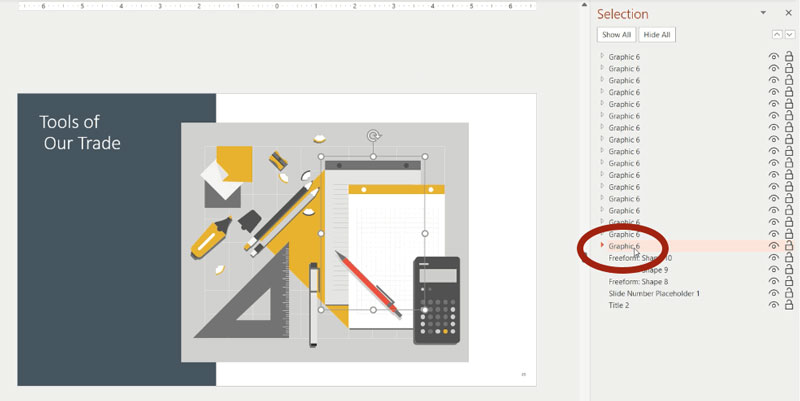
It’s called the “Selection Pane” because clicking any item results in that item being selected on the slide. I often rely on this functionality when I have to select one small item in a large group in order to edit it.
Hide/Unhide
To the right of each line in the Pane, there is a little eyeball icon, and just like in Photoshop, this controls the visibility of each layer/item.

Hiding or unhiding a slide item can be useful to test out a design option, temporarily hide slide assets that might be needed later, or just to reduce visual clutter during the design process.
Note that anything hidden in this way on a slide never actually leaves the file and can be unhidden at any time on any computer. Hiding won’t reduce file size, so be careful of hiding a large image that you might forget about.
Lock Items
Presentation designers have long begged for the ability to lock items on slides to prevent others from editing things they perhaps shouldn’t. This ability finally came to PowerPoint earlier this year with the Selection Pane. Simply click the lock icon next to any layer to prevent others from moving or editing the item. Note that this currently works only on individual slides and not on master items such as placeholders. This feature is currently available only on the PC, but should make its way to the Mac soon.
Layering Order
The Arrange tools can help you adjust the stacking order of items (sometimes called “Z-order”). But with more complicated slides, it is often easier to edit layering using the Selection Pane by simply dragging items or groups up or down.
If you are setting or fixing reading order for accessibility purposes, you’ll want to do this with this the Selection Pane (screen readers generally read items from the back to the front.)
Naming and Renaming
If generic names like “Rectangle 4” don’t provide any useful meaning for you, simply double-click an item in the pane, and type in any name you like. To aid users, you might want to name icons or staff photos, for example. Since I’m really bad at geography, I have used this feature to name global office locations on a map and to name countries on a world map so that it’s easier to select and highlight them when needed.
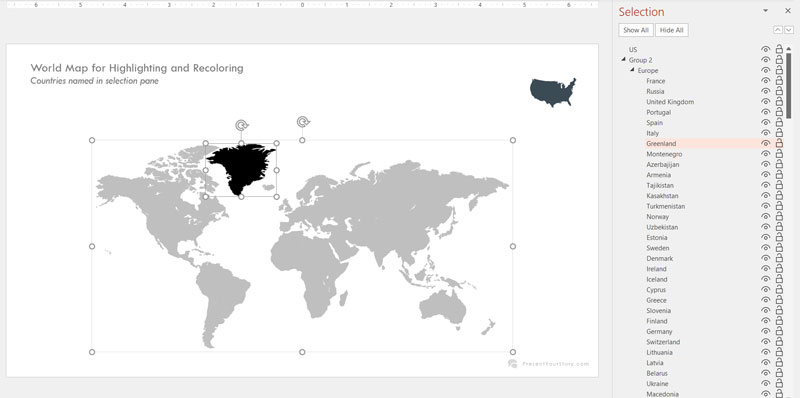
You can find a copy of my world map in Assorted PPT Assets.pptx at PresentYourStory.com/goodies.
Morphing Objects
PowerPoint’s Morph transition is nothing short of magic, but sometimes it doesn’t quite work as intended and objects across slides don’t “match up” the way you wish they would. Sometimes, you really want that yellow square to morph into that blue circle, but PowerPoint has other ideas. By using the Selection Pane, you can force PowerPoint to morph between two items that you select. The trick is to give both items the exact same name and prepend that name with two exclamation marks. For example: !!Shape4. In the two-slide example below, the blue shapes have different names while the green shapes are both named !!GreenShape resulting in a true Morph between slides.

This article was last modified on December 13, 2021
This article was first published on September 15, 2021
Commenting is easier and faster when you're logged in!

Recommended for you
PowerPoint How-To: Hide Onscreen Content in Slideshow Mode
See how you can have content on your PowerPoint slides that will print but not s...

How to Create Attention-Grabbing Agenda Slides for Presentations
Do your agenda slides need a makeover? Jody Wissing's step-by-step approach will...
How to Draw with the Curve, Freeform and Scribble Tools in PowerPoint
Learn how to use the tools for drawing custom lines and shapes in PowerPoint.