


What’s New in Photoshop 27.10
The August 2026 release brings a range of new tools and techniques—plus a complete automated process for beginners.

This article appears in Issue 60 of CreativePro Magazine.
The latest release of Photoshop (27.10) offers plenty to get your teeth into. And one new feature might signal the next era in the history of Photoshop—and Adobe.
Zap Those Zits
Removing blemishes from skin can be a fiddly, time-consuming process. Now, with Distraction Removal, you can perform that job in an instant using Camera Raw—which means the changes are stored as metadata in your original file, so they can be edited or undone at any time.
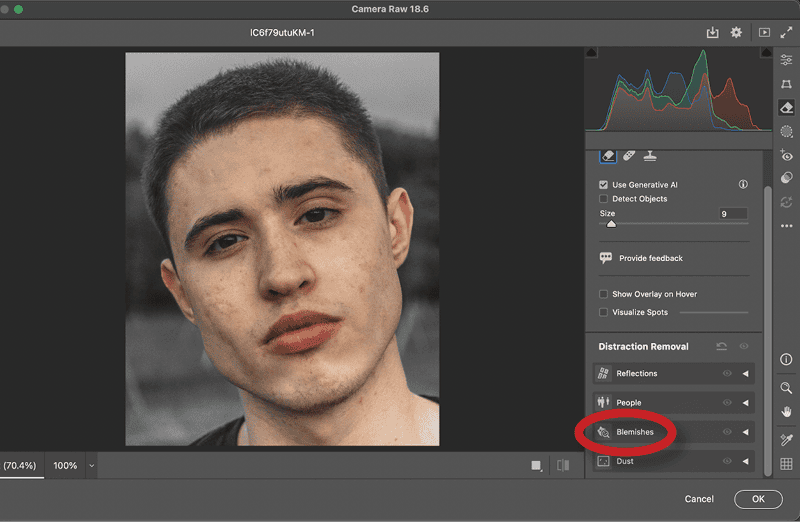
To get started, open your image in Camera Raw. It will open there by default if it’s a DNG (Digital Negative) file; if it’s a regular JPG or other file type, you can choose Camera Raw Filter from the Filter menu. Click the Eraser icon in the toolbar on the right, then scroll down to Distraction Removal and select Blemishes (Figure 1).
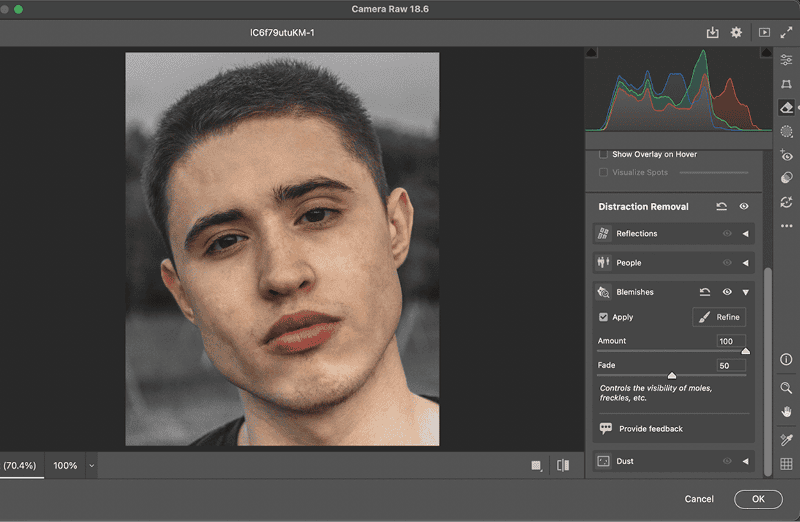
Apply the effect, and watch almost all the blemishes disappear in an instant (Figure 2).
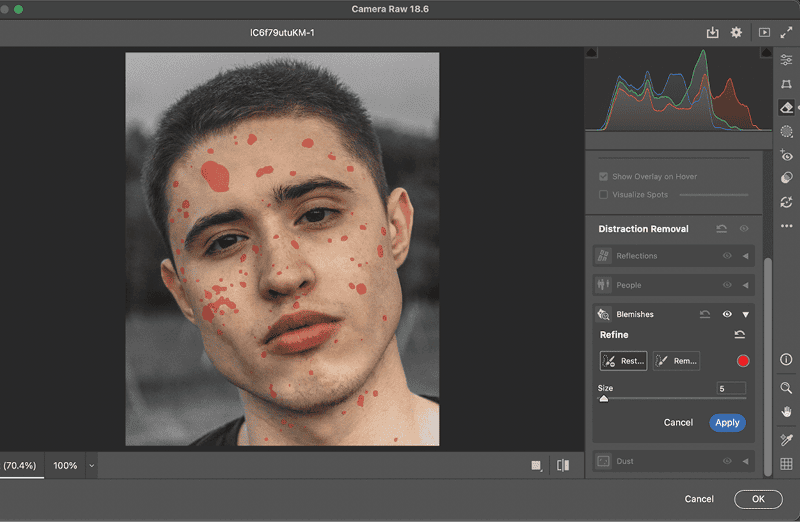
If the tool removes blemishes where it shouldn’t, you can edit the effect. Click the Refine button, and a red overlay appears over all the blemishes Photoshop found. You can now use the Refine brush to remove these areas, or address new blemishes that Photoshop missed (Figure 3).
Painting with Light
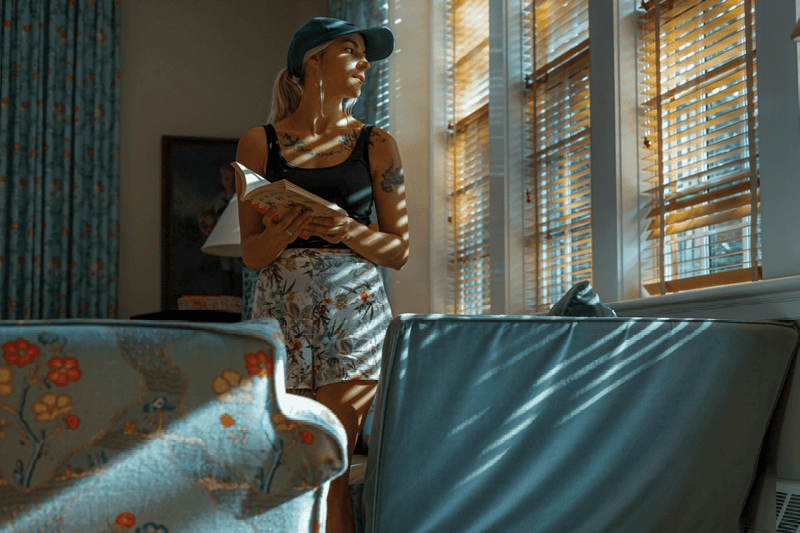
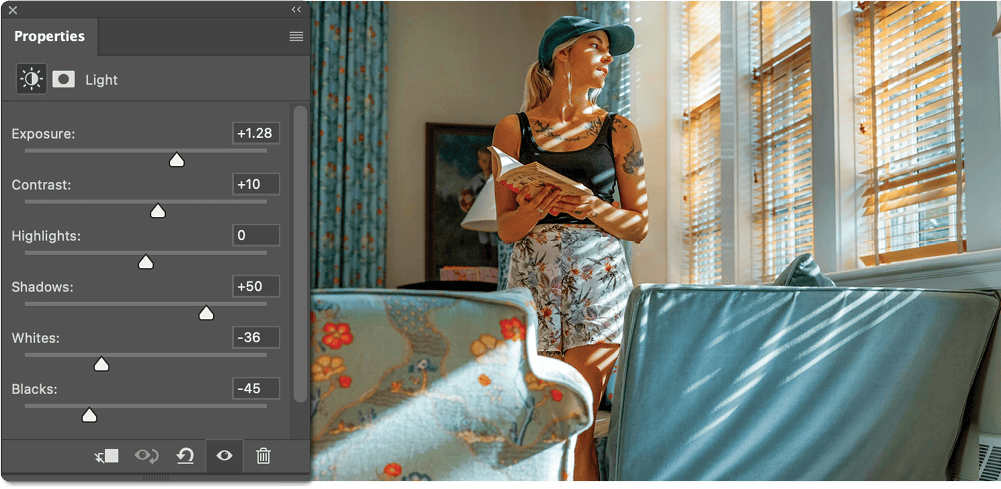
A new Light adjustment layer incorporates several tools for modifying the luminosity of an image, including not only Exposure and Contrast, but also Highlights, Shadows, Whites, and Blacks. Start with your basic image (Figure 4), and choose Light from the pop-up Adjustment Layer button at the bottom of the Layers panel.
The controls here aren’t as sophisticated as those in the full Shadows/Highlights adjustment, but as an adjustment layer they are editable at a later date and can be easily masked (Figure 5). They allow a quick way of bringing light back into a dark image or of rescuing one that is too bright.
Selective AI
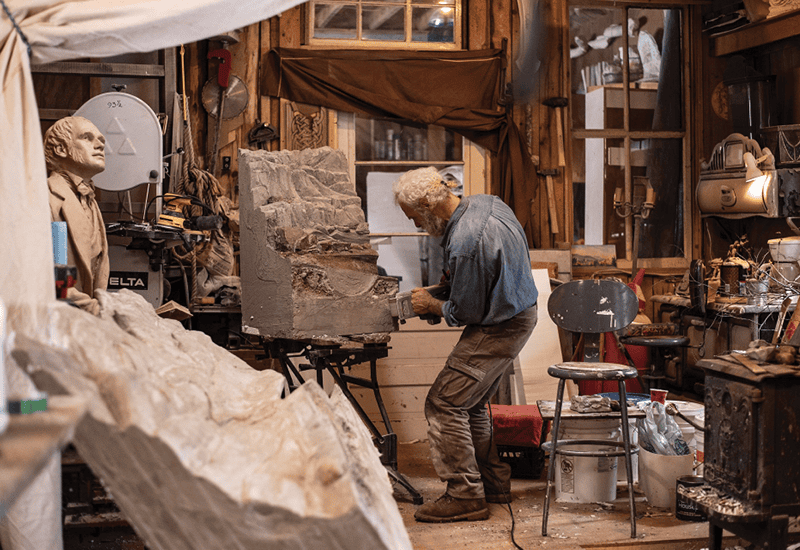
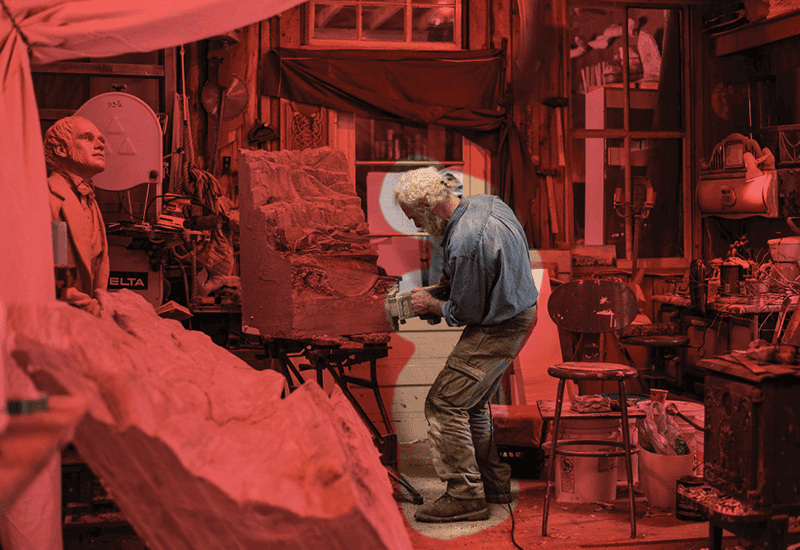
Love them or loathe them, AI tools are here to stay in Photoshop. Traditional photomontage artists may decry the theft of their skill set, but there’s no denying they can help artists on a deadline get a complex job done very much more quickly. Here’s an example: This sculptor is hard at work in his studio (Figure 6).
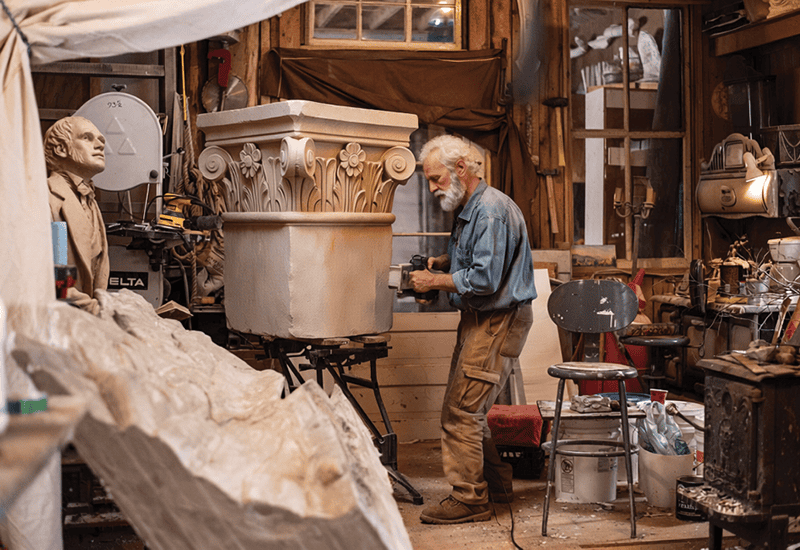
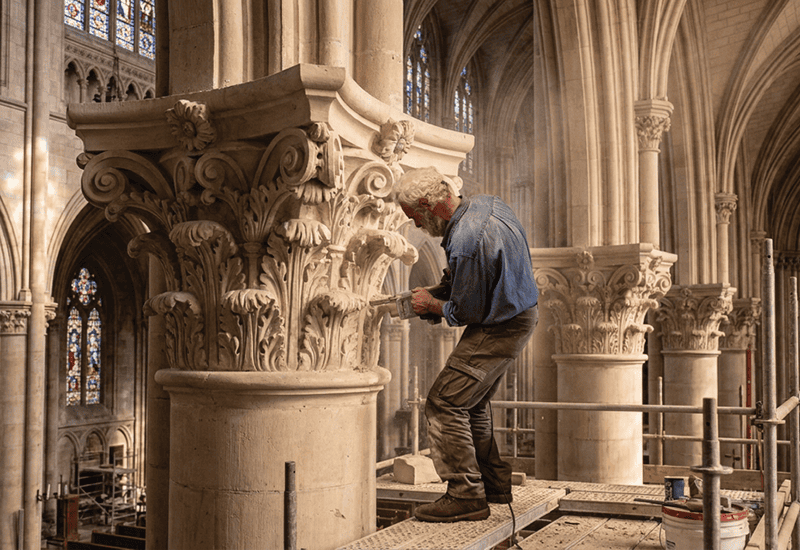
I gave the Photoshop the prompt carving stone Corinthian column in cathedral, and it came up with Figure 7. Apart from the fact that this isn’t a cathedral, the AI engine has changed the sculptor to a different person.
Now, you can mask the area you want changed or the area you want left alone (Figure 8).
Repeating the prompt leaves the subject (the sculptor, in this case) alone, and places him properly carving a cathedral column (Figure 9).
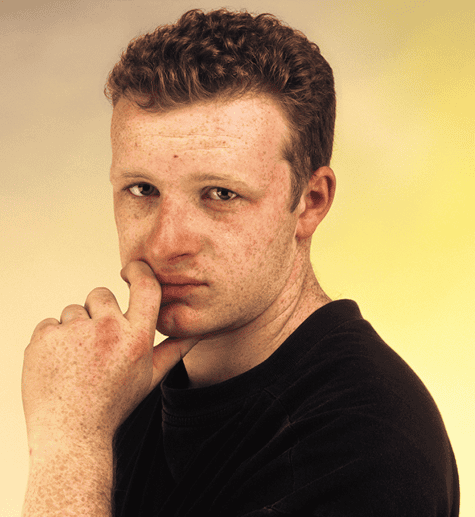
You can use the same technique to highlight just a small area you want to work on. When I told the AI engine to generate curly brown hair for the man in Figure 10, it added rather more hair than I had anticipated (Figure 11).
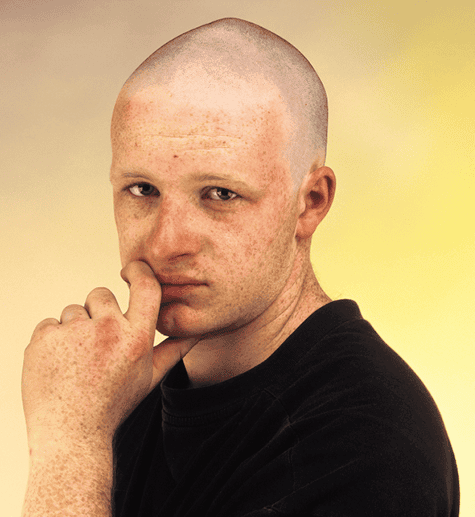
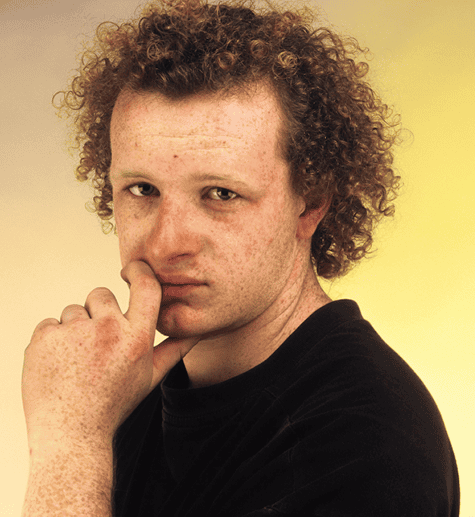
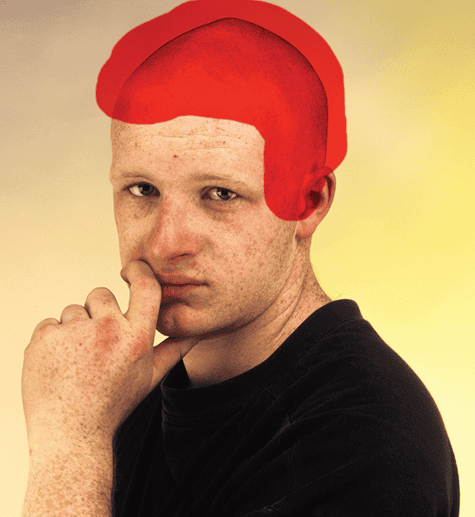
By using the Selection Brush tool (nested with the Lasso tool) to highlight the area I wanted (Figure 12), I was able to get Photoshop to generate a much tighter haircut—without battling with fine-tuning the text prompt (Figure 13).
Draw, Don’t Just Tell
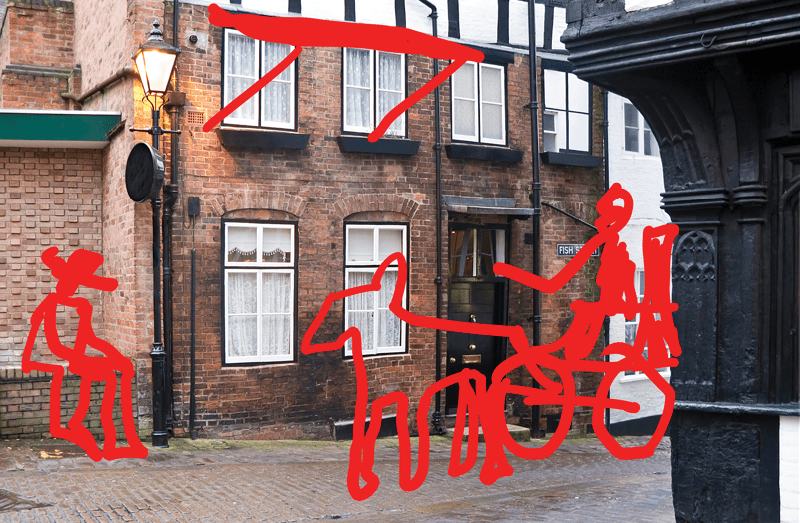
When using the Google AI engines in Photoshop, you can sketch out what you want to achieve as well as provide a text prompt. The result will likely include the additions you want, where you want them.
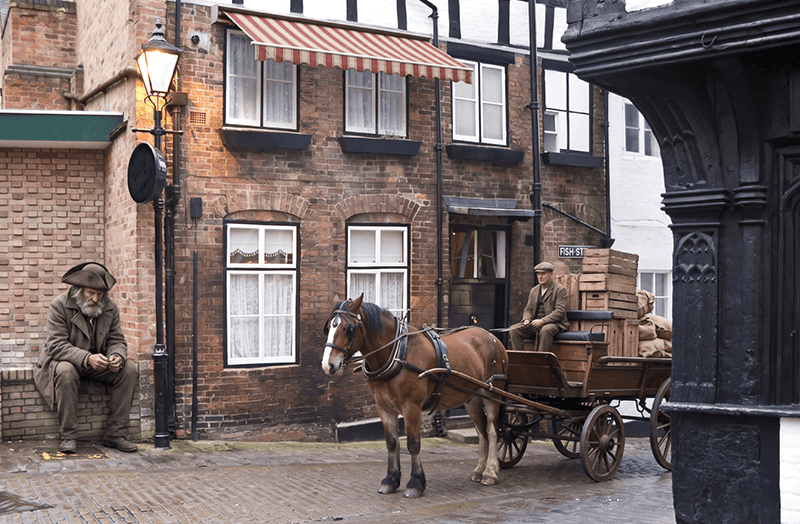
For Figure 14, I used the Markup Brush inside the Contextual Task Bar (it appears only when you select a Google engine) to highlight the areas I wanted it to work on, together with the text prompt man with big hat sitting on wall on left, horse and cart appearing from street on right, striped awning over upper window. The result is almost exactly as I described it (Figure 15). Yes, the man on the left is much too big, but that’s because I drew him too big in the instructional markup.
Text Stays Dynamic
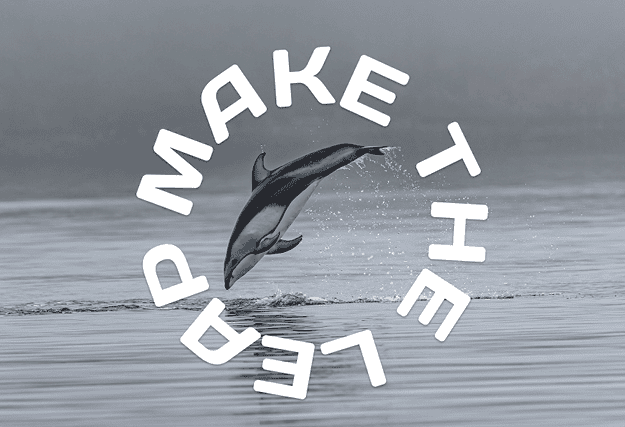
Adobe introduced Dynamic Text a while ago, enabling artists to wrap text around circles and a few other shapes without having to adjust sizes and spacing manually. Now that feature has been extended to keep text dynamic, even after it has been edited.
The text in Figure 16 was wrapped into a circle with a single prompt from the Type menu. When I edit the text, it automatically resizes to make sure it still fits the circle (Figure 17).
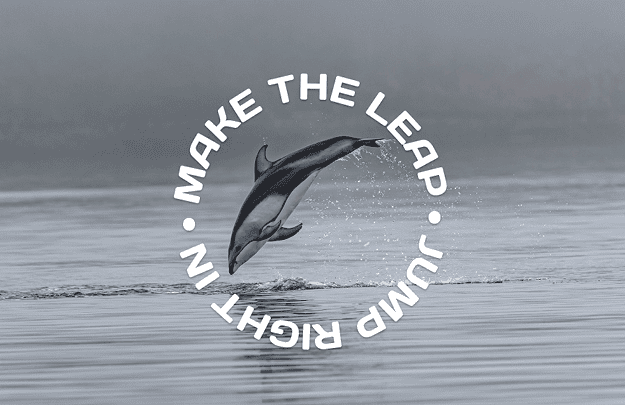
Useful though this is, there should be a way of automating placing text in two semicircles so that they’re both the same way up for legibility. At present, you still have to manually adjust the baseline of the lower text.
A Watershed Moment?
Photoshop artists aren’t going to like this. No one who has spent time learning how to use Photoshop for a career is going to like this. But here it is: Photoshop now has a full-on AI Assisted mode.
In the top-left corner of the main window, you’ll now see that you are, indeed, a Pro Editor, as indicated by the currently active button. But to the left of that is a new AI Assisted button: Click it, and all the Photoshop tools and menus disappear—and I mean all of them (Figure 18).
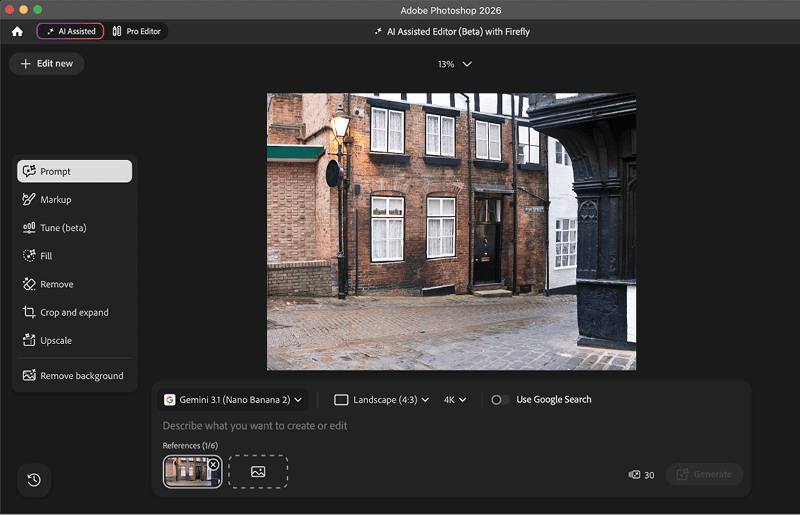
Instead, you’ll see a small range of buttons offering the ability to write a text prompt or mark up an image: Fill and Remove, Crop and Expand, Upscale, and Remove Background. There’s also a Tune button (currently in beta), which performs AI-generated edits but comes with a slider that, to some extent, lets you adjust the strength of the result.
Fortunately, you can hide the AI Assisted mode in the Interface section of the Preferences dialog box (just so your boss never sees it).
This chatbot-centered workflow is the vision Adobe is pushing, not just for Photoshop but for all of Creative Cloud. The recently announced Adobe plugin in ChatGPT is app-agnostic. You begin a task by telling ChatGPT what you want done and it decides which apps and tools to use, taking you out of the driver’s seat entirely (at least until the AI has generated something). Adobe is also integrating Creative Cloud with other AI platforms, including Claude, CoPilot, and Gemini. How much room is left for creative professionals and the skills they’ve honed throughout their careers will be determined by how well these AI tools work and how much they end up costing. If it all works as designed (and that’s a big “if”), it will raise very serious questions about the future of creative work. Stay tuned.
Commenting is easier and faster when you're logged in!

Recommended for you

Work Week Projects: Get Get a Grip on Photoshop’s AI Tools
Five quick exercises to do while you're at work to get comfortable using the gen...
CreativePro Week 2026 Preview: 5 Pixel-Perfect Photoshop and Illustrator Sessions
Our Editor in Chief lists his must-see Photoshop and Illustrator sessions at Cre...