Using the Selection Brush in Photoshop
Learn how to use the Selection Brush, which lets you make complex selections quickly and intuitively.

This article appears in Issue 35 of CreativePro Magazine.
The Selection Brush was introduced in the July 2024 update to Photoshop. Although it’s a wholly new tool, the techniques it uses were previously available using QuickMask – but as many users are unaware of this mode, the new tool provides a useful way to make both simple and complex selections. Here, we’ll show some of the multiple uses of the Selection Brush.
Find the Brush
The trickiest part is finding the Selection Brush. That’s because it’s nested not with the Brush tools, but with the Lasso tool. Choose it by holding on the Lasso tool and then picking it from the flyout menu, or press Shift+L repeatedly until it appears. 
Paint Your Selection
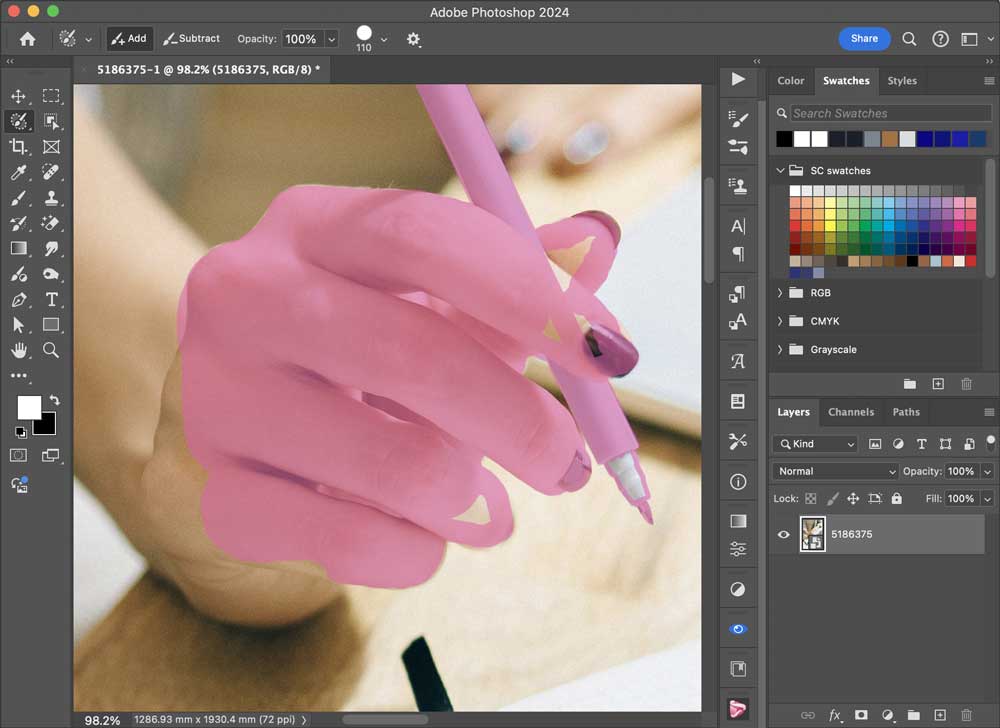
We’re going to use the Selection Brush to select this hand and pen. Start by making the brush size small, and with a hard edge. Hold Option+Control (Mac) or Alt+right mouse button (Windows) and drag left to right to change the size, or up and down to change the hardness. Then simply paint around the perimeter of the hand. The area that will be selected is highlighted in pink. Unlike using the Lasso tool, you don’t need to do it all in one go. 
Paint Straight Lines
Click to paint at the bottom of the pen, then hold Shift and paint at the top of the pen to draw a straight line between the two. This makes selecting straight lines very easy to do. 
Select the Whole Pen
You can select the rest of the pen in the same way, by clicking and then Shift-clicking to paint straight lines between the two points. 
width=”1000″ height=”728″ />
Zoom in for Detail
To select the pen tip, zoom in and use the keyboard shortcuts mentioned above to reduce the size of the brush. This helps to select fine detail areas. 
Fill in the Gaps
Selecting the perimeter of your object will leave the middle unselected. Easy to fix: enlarge the brush size, and it will be quick and easy to paint in the rest of the selection. 
A Softer Edge
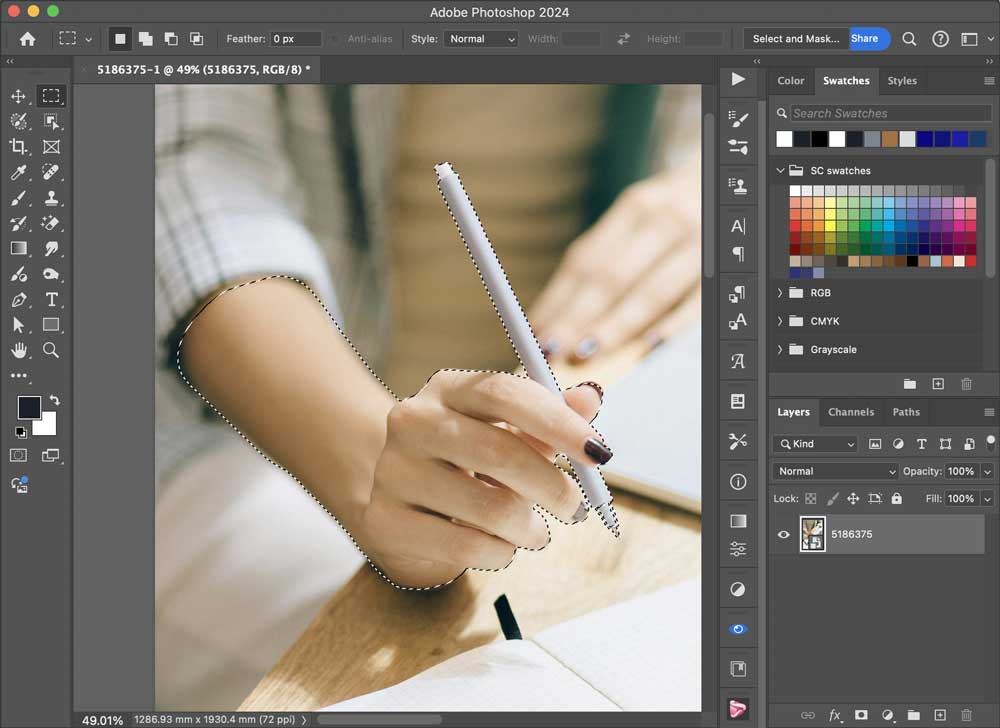
As the arm recedes, it goes out of focus. This would be impossible to select by normal means, but the Selection Brush makes it easy. Use the keyboard shortcuts to make the brush larger, and reduce the Hardness value. 
Paint the Soft Selection
When you paint with the soft-edged brush you’ll create a feathered selection in that area. If you make a mistake, as I’ve done here, just hold Alt/Option and paint out the offending area. As you get nearer the hand, the arm becomes less out of focus. Make the brush smaller to paint these areas, as a smaller brush will produce a less feathered selection. 
Fill in the Gaps
Make sure all the unselected areas are selected before continuing. Here, I’ve forgotten to add in the tip of the pen, so take a moment to check these details. 
Choose Any Other Tool
Switch to any other Selection tool – in this case, I’ve pressed M to get the Marquee tool – and the selection will be turned into the familiar “marching ants” view. Note that the soft selection of the arm will show the ants marching along the center of the feathered area. 
Add a Background
Adding a background which also has a small focal area completes the picture. Not how the arm goes out of focus in tune with the book. Adding a shadow beneath the hand makes it that much more realistic. 
Commenting is easier and faster when you're logged in!
Recommended for you

A Script for Printing by Master Page
Did you ever wish you could print a set of pages from an InDesign document accor...

How to Use the New Selection Brush Tool in Photoshop
Learn how to use Photoshop’s new Selection Brush tool to manually refine a selec...


