

Not too long ago you learned how to use Illustrator’s Paintbrush tool, and later how to create custom brushes. There’s one more brush tool you need to know about: The Blob Brush. This brush was the only one available in Illustrator for iPad until recently, but is not as well known in the desktop version of Illustrator. Let’s discover what it can do.
Selecting and Using the Blob Brush
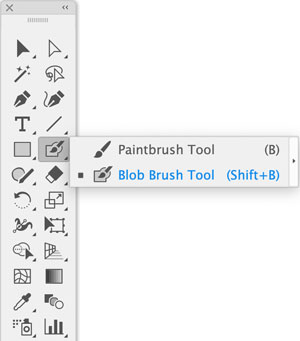
Hold your pointer down on the Paintbrush tool to reveal and select the Blob Brush tool. You can also type Shift+B to switch to this tool.
Now draw something on your artboard, and as you’re working, overlap some strokes – for example by drawing a loop. When you’re done, switch to the Selection tool, and select your drawing.
As you can see, the Blob Brush creates filled shapes as you draw with it and merges them where they overlap. This is a fundamentally different result than the regular Paint Brush which produces strokes.

Figure 1 The regular Paintbrush (top) produces a stroke, a Rounded brush is shown here. The Blob Brush (bottom) produces an unstroked, filled shape and merges overlaps as you draw.
To edit Blob Brush artwork after it’s created, you will have to use other tools – there are no strokes to edit, nor any options than can be applied after creating a Blob Brush drawing.
Blob Brush Settings
You do have control over how the Blob Brush draws: Double-click the tool to show its Tool Options dialog box.

The options here are similar to those for Calligraphy brushes. Here’s what you can do:
Keep Selected specifies that as you draw the last brushstroke remains selected, even if you lift your pointer and start a new one. While this option is enabled, your Blob Brush brushstrokes will be grouped as you draw them.
Merge only with Selection specifies that new strokes merge only with selected ones. When unchecked, a new stroke will merge with any path it encounters. Try the default unchecked setting by drawing a shape with the shape tool, de-selecting it, then drawing over it with the Blob Brush.
Fidelity controls how far you need to move the pointer before Illustrator adds a new anchor point. Lower values are Accurate and will create more points while matching your pointer movement precisely. Higher values are Smooth; Your brushstrokes are smoothed out as you draw them, and the resulting shapes will have fewer anchor points.
Size, Angle, and Roundness are the same controls that are available for a Calligraphic brush, the default type that is used when you first select the regular Paintbrush tool.
Roundness ranges from completely flat (0%) to completely round (100%), with ovoid shapes between the extremes. Angle is apparent only when Roundness is set below 100%.
Each of the three values can be fixed, random, or set to vary based on a drawing stylus’ pressure, tilt, bearing, rotation, or the use of its wheel. When a setting other than Fixed is chosen, the Variation Amount fields become active so you can specify the limits of the effect. Try these out to see the results as you draw with the Blob Brush.
Changing Blob Brush options will only affect subsequent artwork – existing artwork is not “live” and won’t be affected by changes you make in this dialog box.
Combining the Blob Brush and Paintbrush
The Blob Brush creates filled shapes whose edges might not look as though they were drawn with a brush. To avoid that, try this:
- Select your Blob Brush drawing
- Open the Brushes panel by choosing Window > Brushes
- Open a brush library such Artistic_ChalkCharcoalPencil by choosing Open Brush Library > Artistic from the panel’s menu or from the Brush Libraries button in its lower left corner
- Click on any brush to apply it – and now you’ve made the Blob Brush artwork look more hand-drawn by adding a paintbrush stroke.

Figure 2 – Hello written with the Blob Brush and stroked with a Charcoal Pencil brush
Commenting is easier and faster when you're logged in!

Recommended for you

Tip of the Week: Alphabetizing Menus
This tip was sent to Tip of the Week email subscribers on October 16, 2014. Sign...

The RGB Color Atlas
If you liked the news story earlier this week about the 99 Shades of Grey book,...
CreativePro Magazine Issue 21 Now Available
CreativePro Magazine Issue 21 has articles on Generative AI, Adobe Firefly, hard...