

With Illustrator’s Rectangle tool – predictably – you can create a rectangle. Move it around with the Selection tool, resize it with the Scale tool and rotate it with the Rotate tool. So far, so good. But can you now paint it with the Paintbrush Tool? The answer is not so simple. Though the Paintbrush tool sports a familiar icon, it does much more than its name implies.
In this article, I’ll walk you through the basic functions of the Paintbrush tool.
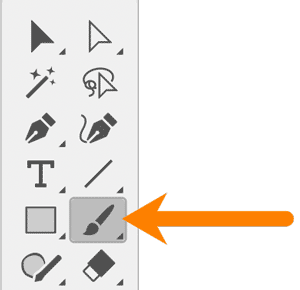
Figure 1 – The Paintbrush Tool
Starting Out
Click the Paintbrush tool and draw on your artboard. Using the Paintbrush for the first time produces as a uniformly thick stroke with rounded ends. The brushstroke you just drew is similar to a line drawn with the Pencil tool, just heavier.

Figure 2 – Top: A line drawn with the Pencil tool. Bottom: a similar line made with the Paintbrush
To modify how the Paintbrush performs while drawing, double-click the tool or press Enter while it’s selected to set options. Set the Fidelity slider to Smooth to create brushstrokes with fewer points, Accurate to precisely match the movements of your pointer, or somewhere in between. Experimentation will help you discover the settings that best match your drawing style.

Figure 3 – Paintbrush Tool Options
To make perfectly straight lines constrained to 45° angles, hold the Shift key while you draw.
To draw a closed shape, hold the Option key. A small circle appears alongside the cursor indicating that the path will close as you join the ends.
Choosing a Brush and Changing Stroke Weight
The true power of the Paintbrush tool lies in the many brushes it can utilize. Choose Window > Control to display the Control bar along the top of your window. With the Paintbrush tool selected, the default Brush Definition (also known as the selected brush) is “5 pt. Round.” Click the drop-down menu and you’ll find other brushes. Better yet, choose Window > Brushes to reveal the Brushes panel.
With a path selected, choose a different brush in the panel or from the Control bar, and notice how your artwork changes.

Figure 4 – The brushstroke shown earlier with the Mop brush applied
Try applying different stroke colors to your brushstrokes. Some brushes have pre-defined colors and won’t change, while others allow you to tint them.
Another way to control the appearance of paths drawn with the Paintbrush is to alter their stroke weight. Do this in the Control bar or reveal the Stroke panel by choosing Window > Stroke. You can enter fractional values such as 0.25 pt to thin out brushstrokes that are heavy by default.
Loading and Using Brushes
As you explore different brushes, switch back to the Selection or Direct Selection tools. Select any path, then click a brush in the Brushes panel. You just modified existing artwork. Here lies the true power of brushes – they can be applied without using the Paintbrush tool at all!
Illustrator comes with many pre-made brushes, some quite elaborate. There are two ways to open brush libraries: Use the panel menu and select Open Brush Library or click the dedicated Brush Libraries Menu button in the lower left corner. There are many categories with several libraries in each. When you click on a brush in an open library panel, it is automatically added to your document’s Brushes panel.
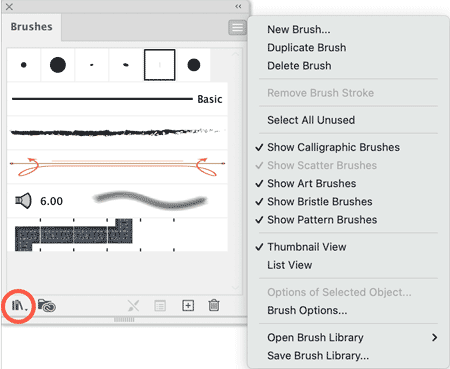
Figure 5 – The Brushes Panel Menu (right) and the Brush Libraries Menu button (circled, left).
Drawing with a Stylus and Modifying Brush Behavior
To fully unlock the creative possibilities the Paintbrush, use a pressure-sensitive stylus with a drawing tablet or display. Tablets from Wacom, Xencelabs and XP-pen connect to your laptop or desktop computer. Devices such as a Windows Surface tablet let you draw directly on-screen. Your tablet’s stylus or pen is required for the next step.
Select the 5 pt. Round brush. Double-click it in the Brushes panel and change the Size from 5 to 9 points. Select Pressure from the drop-down menu next to Size and make the Variation value the same. You can rename the brush if you wish before clicking OK. You may get a warning dialog about existing brushstrokes – choose whichever option makes sense for your artwork.

Figure 6 – Brush options
Now as you draw, notice how the line weight changes as you increase or decrease pressure with your stylus.

Figure 7 – A variable-weight brushstroke drawn with a stylus using varying pressure
Experiment further with the settings. You can use your stylus tilt angle, bearing and rotation to control different aspects of a brush’s behavior. The controls available vary by brush type.
This article was last modified on August 22, 2021
This article was first published on August 22, 2021
Commenting is easier and faster when you're logged in!

Recommended for you

Creating Custom Brushes in Illustrator
Using custom brushes with the Paintbrush, you can quickly create highly detailed...

Building an Isometric Timeline of Modern Milestones in Design and Publishing with Illustrator
Anticipating another great CreativePro Week in Seattle, I was excited to get a c...

Tasty Tips and Tricks
A smorgasbord of tips to make your work go faster and get better results