


This tip was sent to Tip of the Week email subscribers on January 21, 2016.

Sign up now and every week you’ll get a new InDesign Tip of the Week and Keyboard Shortcut of the Week, along with roundups of new articles at InDesignSecrets, plus exclusive deals sent right to your Inbox!
Just scroll all the way down to the bottom of this page, enter your email address, and click Go! We’ll take care of the rest. Now, on with the tip!
If you’re working on a print project and your layout has content that bleeds off the edge of the page, you should confirm that the content bleeds far enough as part of your preflight process. If you don’t know what the necessary bleed amount is, ask your printer.
Then make sure your document is set up with the bleed guides in the right places (in the Document Setup dialog box).

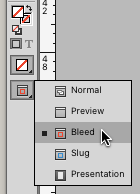
And check each page in Bleed Mode, by choosing View > Screen Mode > Bleed, or choose Bleed from the view modes listed in the pop-up at the bottom of the Tools panel.
With Bleed mode chosen, you can toggle it on and off by pressing w (when you’re not editing text).
In Normal view mode, a page might look OK.

But in Bleed mode, you can spot an inadequate bleed by looking for any content that doesn’t extend fully to the edge of the visible area.

Or, you can automate the search for inadequate bleeds with the Preflight panel. Make a custom preflight profile that includes a Bleed/Trim Hazard warning (you’ll find it in the Images and Objects category). Anything that comes closer to the page edge than the value you set will be flagged unless it extends all the way to the bleed guide.

You’ll see separate warnings for the frame and the content in it if both don’t bleed far enough to match your spec.

This article was last modified on July 25, 2019
This article was first published on January 26, 2016
Commenting is easier and faster when you're logged in!

Recommended for you

InDesign Magazine Issue 144: Stealing Great Design
Issue 144 has articles on stealing great design, designing with rules, borders,...

Drag and Drop text in layout view
Some people hate drag and drop text, some love it; I’m in the love camp. I...

TypeTalk: The Complete Guide to Line Spacing
Line spacing, or leading (as much of today’s design software calls it), is a typ...