
After its initial release more than a year ago, Adobe LiveMotion provided a refreshing alternative to Macromedia Flash 5. Many of us felt right at home, knocking out our vector animations in a program that behaved similar to other Adobe software and complemented them as well.
Although Live Motion 1.0 is easy to use and has an intuitive workflow, it’s not without its share of shortcomings. One of these lapses is shape tweening, or the transformation of one shape into another in an animated sequence. LiveMotion doesn’t natively include the ability to morph one shape into another. But you can easily overcome this limitation by getting some much needed vector help from LiveMotion’s big brother, Adobe Illustrator. Here’s how you can create shape tweens in Illustrator and then animate them in LiveMotion.
Illustrator Does the Heavy Lifting
LiveMotion 1.0 does a respectable job at handling the essential things required to produce dynamic animations, but shape tweens isn’t one of them. But that doesn’t mean LiveMotion fans are completely out of luck. If you happen to use Illustrator, then you have the missing piece for adding shape tweens to your animations. The trick is to create your shape tweens using Illustrator’s Blend tool, then expand the blend in order to release each blend step as a separate layer. These layers ultimately become frames once imported into LiveMotion and converted into a sequence.
Follow these steps to create a simple shape blend in Illustrator:
- Start a new RGB document that will share the same dimensions as your LiveMotion document. Since LiveMotion’s only unit of measure is pixels, I recommend switching Illustrator’s units over to this as well. Show Rulers and Control-click (Mac) or Right-click (Windows) on a ruler and select Pixel from the contextual menu.
- Create two simple shapes on the artboard. In my example I created a hexagon and star (Figure 1). The shapes can be of different color and size.
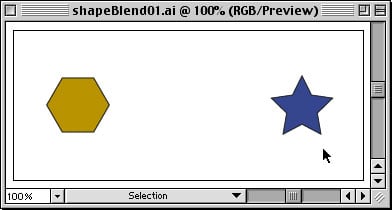
Figure 1: First create the two shapes you want to blend. - Before we blend the two shapes, let’s change the blend options by double-clicking the Blend tool. In the Spacing pulldown, choose Specified Steps. Considering LiveMotion’s default frame rate is 12, I suggest entering a number that works nicely with this number. Here I entered 24 steps (Figure 2). For the Orientation option, pick Align to Path and then click OK.
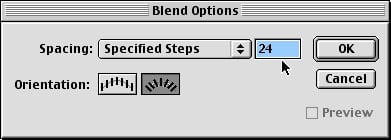
Figure 2: For number of steps, use 12 or its multipliers, in this case 24. - With the Blend tool still selected, click within your first shape and then click within the other shape. This creates a live blend with the options you just set. The blend is dynamically defined between the two shapes using a special type of path known as a spine (Figure 3). Switch to Outline view (View>Outline) to see the spine more clearly. The spine can be edited into a curve or any other shape (Figure 4).
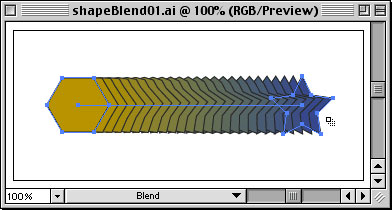
Figure 3: Here is what the live blend looks like once created. Note the spine down the middle.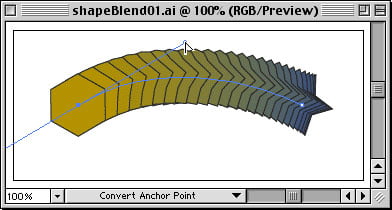
Figure 4: The blend spine can be adjusted to change the blend dynamically. - Switch back to Preview view (View > Preview) and save your document in its native format and version if you have not already. This will be your editable version. Do this because the steps that follow will eliminate the ability to edit your live blend, so we’ll make a quasi-export document from this point on.
- Now save the document as an Illustrator 8 format (File>Save As…), naming it differently than your working file. LiveMotion 1.0 does not support native import of versions higher than 8. Click OK when the warning appears that some features may be lost when saving down into older versions.
- With your blend selected choose Object>Blend>Expand from the main menu (Figure 5). This converts the live blend into basic objects, losing the dynamic capabilities but making it possible for the blend to be imported into LiveMotion (Figure 6).
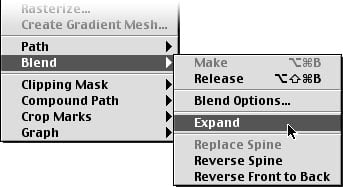
Figure 5: Convert the live blend into objects using Object>Blend>Expand.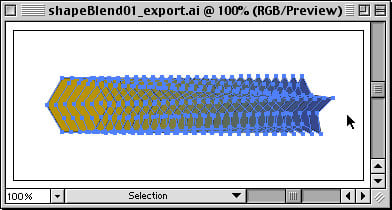
Figure 6: The resulting artwork once you expand your live blend. - Lastly, in the Layers palette select the blend group and choose Release to Layers from the palette’s turndown menu (Figure 7). Be sure the blend group Sublayer that is labeled <group> is still targeted in the palette and not the top-level labeled Layer 1 by default. Otherwise the release command will just release Layer 1 into a Layer 2, which isn’t what we want. With your blend properly released into separate layers, it’s now ready for import into LiveMotion. Save the document, still in Illustrator 8 format, one last time.
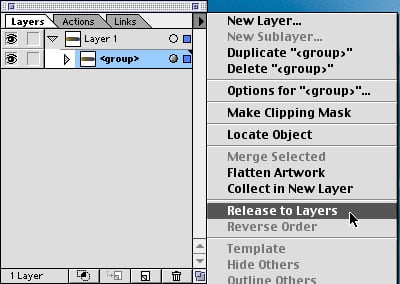
Figure 7: It’s important to have the <group> sublayer selected before choosing Release to Layers instead of the top layer.
LiveMotion Breaks it Down
Now that Illustrator has done much of the hard work, there’s little left for LiveMotion to do. Once you import your Illustrator document, it’s just a matter of converting the artwork into a sequence. Just as LiveMotion can break down a layered Photoshop file into an animated sequence, it can do the same with Illustrator layers.
In order to get your Illustrator blend animating in LiveMotion, do the following:
- Create a new composition in LiveMotion with the same dimensions as your Illustrator document and keep the frame rate at 12.
- Choose File>Place… from the main menu and select your exported Illustrator document (Illustrator 8 format).
- With the placed blend still selected, choose Object>Convert Layers Into>Sequence (Figure 8). This breaks each of the layers into a frame within the animation. Preview your animated shape blend (or tween) in a browser by choosing File>Preview In>(Browser).
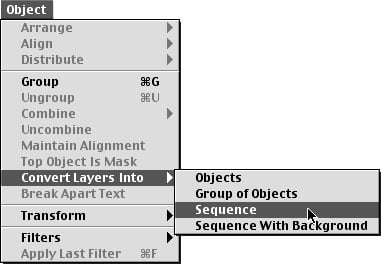
Figure 8: Found under the Object menu, Convert Layers Into>Sequence breaks each layer into a frame.
Chances are you will want to tweak the timing or fine-tune other attributes of your newly created shape tween animation. Timing controls can be located under the Object Time attribute. The thing to keep in mind is your shape blend sequence can now be treated just like any other object in LiveMotion, so don’t feel that you have to stop at just a simple shape tween. You can adjust and add other attributes to make the shape tween even more interesting.
To adjust your shape tween’s timing:
- In the Timeline window, click the turndown arrow of your shape tween layer to reveal its attributes.
- Then click the turndown arrow beside Object Attributes for the layer. Here you’ll notice that Object Time has two keyframes set (Figure 9). This is where the conversion of the layers to a sequence took place. If your shape blend is animating in reverse to how you intended, you can simply swap these two keyframes here. You can also move the keyframes closer to one another to speed up the shape blend animation or add keyframes to the Object Time to finesse the timing or apply easing in and out points.
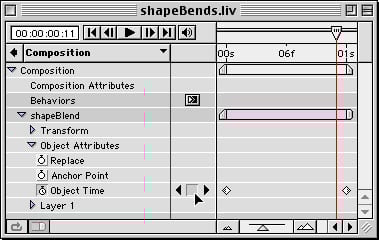
Figure 9: The Object Time controls the timing of your shape tween. - Once you’re happy with the shape tweens timing, you can start adding other attributes to the layer such as opacity, rotation, position and adjusting the anchor point just to name a few (Figure 10). I won’t deprive you of the best part which is exploring all the available attributes that can be adjusted and experimenting with what their effect has on the overall animation, this entirely left up to you.

Figure 10: Here’s an example of extra attributes applied to a shape tween to add a bit of extra pizzazz.
Shapes of Things to Come
Although this approach to getting shape blending into LiveMotion isn’t as seamless as it could be, it’s good to know that there is a workaround, and as workarounds go, it’s not that bad given the integration between Adobe applications. Adobe is working on the long-awaited update to LiveMotion and with its release we can only hope for native support of shape tweening.
This article was last modified on July 20, 2021
This article was first published on November 13, 2001
Commenting is easier and faster when you're logged in!

Recommended for you

Beware of Special Characters in CC Library Assets
A really nice way to keep vector logos and other frequently used items at your f...

Index Stock Imagery Launches Its Millionth Image
Index Stock Imagery, www.indexstock.com, The Independent Choice for Your Imagina...

Scanning Around With Gene: The Horse and Buggy Printer
Type designers and graphic artists tend to fall into two categories. You either...