Photographic Frames and Mattes
On an earlier post, I mentioned how you can use a custom stroke style to make an interesting frame, and Mariella commented that my tip could be extended to create some cool frames around pictures. I took the bait and started playing… and came up with some fun effects.
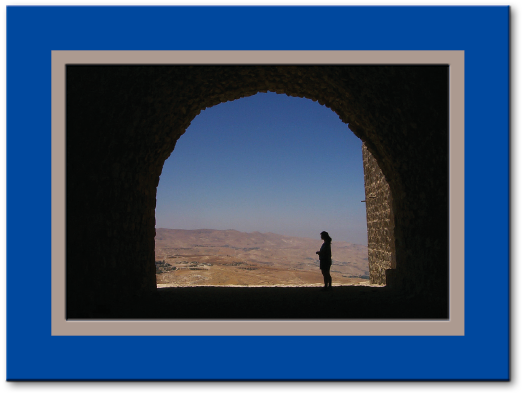
Here’s the effect she was talking about — a photo with a matte and a frame:

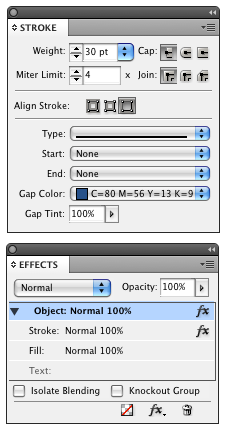
That’s one stroke on the outside of the picture, using a similar “inner stripe” stroke I made in the earlier post (the stroke color is tan and the gap color is blue):

Then I applied a small bevel & emboss to the Stroke, and a small drop shadow to the Object. Obviously, you can control the thickness of the matte vs. the frame by dragging the little triangle in the Edit Stroke Style dialog box.

Here’s a black and white version:

In this case (above), I cleared the transparency effects, then selected the image itself with the Direct Selection tool and applied an Inner Shadow in the Effects panel. Look, ma’, I’m floating!
You can also have fun playing with the corners and edges using Corner Effects, or changing the Join setting in the Stroke panel. Here’s a few I made after going hogwild:
Applying a normal double stripe stroke, then using Fancy Corner effect, then choosing Object > Paths > Close Path (to convert corner effect into actual bezier points), then changing stroke join to Round Join:

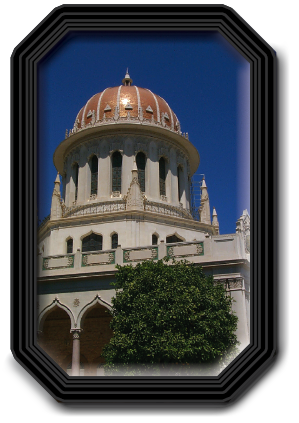
Here’s one with bevel corner effects, a custom 4-stripe stripe stroke, and a drop shadow and bevel & emboss on the stroke:

I’m having way too much fun. Gotta’ stop. Got real work to do. Grr.
Want to play around with any of the frames I’ve made here? Download and unzip this INX file. Note that I have created object styles for each of these frames, so you can copy and paste, or edit at will. (You won’t have my pictures, so you’ll have to insert your own after opening the INX file in InDesign.)
By the way, as I’ve said repeatedly before, I’m not a designer. I’m sure that some of you out there can come up with even prettier examples. If you do, send them to me or post them on flickr or somewhere we can see them.
Oh, there is one other way to make even cooler photo frames… but I’m going to have to hold off to another day for that one.


David,
I love it when you get into the sandbox and just start playing! You make some great “sand castles!”
Thanks for the starter file, too!!!
great ones!
thanks a lot
I love the pristine and elegant black and white version. Very nice!
A bit off-topic, but not too much…
The only thing I like about Quark is that it has the certificate frame which is great for direct marketing projects I work on.
Has anyone come up with a frame like that for InDesign?
I know I can get stock photos of certificate frames, but they don’t scale well and there’s no control over the weight.
So I’ve been searching for something that works from inside of InDesign itself.
As for David’s last example… that looks great!
That inner shadow looks good!
Mike- You can always use Illustrator to create beautiful frames. Since Illustrator supports multiple strokes, the sky is the limit for your creativity.
iStockphoto has some *amazing* guilloche style certificate borders. Definitely worth a look.
David, you have way too much time on your hands. In your case, though, that’s a good thing.
I love how you do your thinking over here, while leaving the box way over there.
The Bahai’ Temple! Nice!
Very nice and useful stuff David — and good golly, you even gave us an INX file! Just like I’ve been clamoring for for ages — but it still happens only one per blue moon. Here’s your revised New Year’s Resolution: “Always provide an INX file for readers to play with — instead of having them waste their lives trying to recreate from scratch the high-falutin’ stuff we’re talking about.”
@Klaus: I know the INX files are useful, but honestly, its often better for people to do it themselves. You know, “teach a man to fish vs. giving them a fish” ;) Recreating from scratch is one of the best ways to learn the techniques.
@Alan: I wish I had too much time on my hands. No, this post was called “creative procrastination” — I was supposed to be doing some actual paying work and did this instead. But you know how some people play computer games or take drugs or whatever? I’m more hardcore than that: I dose on InDesign.
Hi David!
I decided to join in you in “wasting time doing stuff that I shouldn’t be doing when I have other stuff that I should be doing”… Here’s some information on creating frames and borders in Illustrator.
Mordy’s Illustrator tutorial (previous posting) is VERY cool. I think Illustrator is really the place to create the fancy borders. I look to use Pattern Brushes. It’s been in Illustrator for a long time.
Plus, he uses pictures of David for the tutorial!