

Customizing the Calendar
As you can see, the original layout of the Calendar 1 script isn’t too exciting and isn’t necessarily how you want your calendar to look. Since any changes you make have to be made to 12 pages, the easiest way to approach customizing this layout is to change the first page and then use styles to format the remaining pages.
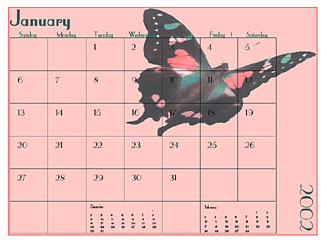
If you want to move some of the elements around as we did in Figure A, you should do that next, but remember that this type of change will have to be made to each page of your calendar. For more information on how to do this, see the sidebar “Moving the calendar’s pieces.” For the example in this article, however, we’ll leave the elements as is.
Deciding on a Theme
The first place to start, is deciding on a theme for your calendar. This involves fonts, colors and 12 similar images. For our example, we chose a butterfly theme and gathered 12 different butterfly images, one for each page. We then decided to use the Parisian font and chose two colors from each butterfly image to use with our text and backgrounds.
Formatting the Text
After you’ve decided on your theme, the next step is to format the text. The text can be selected with the Text tool, which means you can format it as you would any text. Unfortunately, you have to select each instance of text individually, which can be time-consuming. However, once the first page is formatted, you can create styles that you can then apply to the other pages. (If you want the text on each page to have a different color as we do, create the style before you apply the color.) For more information on how to create styles, see the article “Improved formatting with styles” in the September 2001 issue.
Tip: To quickly change the default font, use the Font pop-up menu on the Control palette (Window > Show Control Palette). This eliminates one step.
After you’ve changed the default text, you can add other text to the calendar, such as holidays, birthdays, recurring meetings or deadlines. If you’re creating this calendar as a marketing tool, you can add special events that would interest your clients. To add text, select the Rectangle Frame tool and create a text frame in the square of the day in which you wish to add text. (If the text frame is black, click on None in the Colors palette to better see the text.) Then select the Text tool and enter and format your text. Now with the Pointer tool, position the frame within the square, as shown in Figure F. For more information on how to use text frames, see the June 2001 article “The advantages to using frames.”
Tip: If you’re adding the same text to several squares, you can copy the first text frame and then paste it into other squares.
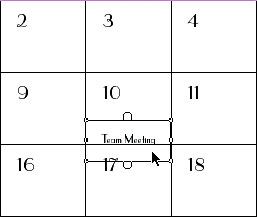
Figure F: Use a text frame to add new text to the calendar.
Once you’ve created all your text frames, select them by holding down the [shift] key and then choose Element > Stroke > None to delete the frame borders. When you do, light gray, non-printing borders appear onscreen. If you want, you can hide the non-printing borders by choosing View > Hide Guides. Your calendar should now look similar to the one shown in Figure G.
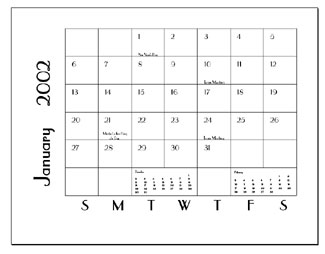
Figure G: Adding and formatting text improves the look of your calendar.
Adding Color and Graphics
The next step is to add some color and graphics to the layout. These elements should match the theme you chose earlier. As mentioned, to help tie in our colors with our graphics, we chose two colors from each butterfly image to use as text and background colors for that particular month. To add these colors to the Colors palette, choose Window > Show Colors and then choose New Color from the Colors palette’s pop-up menu. In the Color Options dialog box, you can either enter the CMYK breakdown of the color, as shown in Figure H, or select the color from a library by clicking on the Libraries pop-up menu. Now name your color and click OK to add it to the palette. Repeat this process to add all the colors you want to use in your document.
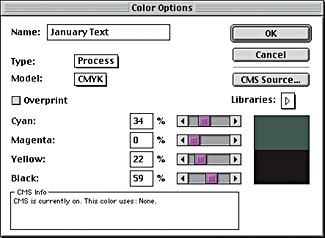
Figure H: Add the theme colors of your calendar to the Colors palette.
Depending on how you want to place your images, you may need to adjust them in an image-editing application first. For example, to place the butterfly behind the text in the calendar shown in Figure A, we first adjusted its opacity in Adobe Photoshop to 75 percent so that any text that was over it was visible. Once your images have been prepared, gather them in one folder.
Now that your colors and graphics are in place, your design possibilities are endless. You can add color to the text, background, individual squares, etc. You can place your images behind the calendar, in corners or inside squares. Figure I shows some more examples of how you can easily spruce up the Calendar 1 script.
Tip: When you click on the calendar with the Pointer tool, you can then change the stroke and color of the lines that surround the days.
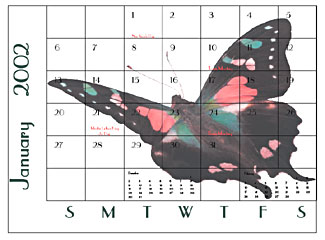
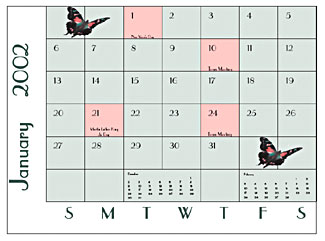
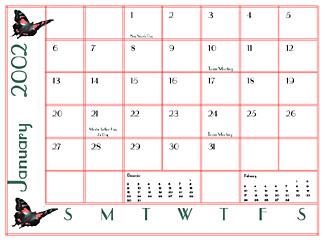
Figure I: The layout of the Calendar 1 script can be customized in many ways.
Final Steps
Once you’ve finished designing the pages of your calendar, all that’s left to do is print it and fasten it with staples or some other method. If you want a front and back cover, you can create a separate PageMaker document with a page size of 11 x 17 designed to match the other pages.
Here’s to a Good Year
The scripts that come with PageMaker are a great way to begin a project, such as creating a calendar. With some manipulation of the elements and the addition of color and graphics, you can produce a great-looking calendar in no time at all.

Creativepro.com readers can subscribe to Element K Journals at a discount. Click here to learn more.
This article was last modified on February 22, 2022
This article was first published on March 22, 2002
Commenting is easier and faster when you're logged in!

Recommended for you

This is not photography: the story of Jerry Uelsmann & Maggie Taylor
Sure, you know lynda.com offers a tremendous variety of instructional videos on...

FlightAlert XT for QuarkXPress 8
XChange UK and ThePowerXChange.com are pleased to announce the immediate availab...

How to Create a Reusable Haze Filter in Photoshop
Learn how to create a reusable Photoshop filter for adding a haze effect to an i...