



With the Oscars coming up later this month, I thought it would be fun to figure out how to make a movie poster with InDesign. Specifically, how to get the typical look of the credits that appear at the bottom of the poster. The common Hollywood approach is for the person’s name to be preceded by the credit in smaller, stacked type.
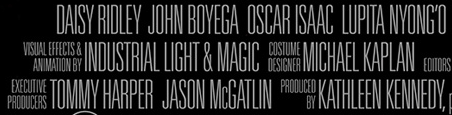
There are a few ways to accomplish this, one of which was described way back in issue #3 of InDesign Magazine. I decided to try tables since it seemed like a natural way to get that stacked type to line up with the person’s name.
I started with a table with two rows and six columns.

Each row would hold one line of the stacked type.
I selected and merged the cells that would hold the people’s names.


I entered the text for the credits and names.

Then it was just a matter of choosing the formatting for the type,
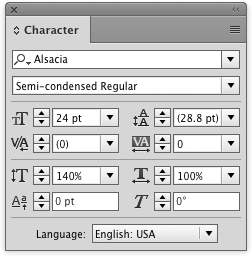
making styles to apply that formatting,

fiddling with some of the cell options to get things into alignment,

and then adjusting the width of the cells to fit the text.

To that end, a script (written by Marc Autret and updated by Kasyan Servetsky) saves a little effort. Put your cursor in a cell and run the script to shrink the cell width to fit the contents.
Repeat the process using separate tables for each line of names.

Then center align the tables over your main poster image and you’re done. Click the image below for a closer look.

Now all you have to do is figure out what to wear on the red carpet.
This article was last modified on July 25, 2019
This article was first published on February 9, 2017
Commenting is easier and faster when you're logged in!

Recommended for you
InDesign How-To: Manage Text Styles Using a Script
Learn a out two powerful scripts for working with paragraph and character styles...

dot-font: The Justification for Hyphenation
dot-font was a collection of short articles written by editor and typographer Jo...

How to Extract Embedded Images from an InDesign File
Need to grab embedded images out of an InDesign document? Myra Ferguson walks yo...