
InReview: MagicTints
This InDesign add-on makes it easy to add a quick color tint to a photo or magically match the overall color tone of another.


This article appears in Issue 129 of InDesign Magazine.
MagicTints is an InDesign extension that can take color information from one image and apply it to another (or a group of images). It doesn’t just throw the colors on the file like a splash of paint; it actually uses machine learning to make color adjustments in a very logical way. There is also an option to manually select one or more individual colors to create a series of images with consistent tonal and color range.
Advanced Photoshop users are likely to recognize that these types of effects can be accomplished using Layers in that software. However, it takes a lot more experience and use of multiple layers in Photoshop in order to accomplish what MagicTints can do with the push of a button.
I can see this extension being very useful for photographers, designers, and other creatives looking for a literal “push-button” way to apply a consistent look to a set of images.
Though this review covers the InDesign extension specifically, MagicTints is also available for Adobe Illustrator, Photoshop, XD, and Lightroom, in addition to other programs and platforms (visit the Anastasiy website for more information).
Setup and Installation
Following the MagicTints installation instructions, I downloaded and used Anastasiy’s Extension Manager. Once the MagicTints extension file is downloaded, you simply drag the file into the Extension Manager, and it will be ready to use the next time InDesign is opened (Figure 1).
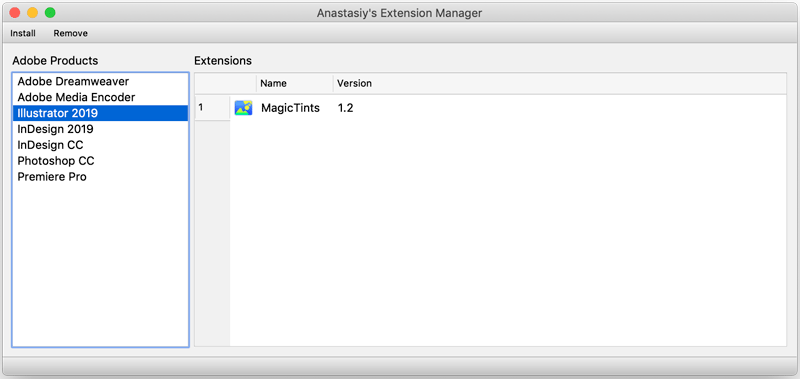
FIGURE 1. Anastasiy’s Extension Manager with MagicTints installed
After you relaunch InDesign, you can access the extension by choosing Window > Extensions > MagicTints (Figure 2).
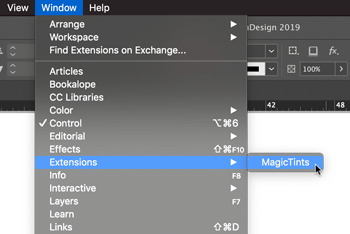
FIGURE 2.
Where to find the extension
Interface
The MagicTints panel is fairly simple. The main window displays your color source groups. Groups can contain images and/or color palettes. (I’ll explain how color palettes work below.) As you can see in Figure 3, I began by setting up two groups. The first group contains one image and one color palette. The second contains a single image.
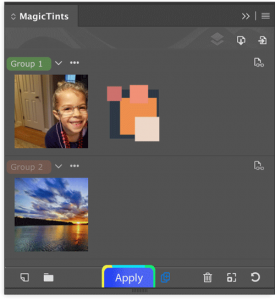
FIGURE 3. MagicTints panel
I could have just as easily placed all three in the same group or split them into three separate groups. It is really up to you how you would like to organize your color sources/groups.
The Magic in Action
For my first example, I selected a nice picture of each of my 3 kids. The idea here was to end up with a series of prints (with similar tonality) that I could frame and hang together somewhere in our home. Of the three images that I selected, two are from the same time and location and already match pretty well. The third, however, was taken outside and on a different day (see Figure 4).
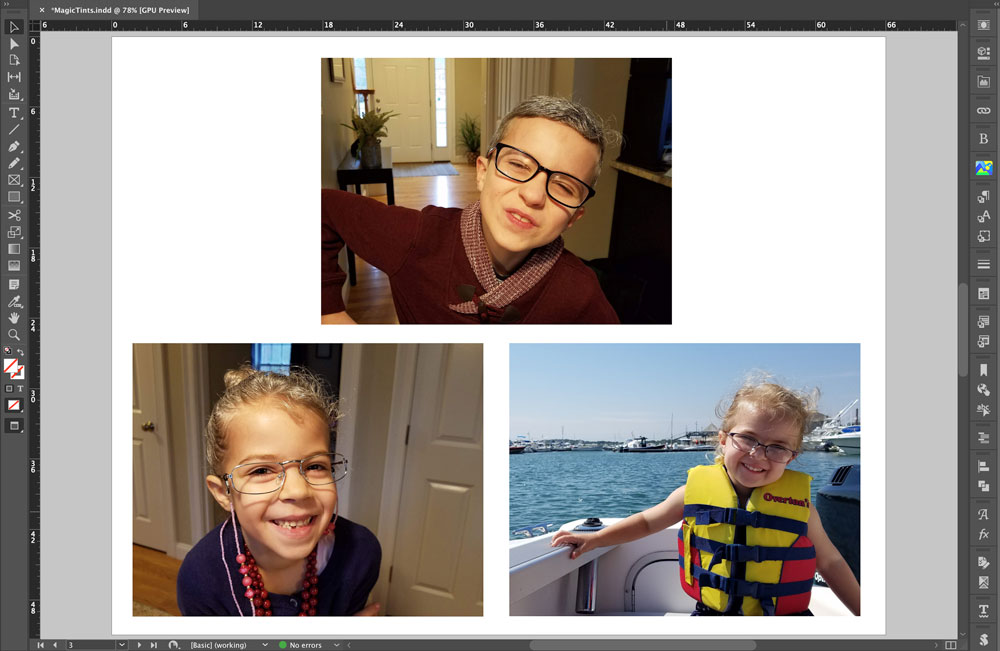
FIGURE 4. Initial photo selection, laid out on a single page in InDesign
Since my third photo is the one that I want to affect, I selected it with the Selection tool. Then, from my MagicTints panel, I selected the image in my first group, which just happens to be one of the three images on the page. Your color source does not need to be included in the InDesign document. It just needs to be loaded into the MagicTints panel.
With the image selected in the document and the color source selected in the MagicTints panel, it is time to click the Apply button. This image took maybe 20-30 seconds to render, and you can see the result in Figure 5. MagicTints did a nice job of matching the warmth and tonality of the other two images.
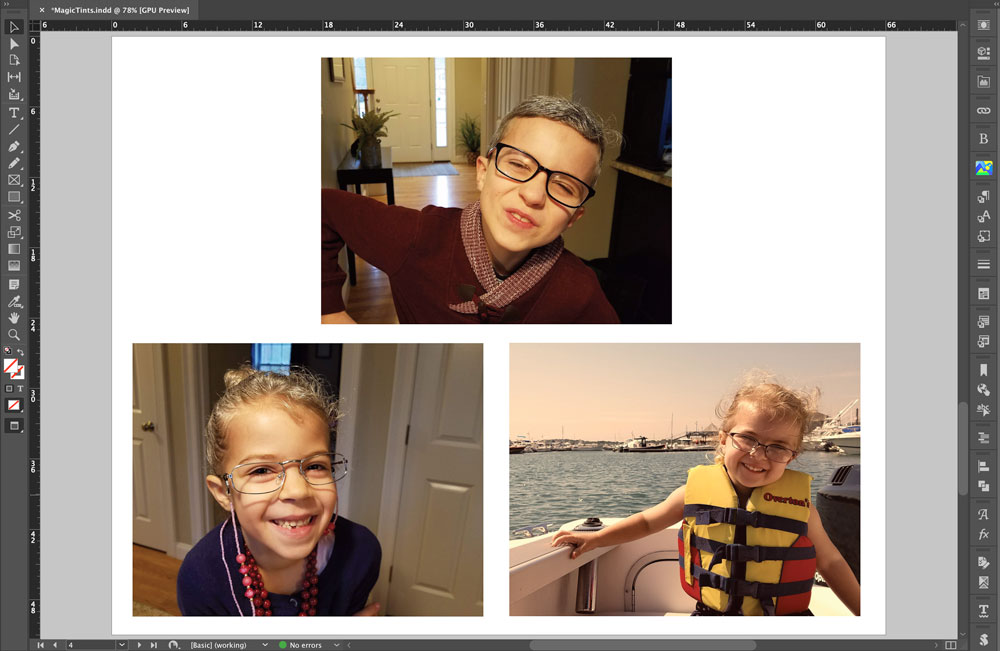
FIGURE 5. My photo series, all with matching tonality, after MagicTints works its magic
There is a Create New Layer button to the right of the Apply button at the bottom of the MagicTints panel. If this option is turned on when you click Apply, the new image will be placed on top of the original one. This makes it easy to see the before/after effect by toggling the visibility of the new image in the InDesign Layers panel. If the Create New Layer option is turned off, then MagicTints will replace the original with the new image file.
MagicTints does not overwrite the original image file. It creates a new file with the extension “_MagicTints.png” and automatically places that new image into the InDesign document. However, if you continue to apply different color variations to the same image, the “_MagicTints.png” file will be overwritten. So, if you want to create multiple versions from a single image, you will need to rename each new file before proceeding with each one.
For my next example, I drew some inspiration from some of the examples on the MagicTints website. Of course their examples are spectacular, but I wanted to see if I could get similar results with my own work.
I selected two photos that I had taken at a lake (Figure 6).
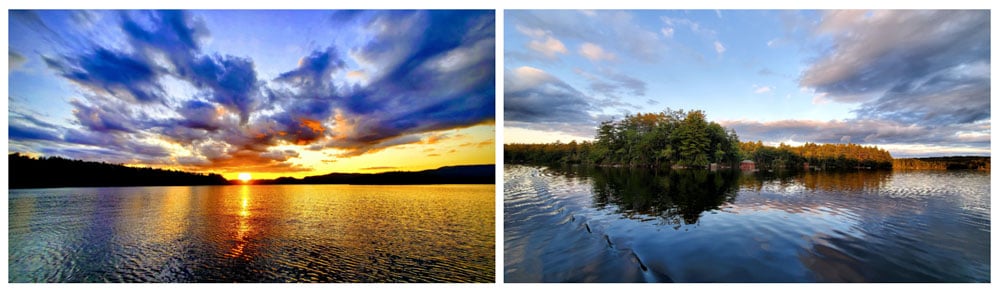
FIGURE 6. Squam Lake photos before
The first is of a gorgeous sunset with vibrant colors. And the second is of a really nice calm afternoon on the water. I love both images, but couldn’t help but wonder what the mid-day photo would look like if it had some of the same beautiful colors from the sunset. So, following the same steps from my first example, and choosing the sunset image as the color source, I ended up with what you see in Figure 7.
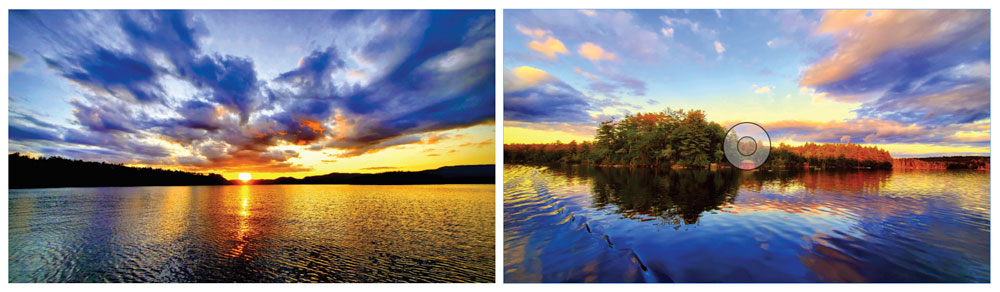
FIGURE 7. Squam Lake photos after
Like my first example, this one took about 20–30 seconds to complete.
Note: The actual time it takes for MagicTints to finish the job seems to be directly related to the file size of the original image. The larger the file, the more time it takes. My sample files were relatively small, between 1 and 2 MB.
For my third and final example, I wanted to see what it was like to use a color palette instead of an image file as my color source. The first thing that I did was choose an image to recolor. I went with the same lake view from my second example. This image is very blue and cold, so I wanted to see if I could warm it up a bit. Instead of choosing just one or two colors, I decided to use the Adobe Color Themes panel. From the list of available palettes, I decided to go with “Lake and Road at Sunset.” Using the Create Color Palette option, I mapped the five colors from the color theme into my new MagicTints color palette (Figure 8).
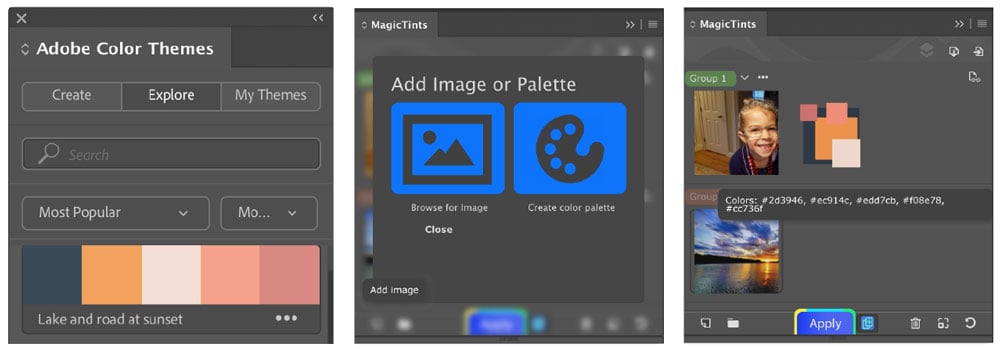
FIGURE 8. Left: Adobe Color Themes panel. Middle: Add Image or Palette option in MagicTints. Right: colors with hex values ported over.
Figures 9–10 show the results.
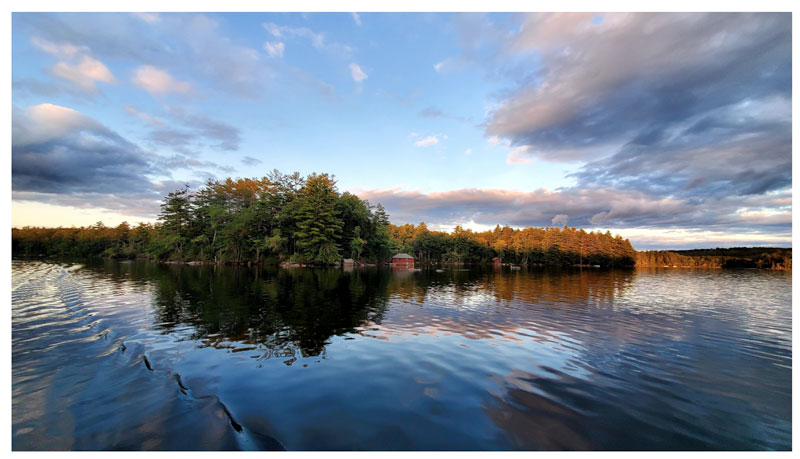
FIGURE 9. Squam Lake afternoon (before)
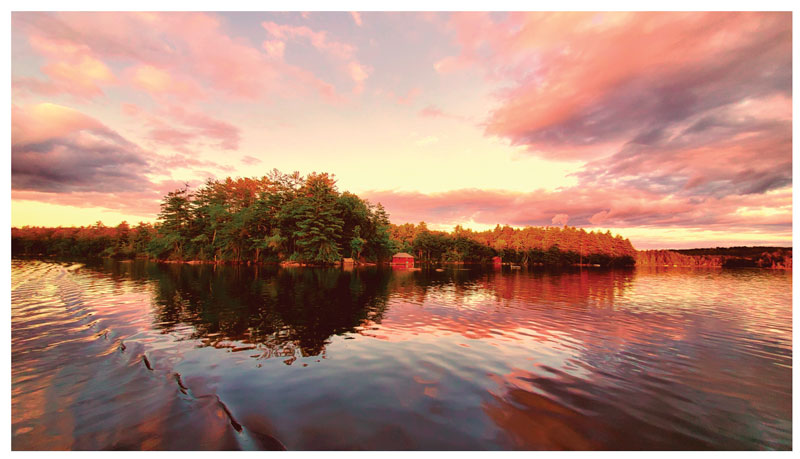
FIGURE 10. Squam Lake afternoon (after)
You can also create your own custom color palettes to apply to photos with MagicTints. Here’s how.
- From the Add Image or Palette window, choose Create Color Palette.
- Selecting the Add Color option to open the standard Color Picker window.
- Select your color, and then close the Color Picker. The color will appear in your custom palette.
- Repeat to add more colors to the palette. When you are done adding colors, click OK; your custom color palette is then added to your current group. This is a simple but very manual process that can only be completed from within the MagicTints panel.
The Create Color Palette option does not work directly with the Color, Swatches, or Adobe Color Themes panel. To build the custom color theme for my final example, I found a color combination that I liked in the Adobe Color Themes panel and sampled those colors from that panel with the MagicTints Color Picker.
Trouble-free Tints
The MagicTints extension promises to do one thing, and it does that thing very well. To be fair, if all you want to do is convert a color photo to black and white or apply a sepia tone to a grayscale image, that can easily be done in Photoshop or a handful of other apps. But, from what I can see, the true power behind what MagicTints offers is the ability to match or change the overall tonal range of an image (or group of images) with the push of a single button—and without the need for special training and use of multiple filters and layers.
One really great feature of this product that I also want to mention is seamless sharing between Adobe Creative Cloud apps. If you have InDesign, Illustrator, and Photoshop installed and you register the extension for all three, then all of your color sources and groups are shared between them.
I did notice a couple of things that could be cleaned up, when it comes to the user interface:
- The InDesign extension currently does not have the ability to apply keyboard shortcuts.
- When applying multiple color conversions to the same original image file, MagicTints will continue to overwrite its duplicate file unless you manually change the filename every time.
I think the overall value of MagicTints will vary depending on the user. For a hobbyist, the $59 price point may be on the high end. But for professional designers MagicTints offers a relatively inexpensive way to simplify the task of retinting images.
- MagicTints 1.2
- Anastasiy
- $59
- Available for Photoshop, Illustrator, and InDesign (CC2014–2020) on Mac and Windows
- Rating: 4 stars
Commenting is easier and faster when you're logged in!

Recommended for you

InDesign Magazine Issue 66: Workarounds
We’re happy to announce that InDesign Magazine Issue 66 (October, 2014) is...

Accessibility Plug-ins for InDesign
Generate PDFs that are more accessible with more ease by using these two new plu...

InDesign Magazine Issue 62: A Fresh Start
We’re happy to announce that InDesign Magazine Issue 62 (June, 2014) is now avai...