
Like it or not, graffiti is everywhere. Whether you see it as an expression of urban culture or a blight on our cities, it’s impossible to escape it. But here’s a way you can turn any photograph into a piece of graffiti artwork in Photoshop, without lifting a spray can or risking the wrath of your neighbors.
Choose your image
Almost any image will do, as long as it’s capable of being turned into black and white – so clear, distinct limbs are better than bunched-up people, for instance. I’ve chosen this skateboarder because he has a recognizable shape, and it’s an activity that’s directly relevant to graffiti artists.

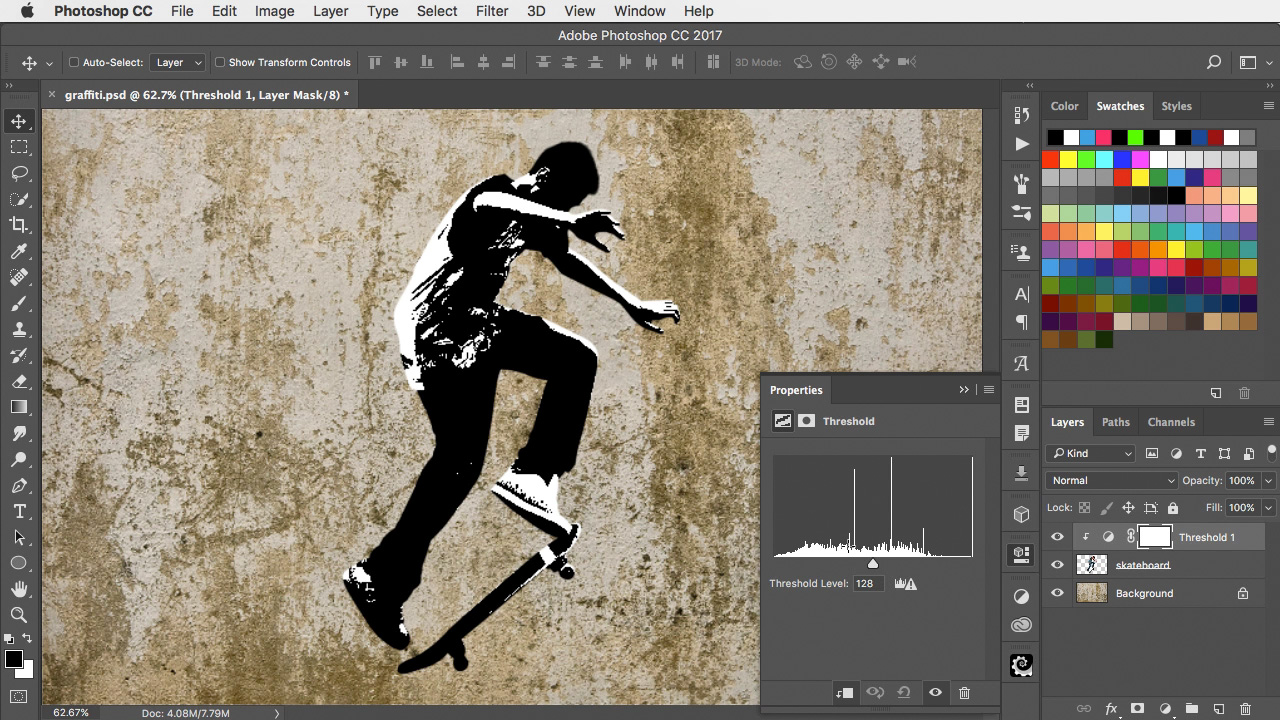
Make a Threshold adjustment layer
Threshold adjustments turn layers into pure black and white. And although you can apply the adjustment directly to your artwork, in this case, you need to apply it as an Adjustment Layer. Make sure you set it to use the underlying layer as a Clipping Mask, so the Threshold effect doesn’t apply to the wall as well.
Dodge and Burn
Use the Dodge and Burn tools to brighten and darken the skateboarder layer directly. Because you’re looking at the layer through the Adjustment Layer, it’s easy to brighten the very dark areas, such as the jeans, to let more light into them and give them more definition.

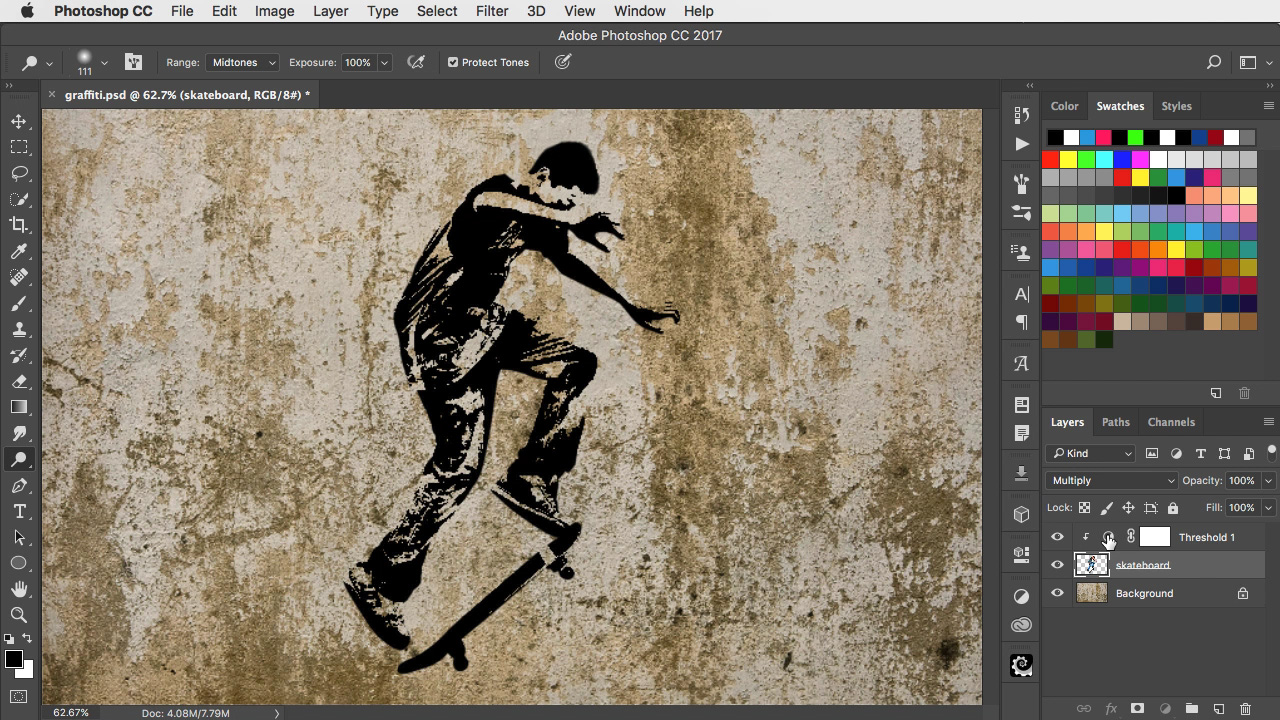
Set to Multiply
Change the mode of the layer from Normal to Multiply, and all the white will disappear and you’ll see just the paint. I’ve also used Dodge and Burn to brighten his face and darkened the back of his shirt. Remember, when using either tool you can hold Option or Alt to access the other one temporarily.
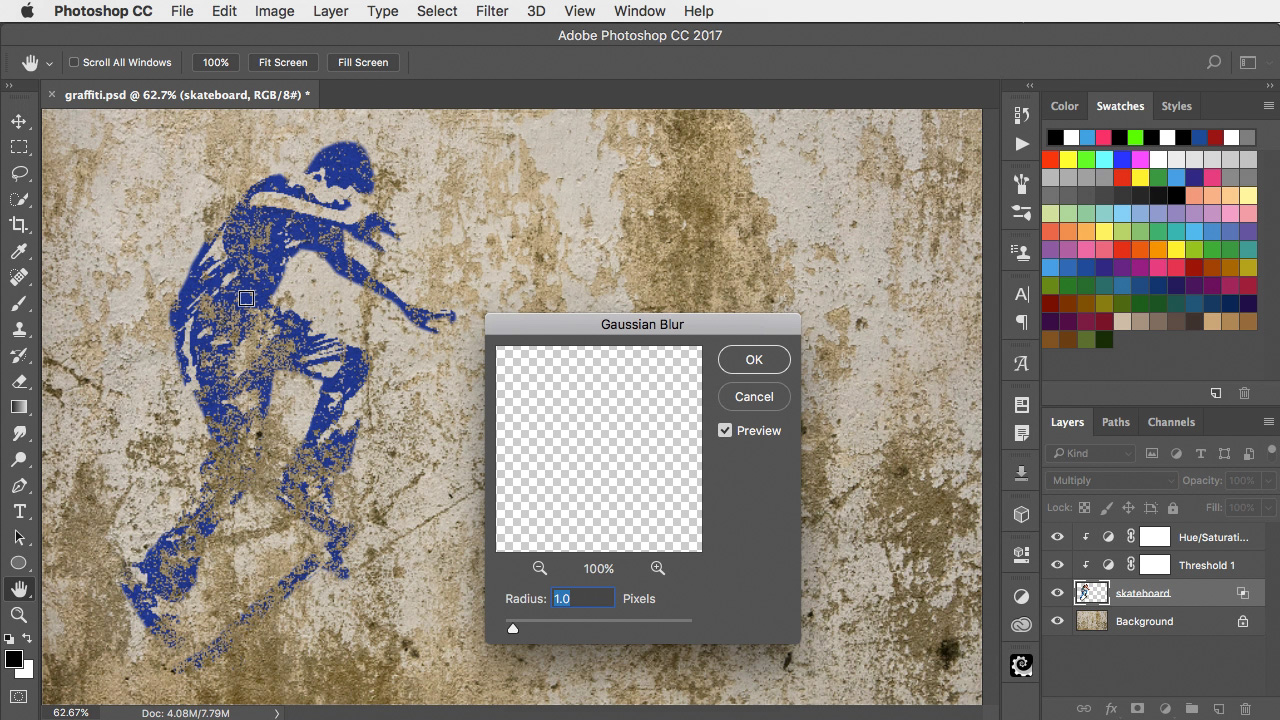
Add some color
Use a Hue/Saturation Adjustment Layer, again using the underlying layer as a Clipping Mask, to add color to the image. Because the Threshold adjustment produced a solid black, you’ll need to check the Colorize button and raise the Lightness level in order to see the effect.

Let the wall show through
Graffiti shouldn’t be perfect. To let some of the roughness of the wall show through, open the Layer Style dialog (or double-click the skateboarder layer’s thumbnail). In the Blend If section at the bottom, drag the left Underlying Layer triangle to the right to reveal those areas of the wall that are darker than the point to which you drag it.

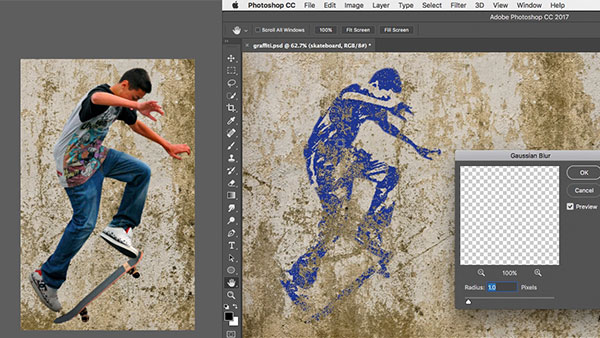
A touch of blur
Graffiti artwork shouldn’t look too crisp. Adding just a small amount of Gaussian Blur – around 1 pixel should be adequate – will soften the edges, giving the graffiti a more sprayed appearance. Because the Threshold and Hue/Saturation processes are both Adjustment Layers, you can go back at any point and adjust these further if you wish.
Graffiti Video Tutorial
Check out the video version of this tutorial, and get a link to download the original artwork.
This article was last modified on July 9, 2021
This article was first published on July 10, 2017
Commenting is easier and faster when you're logged in!

Recommended for you

dot-font: Fun with the Push Pin Legacy
dot-font was a collection of short articles written by editor and typographer Jo...

Using InDesign, Illustrator, and Photoshop Together: Moving Vectors
Vectors (aka paths) are very powerful items. Unlike pixel art that can look lous...

Create Stunning Slideshows with FotoMagico
If you’re a Mac-using photographer looking for a way to showcase your work in pr...