


Did you ever want to secure a file to control who could view, edit, or print it? In most cases, it’s pretty easy to password protect a file, but the exact method depends on what type of file you’re working with and your operating system. Some apps, such as Adobe Acrobat and Microsoft Word, have built-in features for encrypting files. In other cases, you can use free tools to secure your files on both Windows and Mac.
Password Protecting PDFs
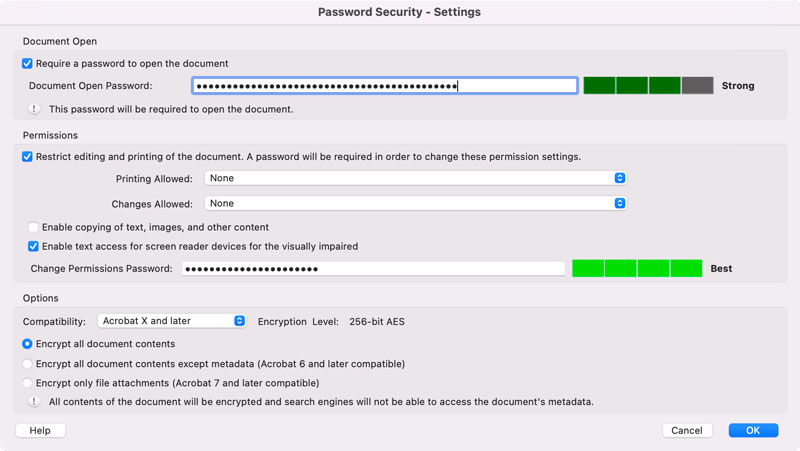
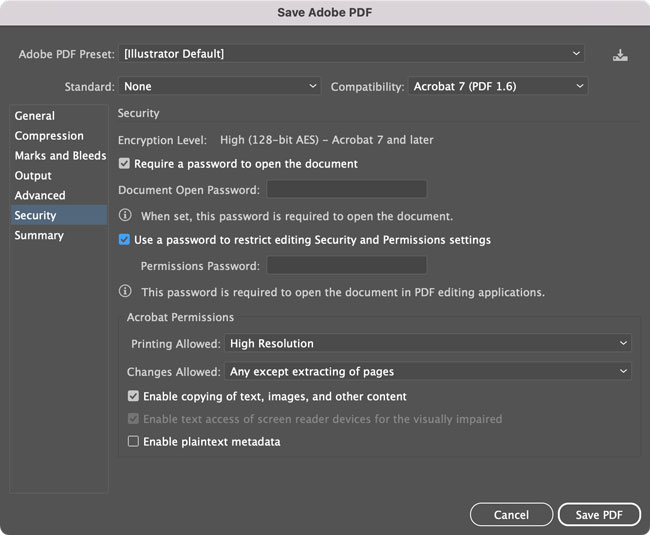
Adobe Acrobat offers built-features for encrypting PDFs. If you’re using the new Acrobat experience, click All Tools > Protect a PDF > Encrypt with Password.
In the Password Security Settings dialog box you can set separate passwords for opening, editing, and printing the PDF, encrypt only file attachments, and so on.
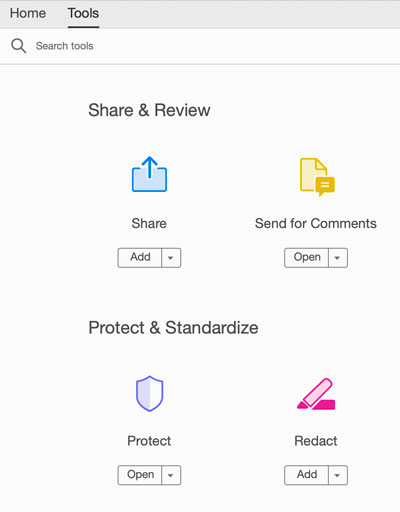
If you’re using the old Acrobat, click Tools > Protect & Standardize > Protect.
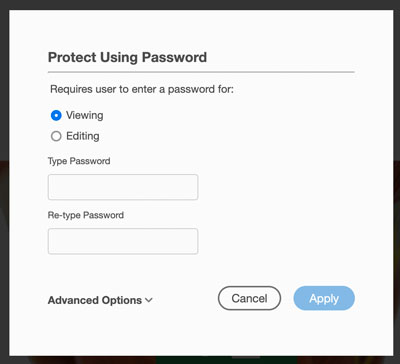
Click Protect Using Password, and choose if the password is required for viewing or editing.
Password Protecting Photoshop Files
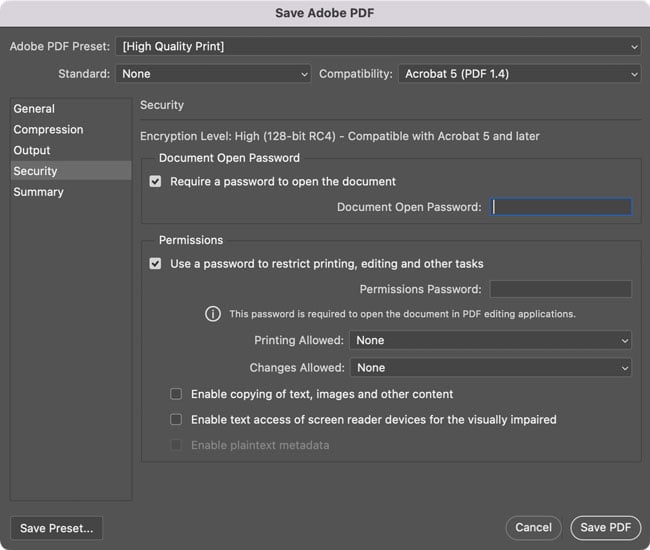
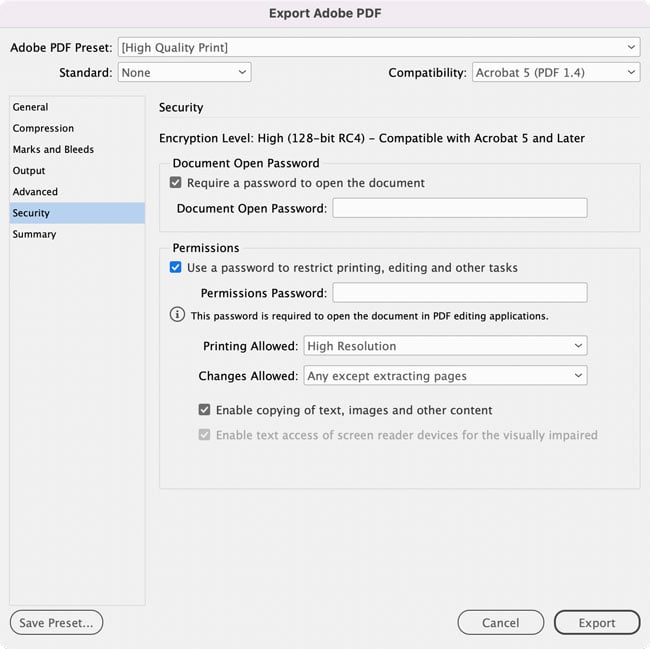
Photoshop doesn’t offer the ability to encrypt PSD files with passwords. As an alternative, you can save an image as a Photoshop PDF.
Choose File > Save As. In the dialog box, choose Format: Photoshop PDF. In the Security options, you can require a password for opening, editing, printing, and so on.
Password Protecting Illustrator Files
By now you can see where this is going, right? You can rely on the PDF file format to require a password to open, edit, or print an Illustrator document.
In Illustrator, choose File > Save As. In the dialog box, choose Format: Adobe PDF. The Security options are very similar to Photoshop’s.
Password Protecting InDesign Files
Unlike Photoshop and Illustrator, you can’t do a Save As in InDesign to save a PDF and preserve native editing capabilities for the file. You can, of course, export an encrypted PDF of an InDesign layout if that’s all that’s required.
But to actually encrypt an InDesign file, you need to use one of the methods below, listed for Windows and Mac.
Protecting Word Files
Word offers easy access to encryption features, but the method differs on Windows and Mac.
On Word for Windows, choose File > Info > Protect Document > Encrypt with Password.
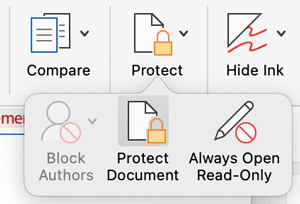
On Word for Mac choose Review > Protect > Protect Document.
Protecting PowerPoint Files
Like Word, PowerPoint makes it easy to encrypt files, with slightly different methods on Mac and Windows.
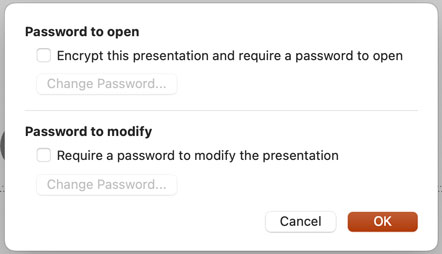
On PowerPoint for Mac, choose File > Passwords.
On PowerPoint for Windows, choose File > Info > Protect Document > Encrypt with Password.
Password Protecting Files on Windows
If you’re looking to password protect individual files or folders, check out utilities like WinZip ($35) or 7-Zip (open source, free).
Password Protecting Files on a Mac
The Mac Finder has no built-in feature for encrypting files with passwords. But, there are various third-party utilities you can employ, including iZip (free for creating archives, $35 for the ability to encrypt them). The aforementioned WinZip also comes in a Mac version.
You can also do the job very quickly in Terminal.
Put the file on your Desktop. Then, enter this line of code, where you replace xxxxx with the name you want your encrypted archive to have, and yyyyy with the current name of the file.
zip -ej ~/Desktop/xxxxx.zip ~/Desktop/yyyyy
Press Return and you’ll be prompted to enter a password. Note: Terminal display won’t react when you’re typing the password, but it is watching. Press Return and re-enter the same password to confirm it. Press Return one more time and you’re done.
There are AppleScripts and Automator workflows as well.
Another alternative is to use Disk Utility to create a disk image instead of a ZIP package.
Using Disk Utility
Encrypting content with the Disk Utility app is very easy, but there’s a little quirk in the process when it comes time to retrieve your file.
Start by putting the file(s) you want to ZIP into a folder.
Open the Disk Utility app. You can find it in the Utilities folder within the main Applications folder.
In Disk Utility, choose File > New Image > Image from Folder (or press Command+Shift+N).
Select the folder you want to ZIP and click Choose.
Unless your files include nuclear codes, 128-bit encryption will do. Choose that and enter/confirm a password.
Click Choose and you’re done.
To access the folder again, double-click it and enter your password.
Note: Since you used Disk Utility, the Finder will show the unzipped folder as a mounted volume. Move the enclosed file(s) to another folder on your computer and then eject the pseudo-volume.
Editor’s note: Hat tip to Alan Gilbertson for advice on the encryption options for Windows users.
This article was last modified on February 12, 2024
This article was first published on February 12, 2024
Commenting is easier and faster when you're logged in!

Recommended for you

Scanning Around With Gene: My Father Was a Plagiarist
Regular readers know I’m a sucker for old art technique books, especially...

How to Choose the Right Image File Format for Print
Excerpted from Real World Print Production with Adobe Creative Cloud b...

Work That Text: The Power Behind Typographic Collages
Direct Impact The principal reason for the presence of copy in a piece of design...