
How to Create Columns in InDesign
Learn the basics of building multi-column layouts to keep your writing automatically organized and readable


This article appears in Issue 34 of CreativePro Magazine.
Want to create text columns to keep your writing organized in InDesign? Here’s an easy and quick way to set up as many columns as you need in a document.
Create a Text Frame
The first step to creating columns is to create a text frame. Text frames are the main vessel for text in InDesign.
- Select the Type tool in the toolbar, then click and drag to make a text frame of your desired size. Note: You can also click with the Type tool to create a new text frame of precise dimensions.
- You can adjust the size of your new frame by taking the Selection tool (black arrow) and dragging any of the corners of the text frame. If you hold Shift while doing so, you’ll preserve the ratio you’ve established. If you want to set the size numerically use the Width and Height controls in the Control panel or Properties panel.
Edit Text Frame Options to Add Columns
By default, a text frame will have only one column. To divide the width of the frame into multiple columns, you can edit the text frame’s properties.
Make sure your newly created text frame is selected with the Selection tool.
Open the Text Frame Options dialog box by doing one of the following:
- Choose Object > Text Frame Options
- Press Command/Ctrl+B –>
- Hold Option/Alt and double-click the text frame

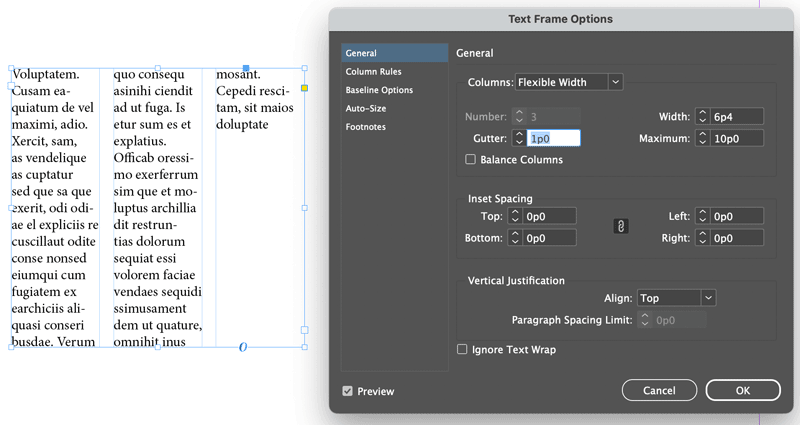
In the General area of the Text Frame Options dialog box, Adjust the Number setting to reflect the number of columns you’d like. Here, I’m setting up my text frame with two columns—you’ll notice that the Width property will change automatically depending on the value you enter into the Number field.

In the Columns setting, there are three options that determine what happens when the width of a text frame changes: Fixed Number, Fixed Width, and Flexible Width.
Fixed Number is the default. The number of columns stays the same when the text frame is resized, and the columns expand or shrink in width.


As the name implies, the Fixed Width column setting keep the column widths the same. If you increase the overall width of the text frame, new columns will be spawned. If you decrease the width, columns will be removed.

With the Flexible Width setting, you enter the Maximum Width you want. Then, when you resize the text frame, columns will expand up to the maximum. Once you go past that, new columns will be added.

Click OK to finish setting up your columns. Now, when you edit text in your text frame, it’ll automatically flow between columns.

Note: If you want the text to be evenly distributed among all the columns you can turn on turn on Balance Columns in the Text Frame Options dialog box.
Bonus tip: Want to quickly change the number of columns in a selected text frame without opening any dialog boxes? Use the controls in the Properties panel or Control panel.

Much More About Working with Columns in InDesign
Now that you know the first steps, you can explore much more about working with columns here at CreativePro:
Add or Remove Columns Automatically As You Edit a Story
How to Create Unequal Columns in InDesign
Balancing Text Columns in InDesign
How to Align Multiple Columns to the Baseline Grid in InDesign
Commenting is easier and faster when you're logged in!

Recommended for you

Scanning Around With Gene: The End of a Personal Journey
Next week marks the tenth anniversary of my column here at CreativePro, and I’ve...

InDesign How-to Video: Set Up a Book Cover
In this week’s InDesignSecrets video, Laurie Ruhlin demonstrates how easy it is...

Scanning Around With Gene: Oodles and Oodles of White-House Poodles
I’m ecstatic on a number of levels about the First Family Elect, not the least o...