Fixing TOC Levels That Refuse to Behave
Learn how text frame options affect the order of items in an InDesign table of contents

This article appears in Issue 28 of CreativePro Magazine.
Faithful fan Tao J. emailed us this plea:
I am currently working on a catalogue and is getting to the last stage now, I am trying to create the Table of contents. But, I’ve already spent 2 nights on this, and I just couldn’t figure out why the level 1 entry sits under the level 2 entry. If you could have a look and figure out what’s wrong, that would be awesome!!!!
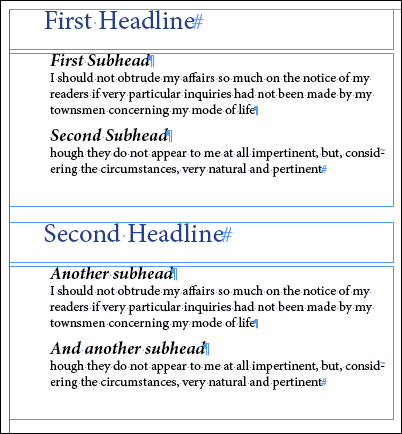
I didn’t really understand the problem until I opened up the InDesign sample page he sent along and took a look. First, here’s what a few of his paragraphs looked like (I’ve re-created it with placeholders to protect the innocent):
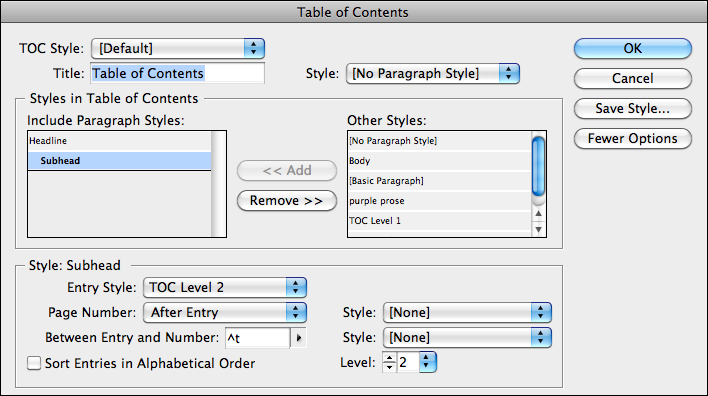
The headlines sit in their own frames, which is a little unusual, but he did that to create a special effect with headline text frames that I didn’t bother to recreate here. The left margins of the subheads and body text are indented a little more than the Headlines, typical. The left edges of the frames are all in alignment. The TOC settings (Layout > Table of Contents) looked fine, no surprises. Headlines were set to be Level 1 and Subheads were set to be Level 2:
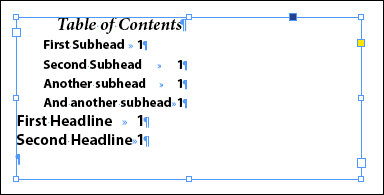
But look at the crazy TOC that InDesign created from it!
After a bit of fiddling I found the culprit: Left Insets. Remember that since the styles Tao specified to be included in the TOC were in different text frames, InDesign had to use its computer logic to concatenate them into one story for the TOC. That means it used the usual Left
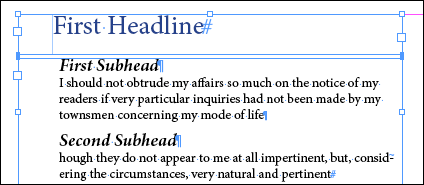
to Right, Top to Bottom order of the text frames, page by page. But why was it thinking that the frames containing the Subheads came before the frames containing the Headlines? Because Tao applied a Left Inset to the frames containing the headlines (via Object > Text Frame Options), instead of specifying a Left Indent for the headline paragraphs, as he had done for the Subhead and Body paragraph styles. Here are the first two frames selected. You can see a faint blue vertical line in the Headline frame, indicating the inset, but none in the Subhead frame:
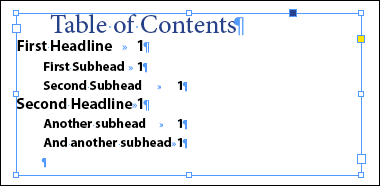
Most people, including myself, would have thought, “well six of one, half dozen of the other” –who cares how you got the text indented, as long as they looked right in Preview and in print, right? But apparently, when you set a Left Inset for a text frame, InDesign considers that to be the new left side of the frame itself, at least when it goes into its Left to Right, Top to Bottom routine. Thus it “found” the Subhead paragraphs first, and then the Headline paragraphs, and that’s how it created the wonky TOC above that kept poor Tao up two nights in a row. The fix was to remove the left inset in the Headline frames, and apply a Left Indent to the paragraphs instead. Or, he could leave the insets in the headline frames, and move all the subhead/body frames over to the right so their left sides were to the right of the Headline frame insets. (But then he’d have to edit their styles to remove the left indents.) I went with option number one and then updated the TOC (Layout > Update Table of Contents), and there you go:
Interesting, right? Something to keep in mind should you ever choose to (or need to) force an indent with a frame inset. It can have unforeseen consequences!
Commenting is easier and faster when you're logged in!
Recommended for you

Find All Headings Based on a Pattern
Here's a short and easy GREP pattern you can use to find one-line paragraphs

Tab Leaders (Part 1): Separating Columns of Text with Dots
Way back in Podcast 25 listeners asked questions about underlining text and crea...

Assigning Default Text Formatting
FS wrote: I always use the import options dialog box to remove all formatting fr...


