

If you’re not experienced with 3D software, you’ve probably had to pass on the idea of making some great-looking 3D text or a custom 3D graphic or logo to use in a project.
Adobe Dimension is quick, nimble, and easy to use for creating and rendering a 3D scene, but it only works with ready-made objects; it has no tools to create new 3D models from scratch. (For an overview of Dimension, see Mike Rankin’s excellent intro article. If you’re a Lynda.com subscriber, Mike has also made an introductory video title on Lynda.com and LinkedIn Learning that is well worth binge watching.)
While Photoshop can create 3D models, its 3D features can be intimidating, and no-one has ever called them “quick” or “nimble.” There are plenty of Photoshop users whose eyes glaze over trying to figure out what’s what with 3D. If you’re one of them, take heart! In this introductory article, we’ll use Photoshop only to create the bare-bones model, then export it for Dimension to create the final artwork for use in a layout.
Creating 3D Text
I’m using a Photoshop 8×10 preset document size, but it could be whatever size works for your project.
Step 1:
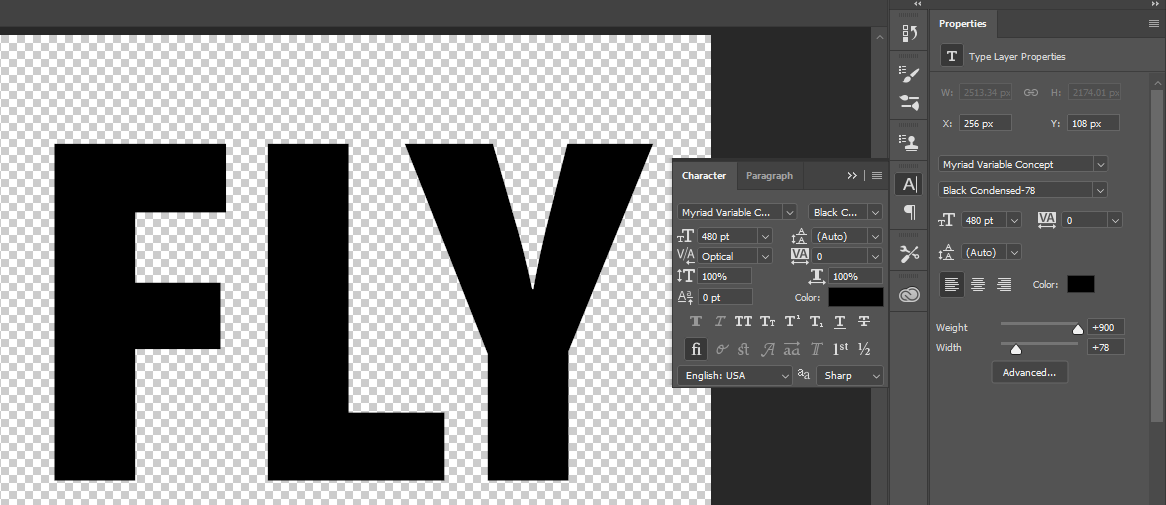
Create your text layer. This one uses Myriad Variable Concept with Weight set to 900 and width at 78.
Step 2:
Delete the background layer if you prefer, because we won’t use it for anything.
From the top menu, choose 3D > New 3D Extrusion from Selected Layer. If the 3D workspace isn’t already active, Photoshop will offer to switch to it. (Say OK. It’ll make things easier.) The immediate result is drab-looking grey with a huge extrusion. The color is irrelevant because we’re going to do our finish work in Dimension, but unless you want to use the text for the opening title of a biblical epic, you’ll probably want to reduce the extrusion depth.
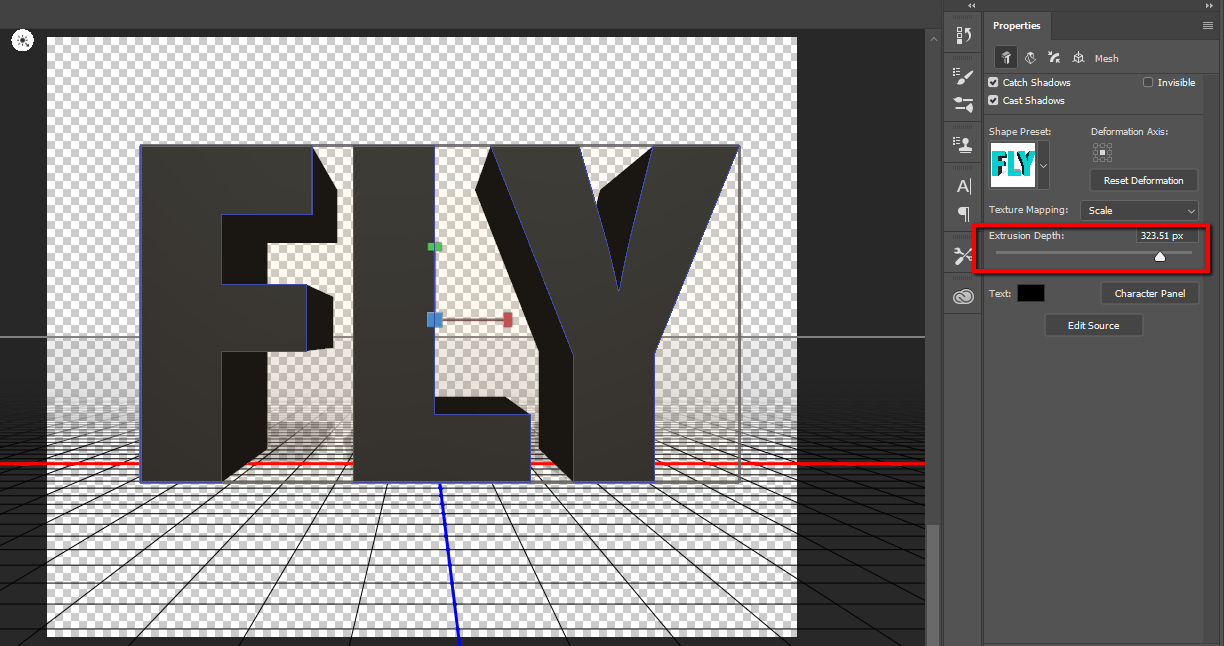
Fortunately, the Properties panel already exposes that setting, so change the value to something more suitable. The value will be different depending on the size of your document and the size of the text. I chose 75 pixels for this example.
Step 2a (Optional):
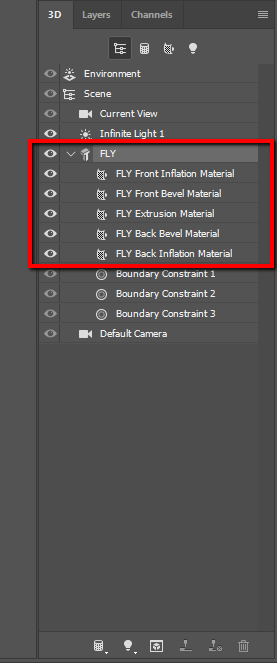
Photoshop creates several different surfaces when it generates a 3D extrusion, each of which can have its own material applied and (in the case of the front and back bevels) a custom size. You will see them listed in the 3D panel, which is now visible in a panel group with the Layers panel.
Click to expand
Click to expand
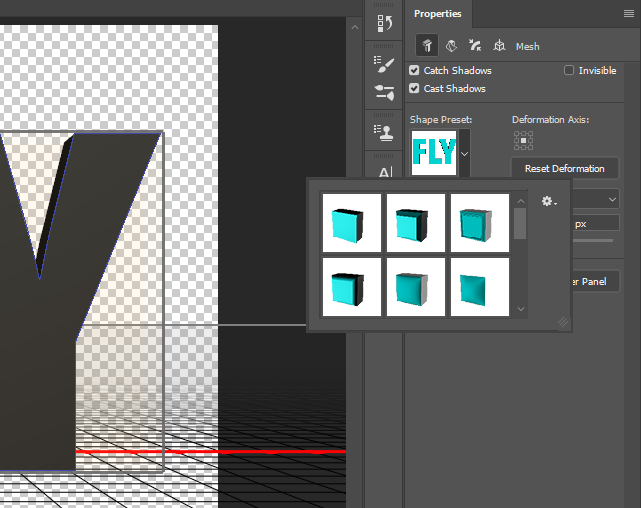
The Properties panel offers a group of simple presets, including the straightforward extrusion we have now. Try clicking on each one to see what results. For now, I’m going to choose the bottom middle setting: Inflate.
Step 3: Export
From the menu, choose 3D > Export 3D Layer.

In the 3D File Format dropdown, the last entry is the format that Dimension recognizes: Wavefront|OBJ.

There are no export options, so save the file in your project folder with an appropriate filename. That’s all we’ll do in Photoshop, so you can save and close the file.
Step 4: Create a new document in Dimension
Switch to Dimension and open a new document (File > New, or Cmd/Ctl-N).
The default of 1024 × 768 pixels at 72 ppi is a little too 1990s for most purposes, even on the web, so we’ll want to make it larger. 11× 8.5 inches at 150 ppi is a good compromise between the resolution we’ll need for print and the time it will take to render the final 3D image.

Dimension currently (v2.1 at this writing) only shows pixel dimensions on the canvas itself, but the Canvas Size W and H input fields can be pixels, inches or centimeters. Dimension calculates the pixels based on the value in the Resolution field.
Change the Resolution field to 150 from its default of 72, then change the Units field to “Inches” and enter 11 and 8.5 under “Canvas Size.” The sequence matters! If you set the canvas size in inches first, then change the resolution, Dimension will change the W and H values to match the new resolution, keeping the pixel dimensions the same.
When you exit the Height field, the “8.5” you just typed changes to “9.” Don’t freak out! Dimension doesn’t show fractional values, so what you see is rounded to the nearest whole number. The real value is still there, though. This is true throughout the application. I hope they fix this in a later version, because it can be confusing.
Here’s what you should see:

Step 6: Import your model
On the File menu, choose Import > 3D Model. Navigate to where you saved the .obj file from Photoshop and click Open. It’s a peculiarity of objects exported from Photoshop in this way that when you import them into Dimension you will see this:
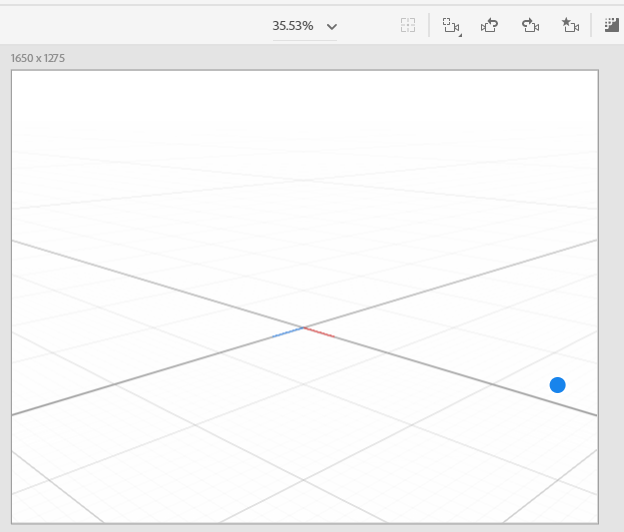
The pale blue dot (no, not that pale blue dot) is Dimension’s way of telling you that there is a model selected, but it’s off the canvas where you can’t see it. The fix is easy. From the menu, choose Camera > Frame Selection, or use the keyboard shortcut F.

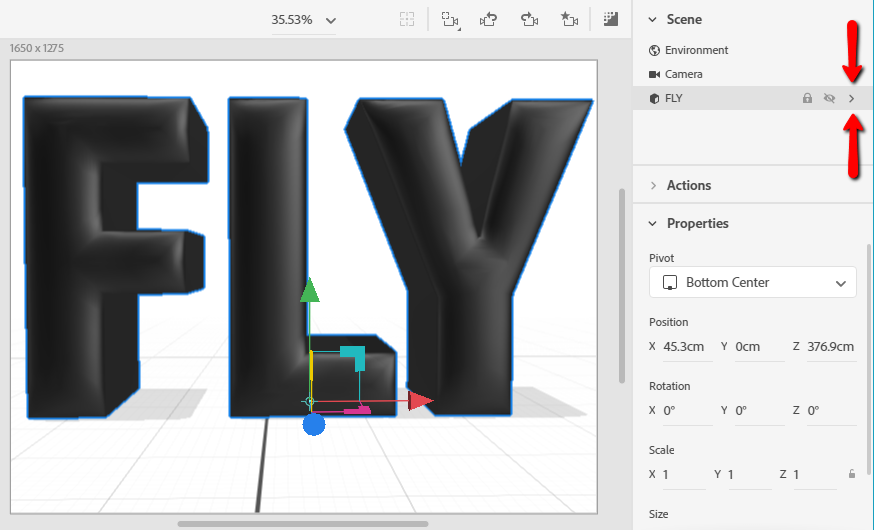
The 3D text jumps to the middle of the canvas, but you may not like the angle.

Hold down the right mouse button, which temporarily activates the Camera Orbit widget, and drag to the right until the text is square on. Click and drag (left mouse button) the red arrow until the text is centered on the canvas. You should get something like this:

Step 7: Apply materials
In the Scene panel, the model appears right under “Camera.” In my example, it’s called “FLY” because that was the 3D layer name in Photoshop. Hover the mouse over that line in the Scene panel and click the subtle dropdown arrow that magically appears.
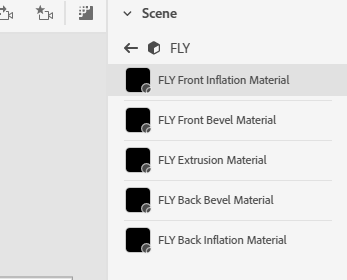
You see a list of the “materials” that Photoshop generated when you created the original 3D layer. Dimension lists these in reverse alphabetical order, for unknown reasons, so the Front Inflation Material is at the top of the list and is already selected.
In the Starter Assets panel to the left of the canvas, click the second icon in the “Filter By” set. This displays Dimension’s default set of materials.

Click to expand
Because the Front Inflation Material is already selected (note the blue outline), clicking on a material thumbnail will apply that material to the front of the text. I chose Damaged Gold. Notice that the name of the front surface material in the Properties panel is now “Damaged Gold” and it’s moved to the bottom of the list (the reverse alpha order thing).
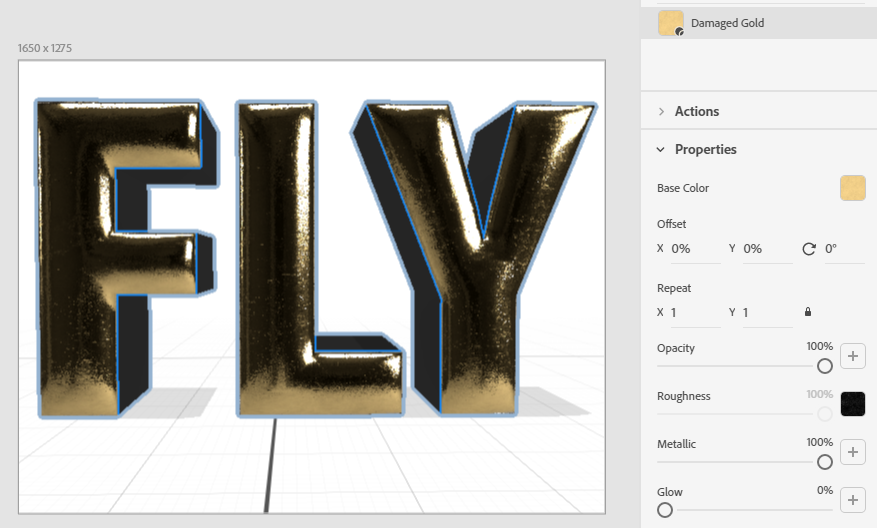
Although “Front Bevel Material” appears in the list, we didn’t actually create a front bevel in Photoshop, so nothing will happen if we add a material to it. Skip that, and click on “Extrusion Material,” which is the surface between front and back. The blue outline in the model indicates that this part of the model is now selected. We can apply any material we want, but let’s choose Frosted Glass because why not?
Select “Back Inflation Material” in the same way and apply Gold. Your text should look something like this:

Step 8: Lights
In the “Filter By” row of the Starter Assets panel, click the third icon: Lights.

Click on the different lights until you find one that you like the look of. I chose “Sunrise Campsite” just for fun.
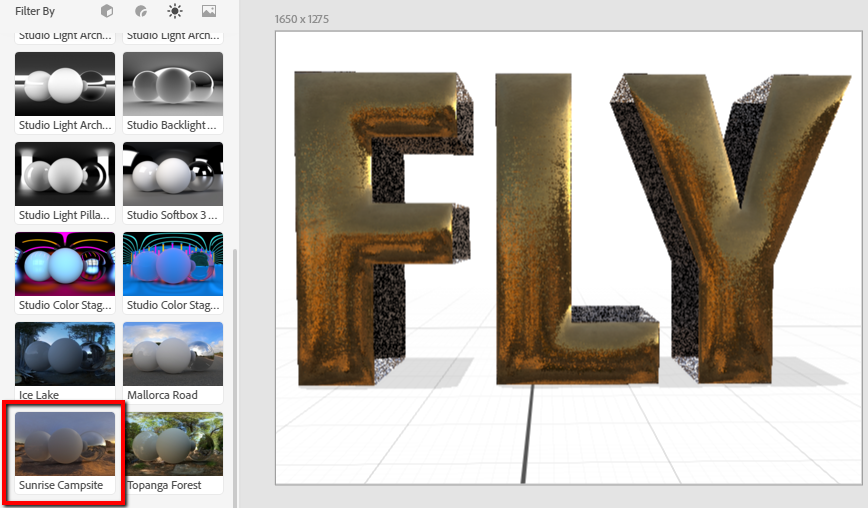
In the Properties panel, play with the Intensity and Rotation sliders until you get the effect you want.

Step 9: Render!
Now it’s time to see the result of your efforts and create a PSD or PNG to use in other compositions. Dimension currently has no option to make the background transparent in a rendered PNG, so PSD is your best choice for an element like this that will be a component of a full layout.
Before doing anything else, save the file and give it a name so we don’t end up with “Untitled.psd” as the output!
Up to now, we’ve been in Dimension’s “Design” space. Click on “Render” to open the render window.

Leave the “Quality” setting at “Low (Fast)” for now. It may be plenty good enough for your needs, so why use extra time and power if you don’t have to? Choose whether you want PSD or PNG or both, and change the “Save to” path to something useful.

Now, click the friendly blue Render button, and watch while Dimension works its ray-tracing magic.
Here’s the final output from that low quality render, which took just under four minutes:

And here’s how it can be applied over an arbitrary background.

In Part 2, I’ll go into some of the complexities you can run into when you want to create 3D models from vector shapes, and how to get around them.
Meanwhile, play around with Dimension. Even at this early stage in its development, it’s a useful addition to your Creative Cloud toolbox. Although its main purpose is to be a tool for designers to create photorealistic compositions for client presentations or advertising, its simplicity makes it useful for other parts of a creative workflow.
This article was last modified on March 10, 2019
This article was first published on March 10, 2019
Commenting is easier and faster when you're logged in!

Recommended for you

Secrets of the Esc Key
If you’ll pardon the pun, the Esc key might escape the notice of many Adob...

A Film Technique for Your Digital Photography
Before Picture Elements (“pixels” for short) were a gleam in some IB...

How to Create a Burnt Paper Effect in Photoshop
Creating a burnt paper effect in Photoshop is much easier than you might think....