

Photoshop’s Layer Modes provide several ways of enabling you to see through the current layer to the layers beneath. But, as we’ll see, simply choosing one of these modes isn’t always enough. Instead, we can use the Blend If controls to selectively hide a layer based on its luminosity—often, with spectacular results.
Step 1: The starting images

This photograph of fireworks has been placed on top of an image of London’s Houses of Parliament. I want to be able to remove all the black from the fireworks explosion, so it appears on the daytime sky.
Step 2: Layer modes aren’t enough

The obvious way to approach this might be to change the Layer Mode from Normal to Screen – and yes, this does remove all the black. But what’s left looks very washed out. This method won’t work here; so change the mode back to Normal and we’ll try something else.
Step 3: Open the Layer Style dialog

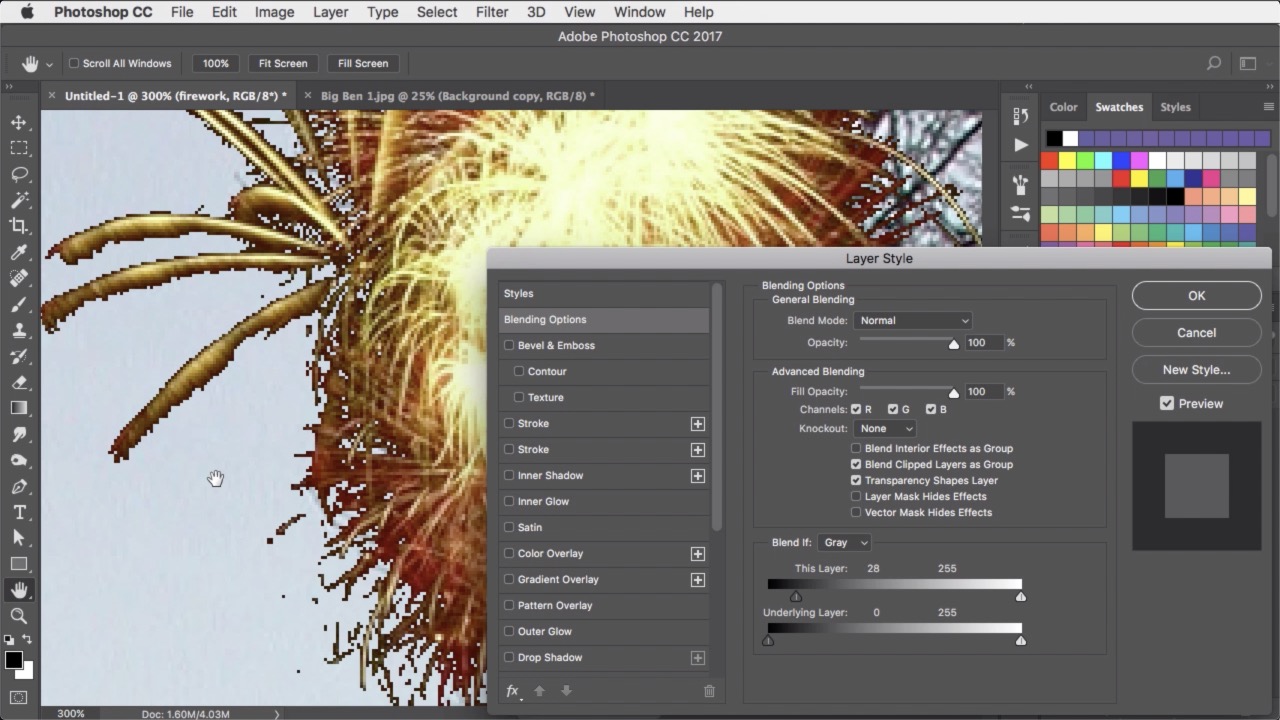
Double-click the firework layer’s thumbnail in the Layers panel to open the Layer Style dialog. We’re going to be looking at the Blend If section, right at the bottom.
Step 4: Drag the slider

If you grab the left-hand slider beneath the This Layer section and drag it to the right, you’ll hide everything on the current layer that’s darker than the value to which you drag it—in this case, a gray value of 25. Just like that, all the black disappears, without losing the strength of the firework.
Step 5: A closer look
When you zoom in, though, you can see that this produces a sharp cutoff. There’s an ugly bitmap stepping between the visible and the hidden parts of the firework.
Step 6: Split the slider

If you hold Option (Mac) / Alt (Windows), you can split the slider into two, and drag each half independently. Here, everything darker than the value of 22 is hidden, and everything brighter than the value of 72 is fully visible. The image fades smoothly into view between these two values, producing a much more appealing result.
Step 7: The underlying layer
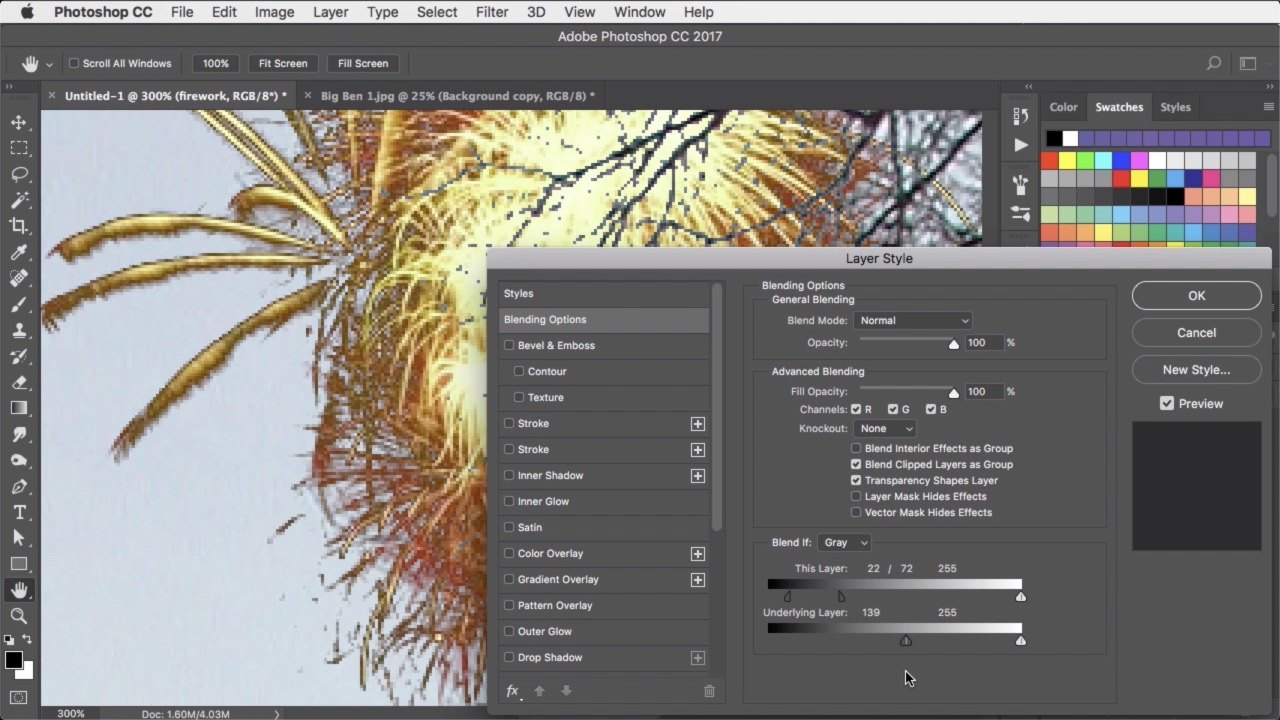
You can also control the visibility of the current layer depending on the luminosity of the layer beneath it. Here, dragging the left-hand Underlying Layer slider to the right hides the firework layer where the layer beneath is darker than, in this case, a value of 139.
Step 8: Soften the result
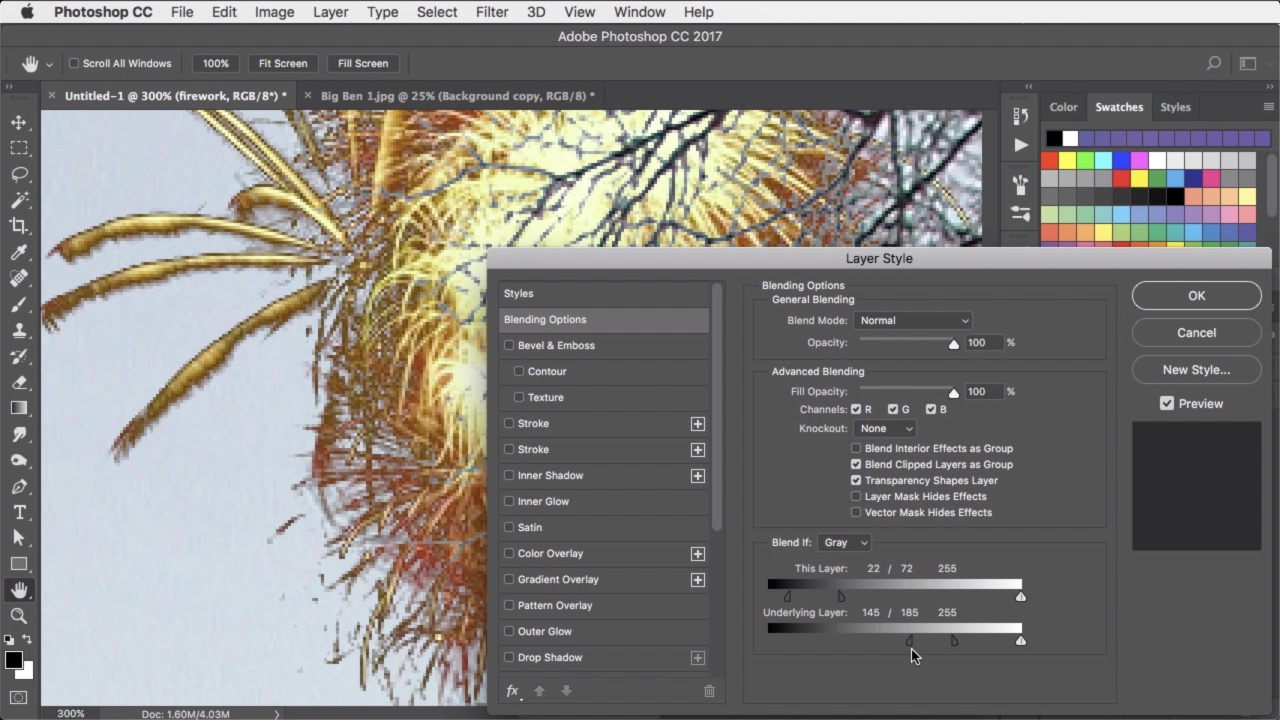
Once again, you can split the slider in two by holding Option/Alt as you drag it. So now, everything darker than 145 is hidden, everything brighter than 185 is visible, and the image smoothly fades between those two values.
Step 9: The blend result

Click OK to apply the blend effect, and you’ll see that not only is the firework full strength, it’s also neatly hidden behind the branches of the tree.
Step 10: It moves!
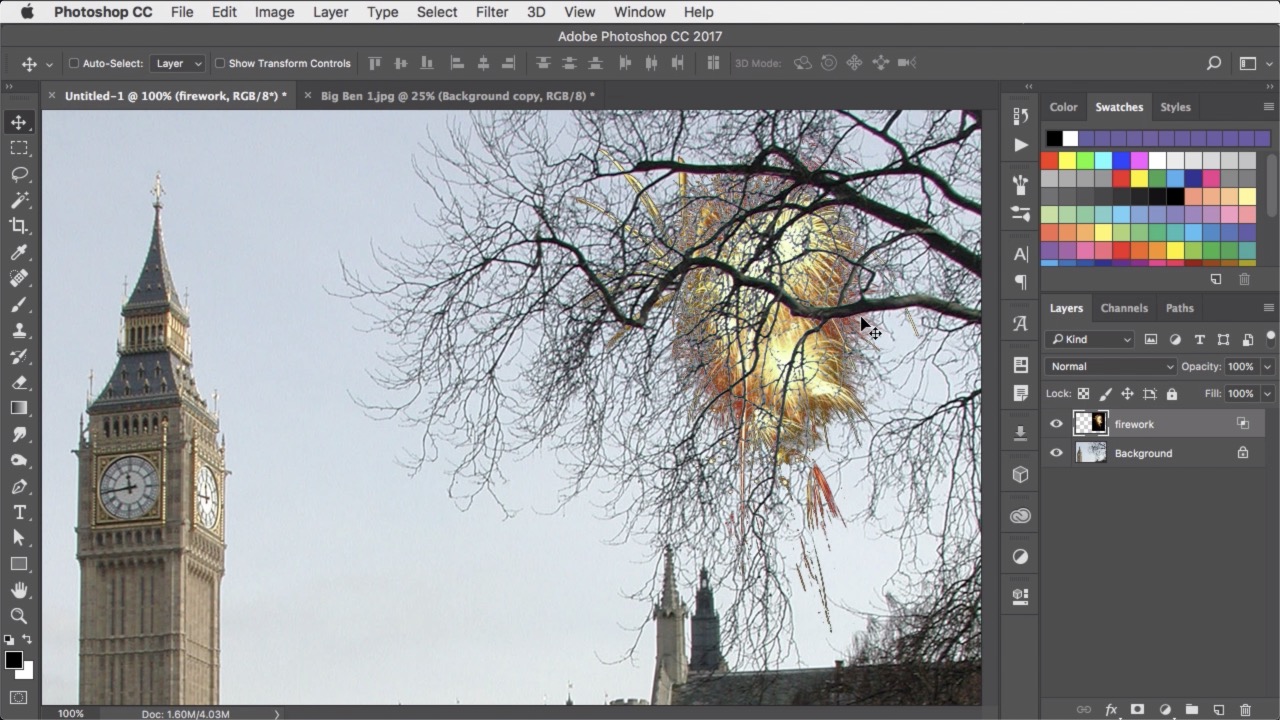
The huge advantage of this method is that the firework will be hidden, based on the brightness of the layer beneath, wherever you put it. So you can move it around at will, placing it wherever you like behind the tree. Note that nothing has been erased from the firework layer: you can always open the dialog again and adjust its settings, or remove the effect altogether.
This article was last modified on May 7, 2020
This article was first published on October 7, 2019
Commenting is easier and faster when you're logged in!

Recommended for you

CreativePro Video: Fill Images to Slides in PowerPoint
In this week’s CreativePro video, Nolan Haims demos how he fills an image to fit...

FourMatch, the lie detector for photos
Back in June, I wrote a story on a new company that was developing software for...

Free Webinar: Photoshop + AI—Smarter Tools, Better Results
Learn how to use Photoshop’s AI tools to speed up your editing process and...