
New 3D Tools for Designers
Adobe is making 3D easier for graphic designers, and you can do it, too!

This article appears in Issue 41 of CreativePro Magazine.
If your eyes have ever glazed over trying to decipher a 3D app or workflow, you’re not alone. For years, some dedicated people at Adobe have been working to make 3D accessible to “flatlanders” like us, but with mixed success. Photoshop had built-in 3D for a while, but it was hard to figure out, slow to work with, and the documentation wasn’t the best. Adobe Dimension was to be the designer’s friendly 3D tool, but within a couple of years Substance 3D came along, requiring a whole new subscription, and Dimension was retired from active development.
Things looked a little bleak for a while, but the Substance teams were at work behind the scenes: A brand-new 3D and Materials panel appeared in the 2022 release of Illustrator (version 26). Dimension got a new lease on life and near feature-parity with Substance 3D Stager, and Adobe MAX 2024 saw the release of Substance 3D Viewer beta along with a plug-in in the current Photoshop beta. Things, in short, are looking up! And, we have an assignment that pulls all the tools together.
Download Assets
The example files described in the article are available as a download here.
The Bola photographs are by Adobe Stock contributor Screaghin. They are numbers 271372905, 290971969, and 290972711.
Illustrator Does 3D
Our favorite indie pop star, Bola Granola, is planning a new tour to promote her album Cereal Killer, just re-released on the Special K label. Her management wants a 3D version of the Bola mark that can be used in advertising on the web, in print, and in After Effects for video shorts. The set designer wants to show management a concept of how
the stage will look with an illuminated version of the mark.
You can download the files and follow along. I’m going to assume that you did, and you are, and we’re getting along great!
Extrude text
The mark is in two groups, created by outlining the text (Figure 1). To give it some dimension, select both groups, open the 3D And Materials panel (Window > 3D and Materials), click the Extrude icon for 3D Type, and change the Depth setting to 10 px. Turn on Bevel, set Bevel Shape to Round, and turn on the Bevel Inside option (Figure 2).

Figure 1. Create Outlines produces a group from each word of the text.

Figure 2. Click the Extrude button, and change the Depth setting to 10 px.
Leave the other settings at the default, because we don’t need to change them when we export to a 3D model format. Keep everything selected.
Export the 3D model
Scroll all the way to the bottom of the panel, and click Export 3D Object (Figure 3). The Asset Export panel opens, containing two thumbnails with blue outlines: Asset 1 and Asset 2 (Figure 4).

Figure 3. At the bottom of the 3D and Materials panel, click the Export 3D Object button.
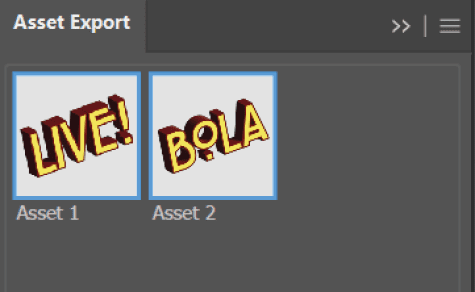
Figure 4. The Asset Export panel gives the groups generic names. Change them immediately!
Generic names like this are a recipe for chaos, so immediately rename the thumbnails to Live! and Bola. In the Export Settings section of the panel, you can specify the scale and file format of your exported files. By default, two files will be queued for export. Change the format option of the first to GLTF (Figure 5) and delete the others.
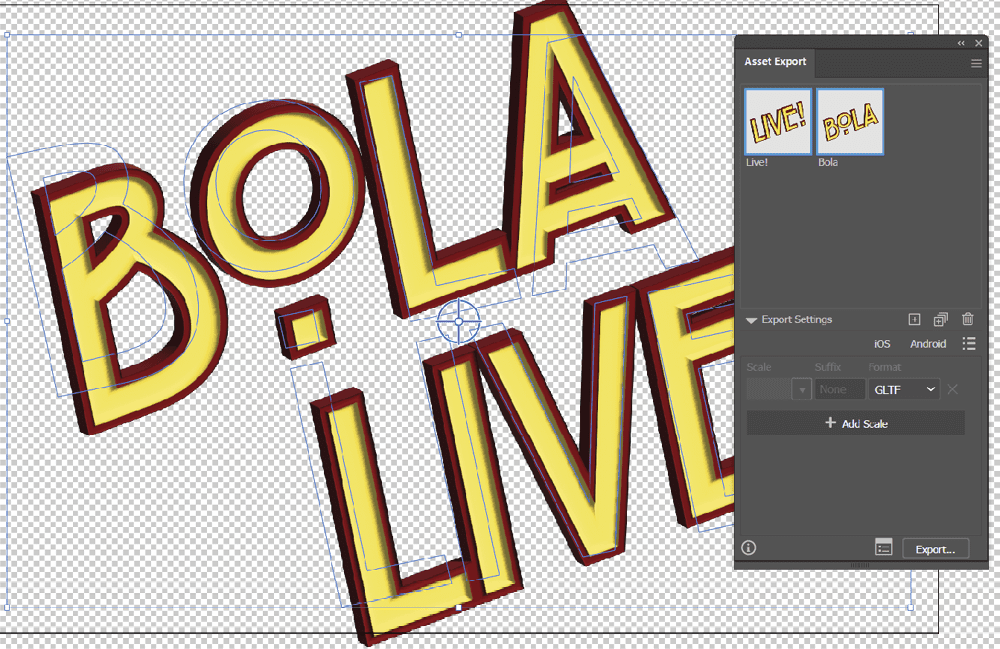
Figure 5. With the assets safely renamed, use only the GLTF option in Export Settings.
Click the Export button, and choose or create a folder for the models. (Note: Illustrator will probably create a subfolder called GLTF and save the assets there.)
Extrude objects
A backdrop for the stage set and a fun motif for the stage floor will show off other aspects of Illustrator 3D—and satisfy Bola’s set designer.
To make a circular backdrop (cyclorama) start with a simple arc (Figure 6) with a 1-point stroke. In the 3D and Materials panel, select Extrude for the 3D Type and set the Depth slider to 750 px (Figure 7).
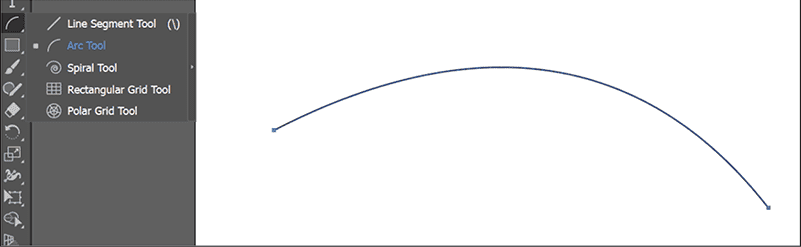
Figure 6. Start with a simple arc.
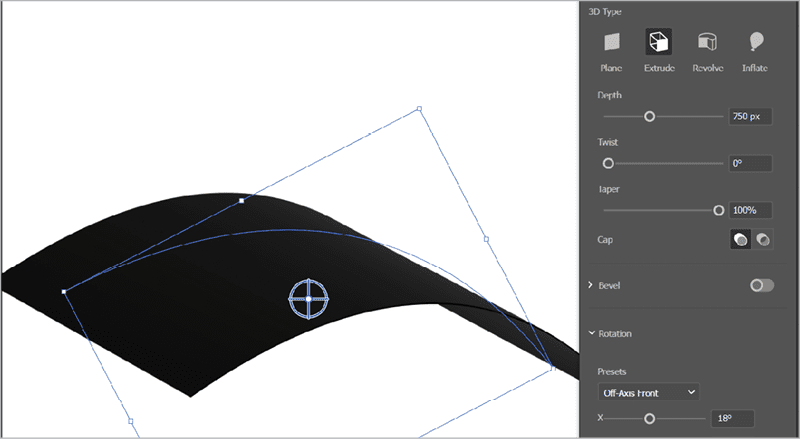
Figure 7. After setting the Extrude depth to 750 px, use the Rotate widget (crosshairs) to change the orientation.
In the center of the selection, do you notice the circle with what look like crosshairs? This is the Rotate widget. Use it to reposition the arc so it’s roughly vertical.
Add a material
For purposes of the demo, let’s apply a material: Click the Materials tab, and scroll through the choices under All Materials and Graphics. Click Gold Natural to apply it to the arc (Figure 8). The result looks a bit dull, so switch to the Lighting tab and change the Rotation setting to 12 degrees (Figure 9). At this point, feel free to experiment, because there’s a lot that you can do to customize the material and its look.

Figure 8. With the object still selected, click the Gold Natural material to apply it, as you would a swatch.
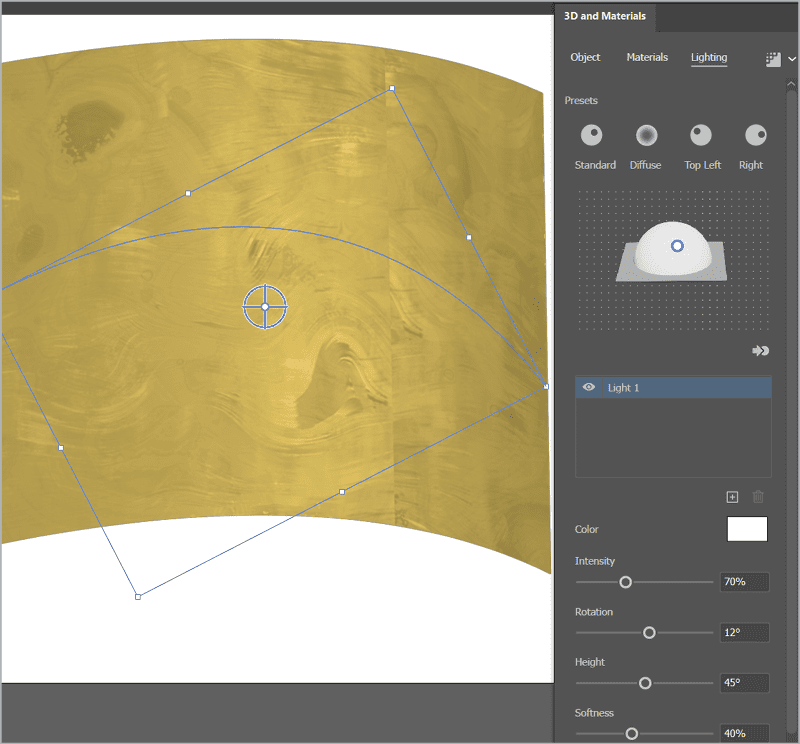
Figure 9. Changing the lighting makes all the difference!
When you’re satisfied, save the document as Cyclorama.ai, then use the Asset Export panel to export Cyclorama.gltf to the same folder as the brand marks.
A bowl of cereal
Bola’s record label, Special K, insists on making the stage into a bowl of cereal. (She really should sign with another label, but that’s another story.)
Start in Illustrator with a circle, extrude it in 3D and Materials to a depth of 100 px. This time, change the Taper value to 95%. Turn on Bevel, and change Bevel Shape to Round, Width to 25%, and Height to 20%. Turn on the Bevel Inside option. The panel should look as it does in Figure 10.
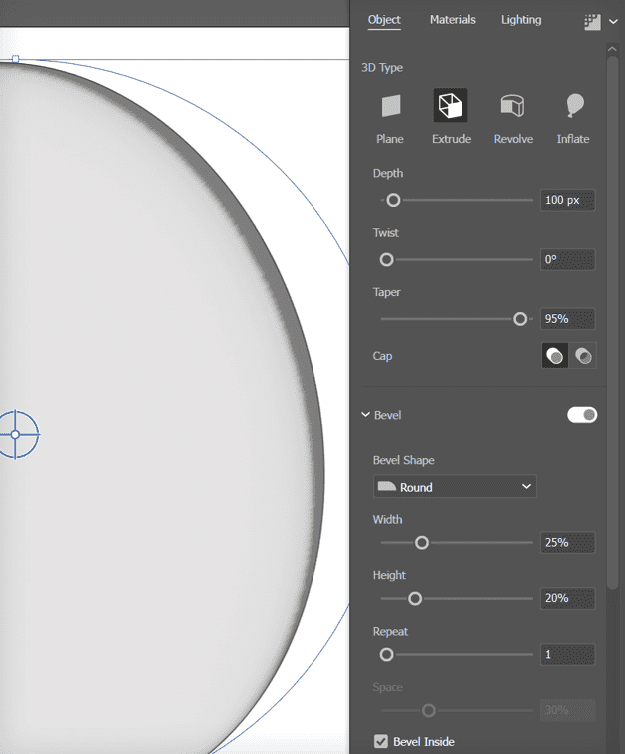
Figure 10. A circle extruded with a slight taper and an inside bevel makes a reasonable facsimile of a shallow bowl.
Click the Materials tab. If you have a Substance 3D subscription, click the Substance 3D Materials icon below the All Materials and Graphics thumbnails (Figure 11). When the Substance 3D Assets page opens, type corn loops in the search field and download the Corn Loops Cereals material (Figure 12). Alternatively, you can choose a material from the selection Illustrator provides or from the free Adobe Substance 3D Community Assets site.

Figure 11. The Substance 3D Assets icon (on the left) takes you to the Substance 3D Assets website. The other icon opens the Substance 3D Community Assets, all of which are free to use.

Figure 12. The Corn Loops Cereals thumbnail on the Substance 3D Assets site
Whatever you choose, add it to the Your Materials list in Illustrator using the + icon under All Materials and Graphics in the Materials tab. Figure 13 shows what the corn loops look like applied to our bowl. I changed two parameters in the Properties for this material, setting Resolution to 2048px and Repeat to 254 (Figure 14).

Figure 13. The downloaded and applied material appears in the Your Materials list.

Figure 14. Adjusted parameters for the Corn Loops material
Save the Illustrator file and export the GLTF to your 3D models folder as before.
We don’t have space to examine how all these parts go together in Stager or Dimension, but Figure 15 gives an idea of how they might look in a mockup.

Figure 15. What a rough design mockup for the stage might look like in Substance 3D Stager
Fine-Tune 3D in Photoshop
The 3D mark we created in Illustrator will look great in the online and print ads for the tour, but we can do more in Photoshop using the new Substance 3D Viewer and the current beta version of Photoshop.
Install Photoshop (Beta) from your Creative Cloud desktop app, then Substance 3D Viewer (Beta). You’ll find both on the Beta tab of the Apps section (Figure 16).
![Screenshot of Creative Cloud desktop app. Apps selected on left margin. Beta tab selected at top. Popular beta apps: [Ps icon] Photoshop (Beta) Ideate and create assets faster, and place 3D objects into your designs. (Open button). [Pr icon] Premiere Pro (Beta) Test features and fixes under development in the Beta builds. (Install button) [Ae icon] After Effects (Beta) Test features and fixes under development in the Beta builds. (Install button) [Sb icon] Substance 3D Viewer (Beta) Open, view, and create with 3D models (Open button).](https://creativepro.com/wp-content/uploads/2025/02/Figure-16_800-fs8.png)
Figure 16. This is where to find Creative Cloud beta apps to install.
The promotion campaign will feature an album cover photo, and we want to include some 3D elements. We’ll start with an Instagram 1080×1080-pixel crop of the photograph, then drag Bola.gltf into the composition. As you can see in Figure 17, it appears in the Layers panel as a Smart Object. The orientation isn’t quite right, so we’ll fix that first. Double-click its thumbnail in the Layers panel to open it in Substance 3D Viewer (Figure 18).
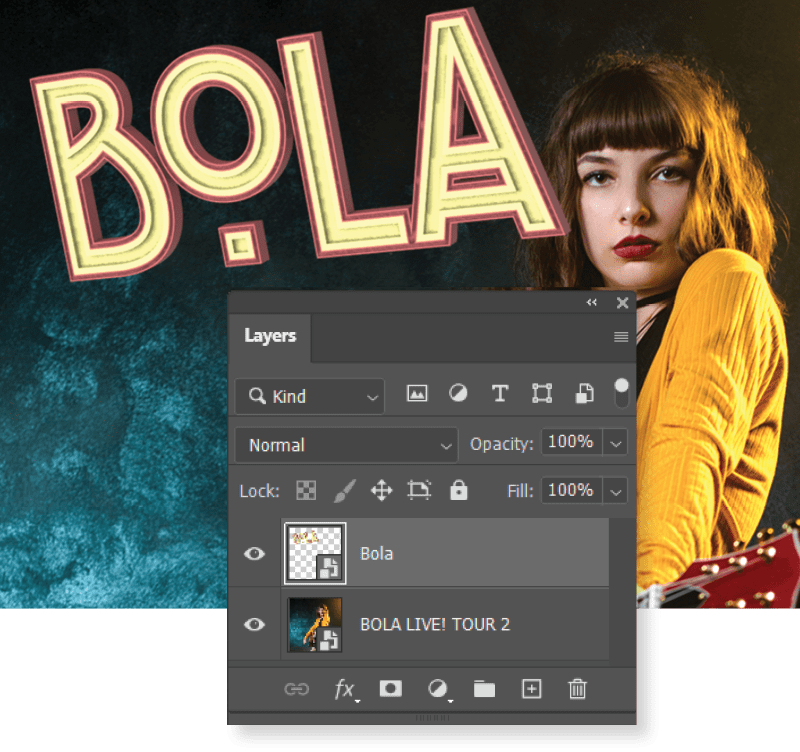
Figure 17. The 3D model (GLTF) exported from Illustrator comes into Photoshop as a Smart Object. Most 3D formats from other sources are also supported.
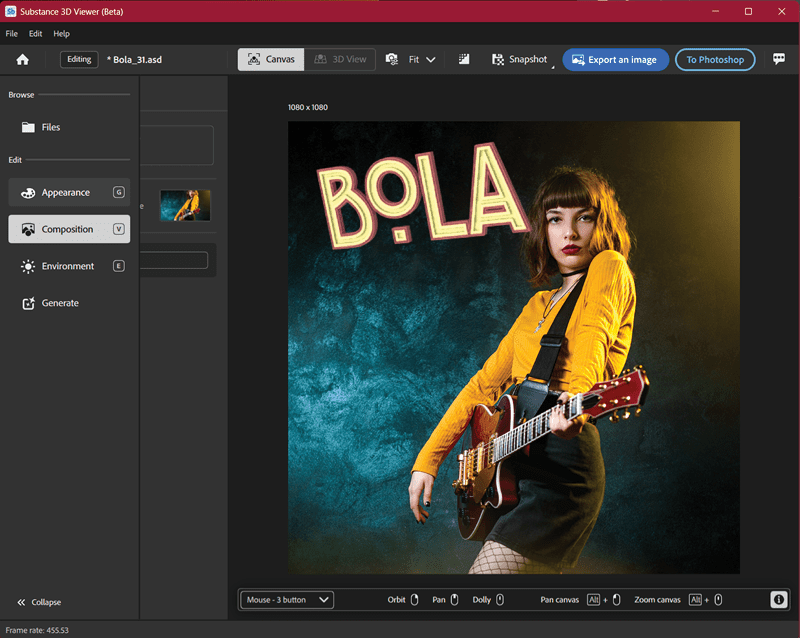
Figure 18. When Photoshop opens the 3D model in Substance 3D Viewer, it also sends the rest of the image so that you can see and adjust the model in context.
Viewing the model in context
Viewer shows the 3D model and the background image from Photoshop, so you can see the changes you make in the proper context. The Composition workspace is already active. (You can switch to it at any time with the keyboard shortcut V, like the Move tool in Photoshop.) Now you can left-click and drag to reposition; right-click and drag to change orientation (Figure 19).

Figure 19. Move the 3D model into position and orient it to match the image.
The shading doesn’t match the lighting of the photograph, so press E to switch to the Environment panel. Turn on Ray Tracing as shown in Figure 20 and make the other changes shown: Change the Light preset to Exterior.exr, Brightness to +1.10, Rotation to –74, Ground Plane off, and Denoiser on.
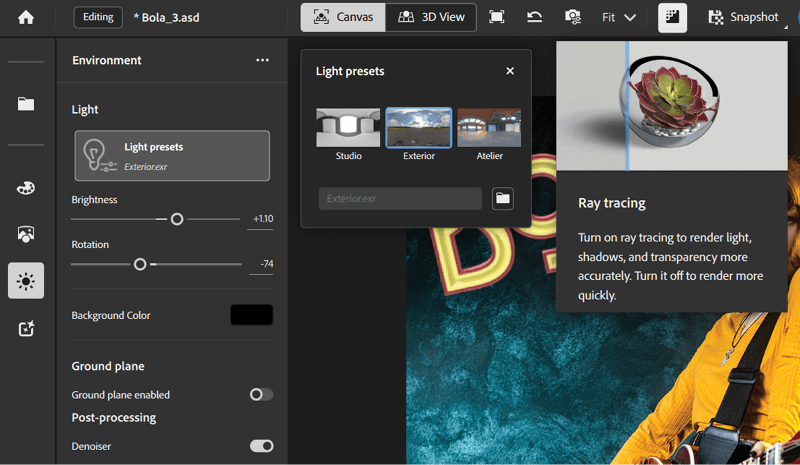
Figure 20. Turning on ray tracing (highlighted icon, top right of screen) is essential for an accurate view of light and shading. Adjust the light to match the image.
Now click the big To Photoshop button (Figure 21), and switch back to Photoshop. Substance 3D Viewer has updated the position and lighting in Photoshop.
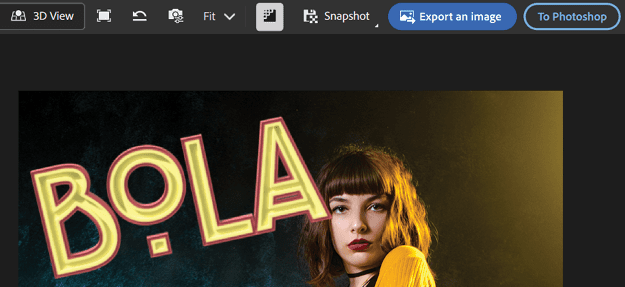
Figure 21. The To Photoshop button appears when the object in the viewer came originally from Photoshop. Click it to update the original Photoshop document.
Now it all makes Sensei!
Target the bottom layer (the photograph) in the Layers panel and choose Select > Subject from the main menu (Figure 22). Choose Select and Mask from the Control panel, change its Output To value to New Layer with Layer Mask, and click OK (Figure 23).
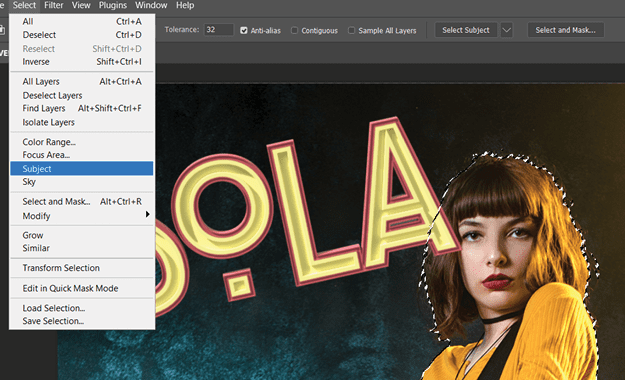
Figure 22. With the image layer targeted in the Layers panel, the Adobe Sensei–powered Select > Subject is the new, magical way to get a great selection.
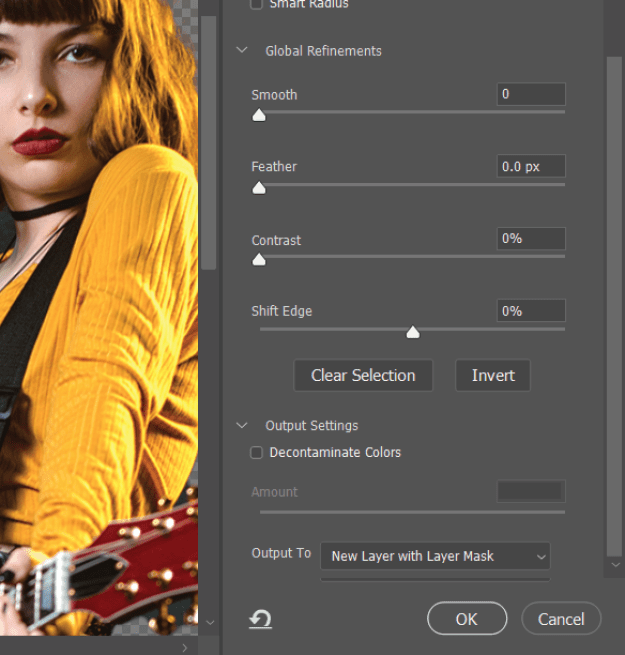
Figure 23. Use the Select and Mask workspace to copy the image to a new layer with layer mask.
The bottom layer is now invisible, so turn it back on by clicking the eyeball icon next to it in the Layers panel, then move the new masked layer to the top (Figure 24).
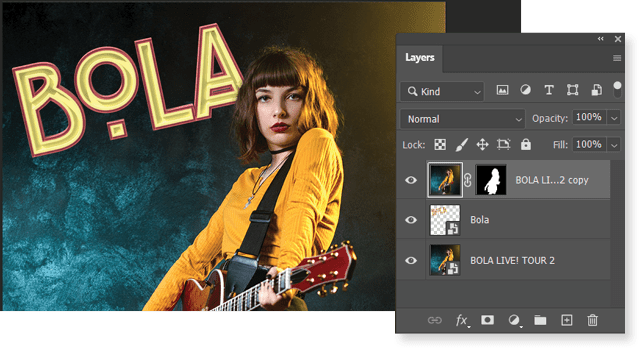
Figure 24. Move the copy layer to the top, creating the overlapped look.
Finish in InDesign
We can create all shapes and sizes of ads using this hero image in InDesign and export them to Adobe Express for social media (Figure 25) or the press (Figure 26).

Figure 26. The same asset in a print ad

Figure 25. A social media ad using the Photoshop asset
Finally! 3D We Can Really Use
Way back in 2016, Adobe promised 3D tools for designers. It’s been a journey, but they’re delivering on that promise. We can turn our Illustrator graphics into 3D models and easily incorporate 3D models into our Photoshop (beta) composites with the new Substance 3D Viewer and plug-in (which will only get better, and probably has by the time you read this). Welcome to the third dimension!
Commenting is easier and faster when you're logged in!

Recommended for you

Virtual Photography
Tools and techniques for creating photorealistic objects and scenes that never e...

Building a 3D Scene
When you want to recreate an iconic image with photorealism it’s time to round u...
Illustrator 2022 3D Features
Get to know these impressive new tools for turning flat artwork into workable 3D...