

It’s not unusual for designers to create packaging artwork, but visualizing that artwork on a 3D model still requires a high degree of skill. Adobe’s newest app, Dimension, goes some way towards solving that problem, but placing multiple artwork designs on a single model in Dimension can be an awkward process.
Mockup 3D is a new tool aimed at designers who want to produce a quick, attractive mockup in just a few minutes. It’s browser-based, but is a fully-fledged application in its own right, complete with a wide range of keyboard shortcuts.
Mockup 3D costs $30 for a single month’s access, or $25 a month if paid annually. You can still try it out without paying, but your placed designs will feature a checkerboard background until you pay the fee.
Step 1: Visit mockup3d.com
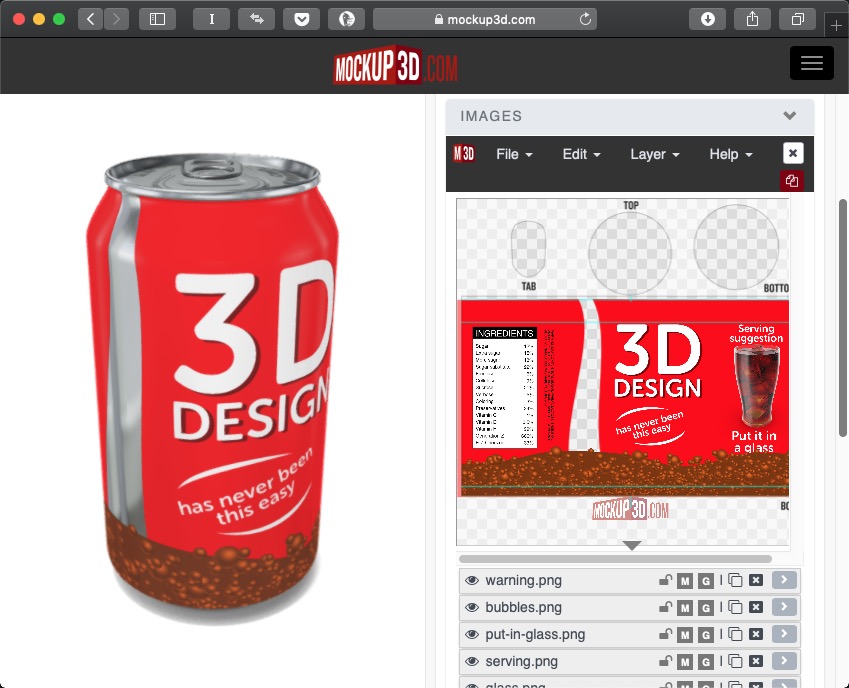
This is where it all starts. You’re presented with a range of models including cans, bottles, bags, boxes, cartons, caps and T-shirts. It’s a small selection at the moment, but it’s sure to expand in the future. For this example, I chose a soda can. To make the design process easier, you can download a template that will aid in assembling the artwork in Photoshop.
You can drag multiple pieces of artwork into the Images view, either in JPG format or PNG if you want transparency. Then it’s an easy process to move and scale each placed image, rotate them by grabbing the handle sticking out of the top, and move them up and down in the stacking order. Each change you make takes place in real time on the model, which you can spin around and view from any angle.
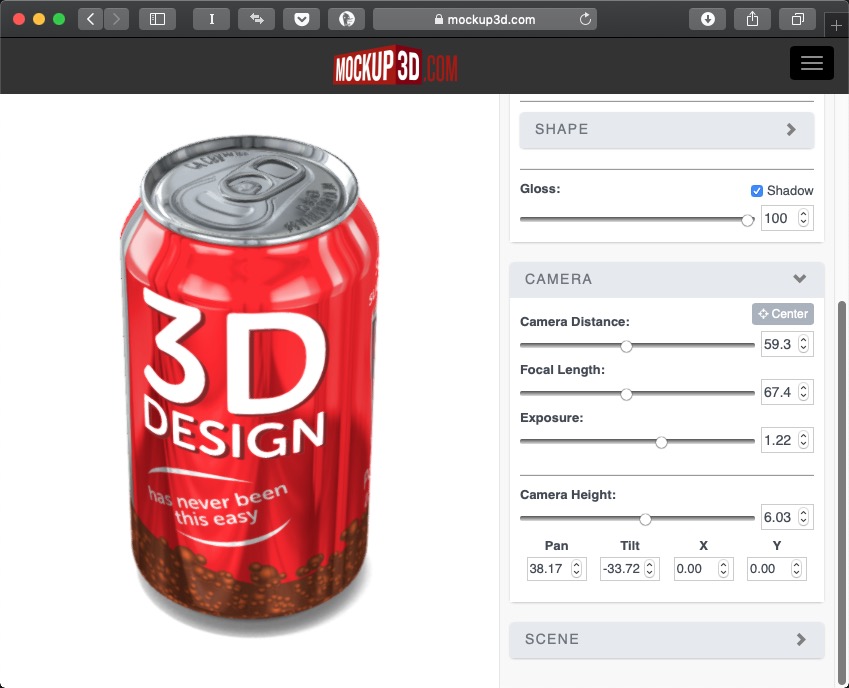
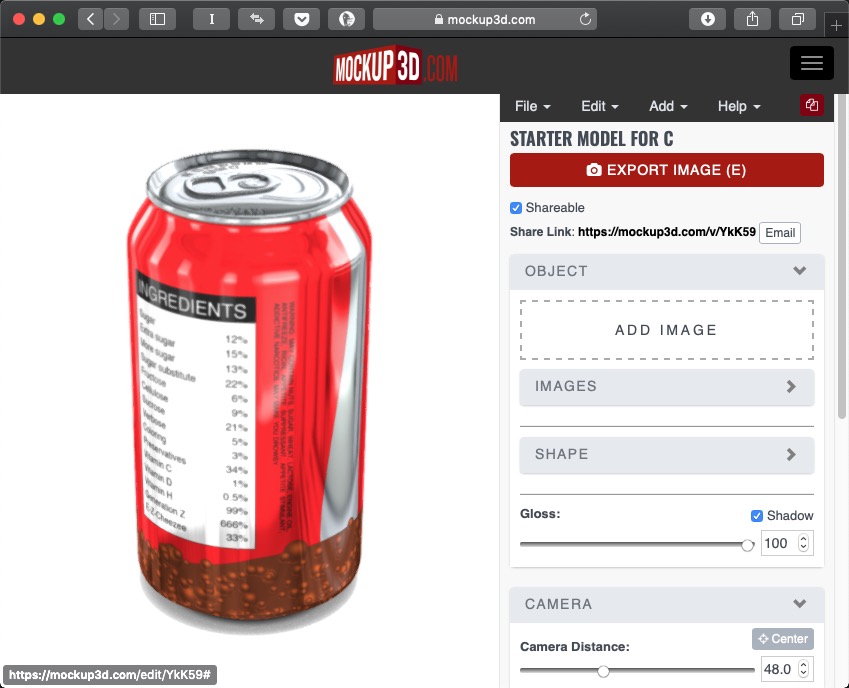
Step 2: Add some gloss
You can boost the glossiness of the model surface, and by default the placed artwork will take on that gloss as well. But click the arrow to the right of the name of each piece of placed artwork and you’ll be able to change its gloss – and its opacity – independently of the global setting.

Step 3: Set the camera
It’s easy to change the focal length of the camera, to change the perspective distortion of the image. You can change the viewpoint by dragging the model itself, or use the pan, tilt and X and Y controls for more precise numerical settings.
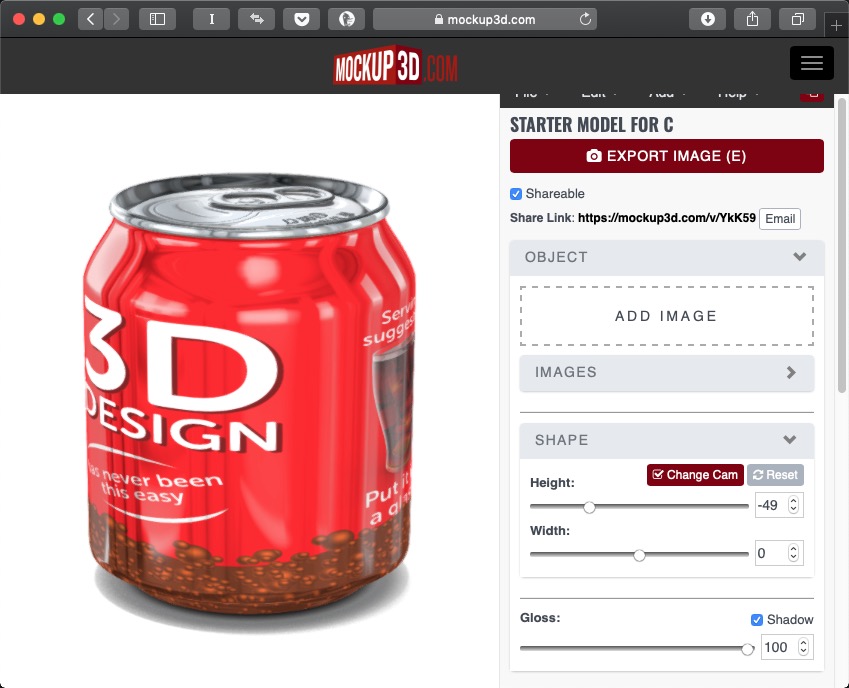
Step 4: Squeeze the model
All the models can be stretched vertically and horizontally, so you can customize them to get the proportions you want. It’s especially useful if you like short soda cans. Or, indeed, boxes at different proportions to those supplied.
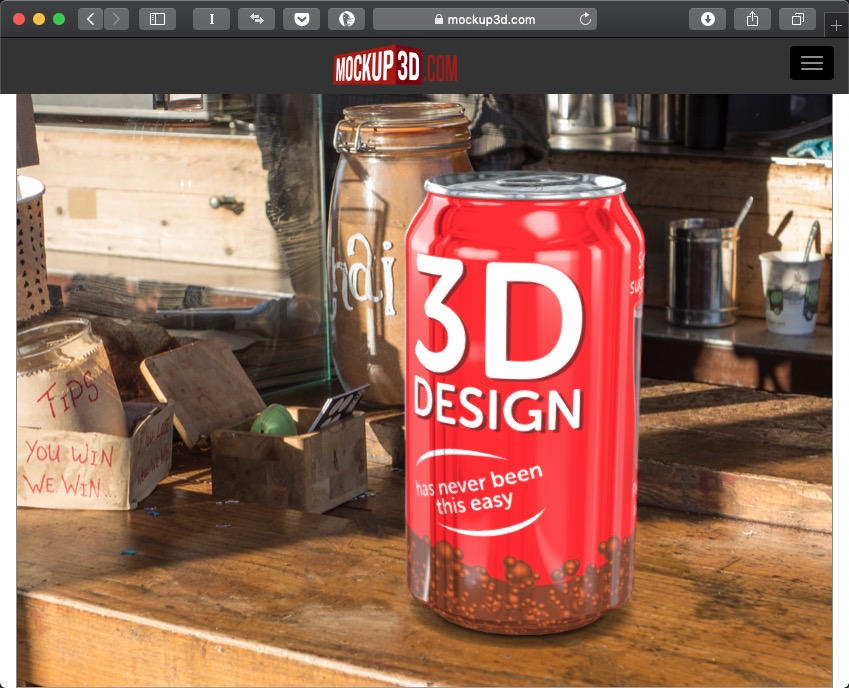
Step 5: Add a background
For precise positioning in a photographic scene, you can load that scene as a background image and then align your model within it. A shortcoming here is that while you can pan and tilt the camera view, you can’t yet rotate it to match the scene exactly. We look forward to this feature being implemented in a future update.
Step 6: Export the model
Use the Export Image button at the top of the screen to save the image in either PNG or JPG format to your computer. The exported image is limited to the size at which it appears in your browser window, so the resolution is limited to the size of your monitor. You can also share a link to the spinnable model so others can view it in 3D in a browser window – and you can check out this model here.
Conclusion
Mockup 3D is an ingenious, powerful tool that’s easy to use while retaining a strong feature set. The ability to spin a model around in order to place artwork precisely is a real bonus. There is as yet no ability to change lighting direction, or to change the reflection map. This is a product in the early stages of development – the developer tells us he’s working on the ability to create boxes to precise user-specified dimensions – so we can expect more functionality as the site matures.
This article was last modified on February 18, 2019
This article was first published on February 18, 2019
Commenting is easier and faster when you're logged in!

Recommended for you

How to Create 3D Objects Quickly in Illustrator
See how easy it is to create great looking 3D objects in Illustrator quickly. Us...

Experimenting with Illustrator’s New Mockup Feature
Take a first look at the Mockup feature in the best version of Adobe Illustrator

Making a 3D Rainbow in Illustrator
Explore the amazing things you can do with Illustrator’s 3D and Materials panel