
One of the most abidingly popular features on CreativePro is Chad Chelius’s excellent piece on creating crop marks in Photoshop. But why should you have to go through the process every time, when you can record it once as a Photoshop Action and then replay it with a keystroke?
Making an Action to create crop marks on every size of document is necessarily a little complex, but taken step by step it’s a satisfying exercise that will save you hours in the long run.
Step 1: Make a new document
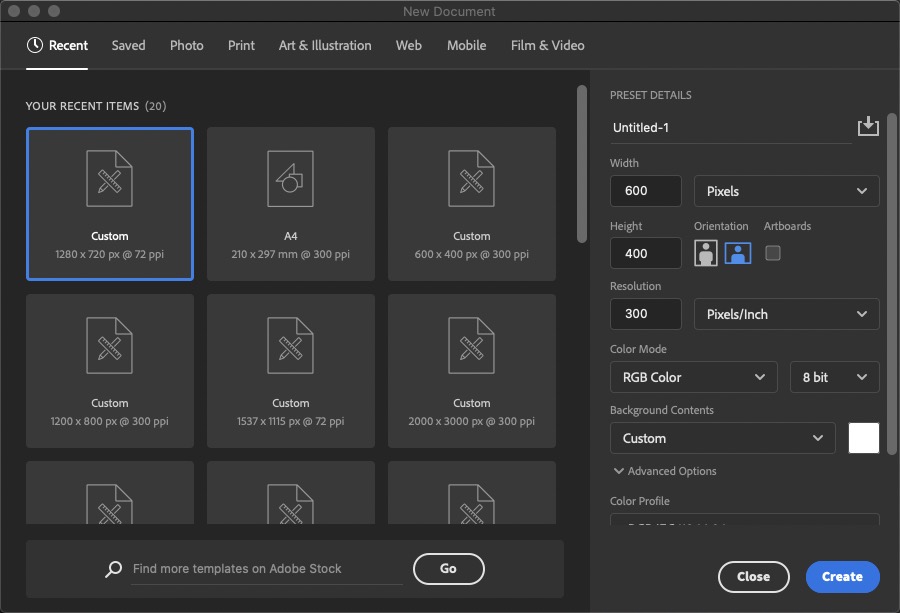
The initial document can be any size; I’ve chosen 600 x 400 pixels to make it easier to manage. The only critical factor is that the Resolution must be set to 300 pixels per inch. This is a standard for commercial printing, and the Action will only work correctly with this setting.
Step 2: Make a new Action
Open the Actions panel (Window > Actions), and click the + icon at the bottom to make a new Action. Call it “Cropmarks”. If you like, you can assign a keystroke to it using the Function Key pop-up list. Then click the Record button. Everything you do now will be recorded into the Action.

Step 3: Make a guides layer
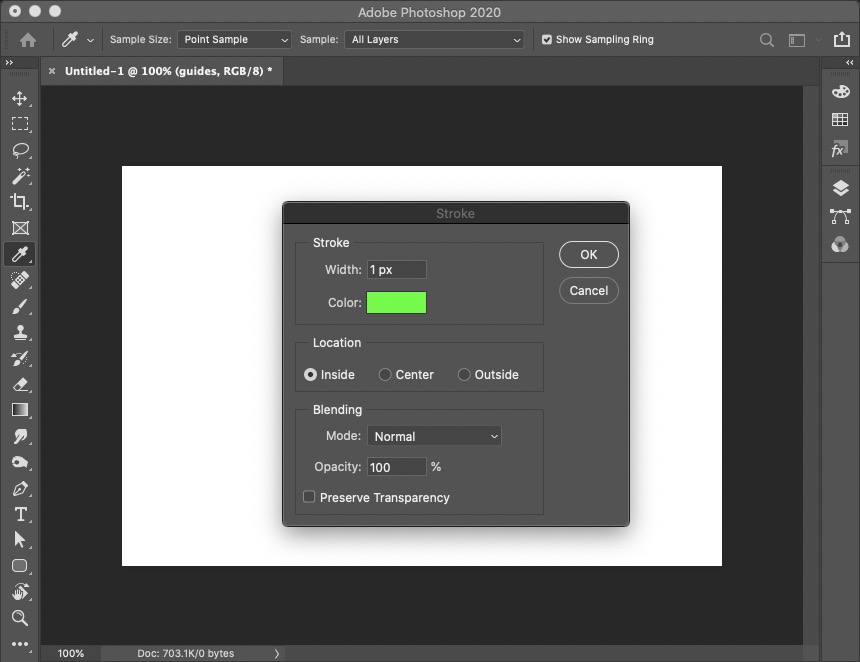
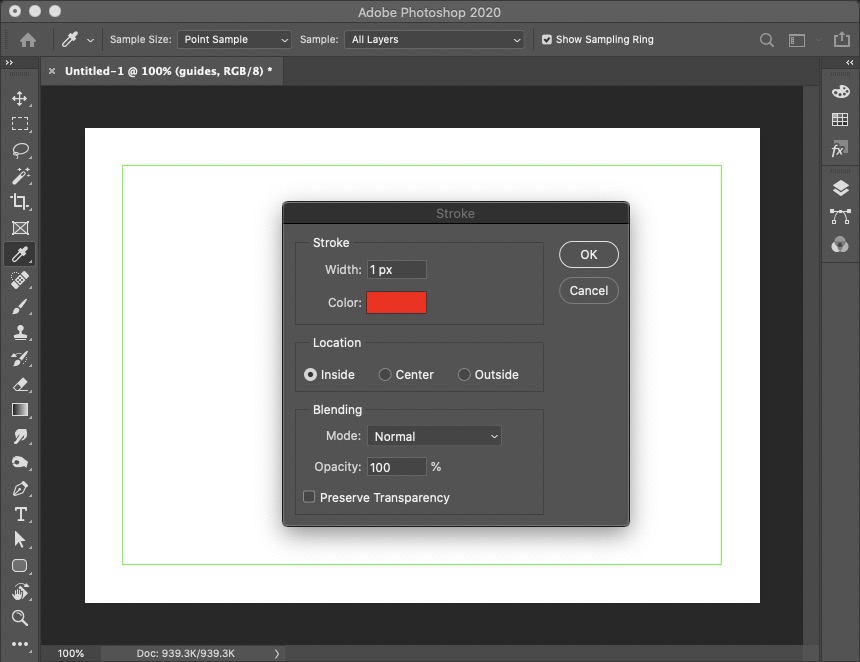
Begin by making a new layer which will hold the crop and bleed guides, and call it “guides” for ease of reference. Choose a bright green (or whatever color you like), then Select All and use Edit > Stroke to add a 1 pixel stroke to this layer. Set the Location to Inside.
Step 4: Increase the Canvas Size
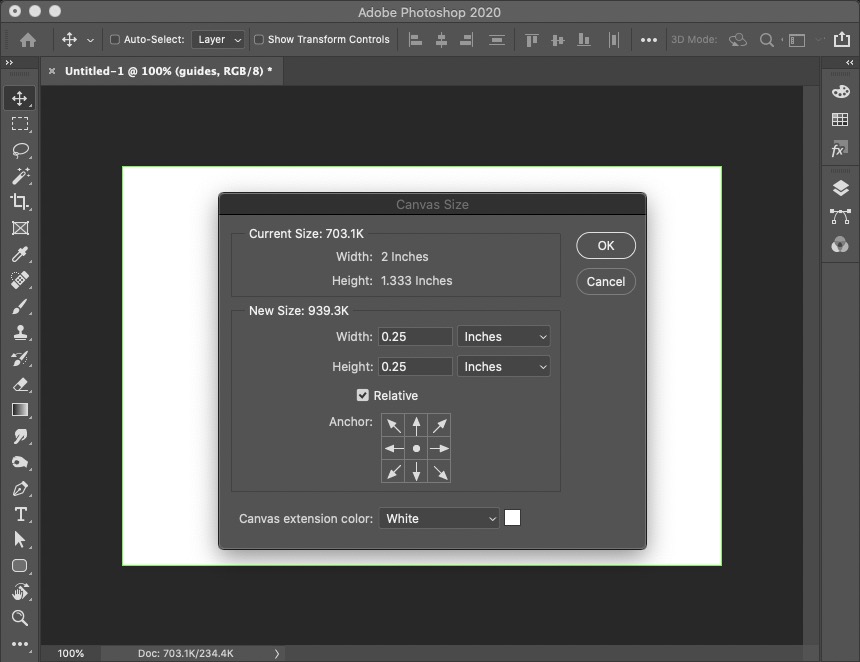
Choose Image > Canvas Size to make the document the size of the bleed area. Click the Relative checkbox so the amount of change isn’t dependent on the size of the current document. A typical bleed amount is one-eighth of an inch, so set both the Width and Height settings to 0.25 inches to allow one-eighth either side, top and bottom.
Step 5: Mark the bleed area
Here’s how the document looks with the expanded canvas. Choose a bright red (or whatever color you wish) as the Foreground Color, and once again Select All and apply a 1 pixel stroke inside the selection area. But don’t deselect just yet.
Step 6: Making the mask, part one
We want to make a white mask to hide the image area outside the bleed region. First, we need to capture this area. The simplest way to do this is to first make a new temporary layer (I’ve called mine “mask temp”), and fill this layer with any color. You can use Option Backspace/Alt Backspace to fill a selection with the foreground color.

Step 7: Increase the Canvas Size again
We now need to make space for the crop marks, outside the bleed area. So open the Canvas Size dialog again, and this time add 0.5 inches to both width and height, so you get an extra quarter inch both sides. Again, make sure the Relative box is checked.

Step 8: Making the mask, part two
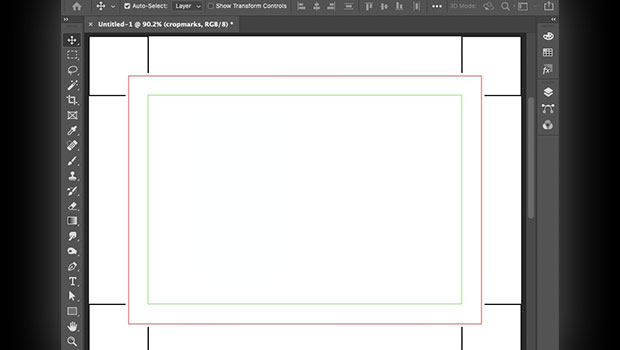
Here’s how the document now looks. Hold Command or Ctrl and click the thumbnail of the temporary layer in the Layers Panel, which will load it as a selection. You can now delete this layer, and the selection will remain active.

Step 9: Making the mask, part three
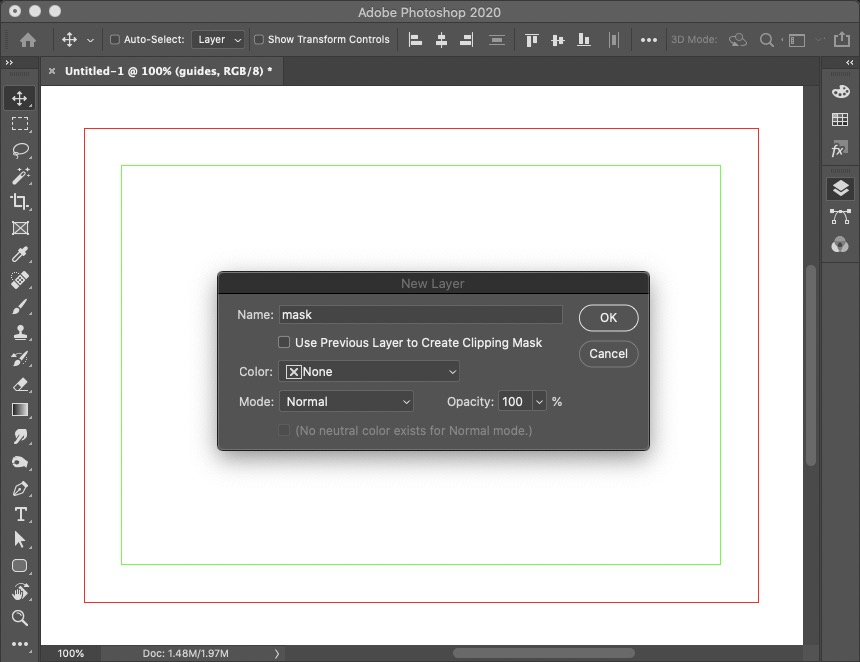
Make a new layer, and call it “mask”. Set the foreground color to white, and then use Select > Inverse so that everything outside the original selection is active. Again, use Option/Alt Delete to fill this selection with the foreground color.
Step 10: Here’s the mask
This is how the document looks with the background layer hidden. The red and green guides are on their own layer, and the white mask is on a separate layer.

Step 11: Make a layer for the crop marks
Make a new layer, and call it “cropmarks”. Then zoom into the top left corner and use the Rectangular Marquee tool to make a selection from the corner so that it touches the green crop area. If you hold the Shift key while you do this you’ll get a perfectly square selection.

Step 12: Draw the crop marks
Set the foreground color to black, and open the Stroke dialog once more. This time, change the Stroke width to 2 pixels (because 1 pixel will be too thin to show up well when printed at 300 dpi). Set the Location to Center, and click OK. Don’t deselect just yet.

Step 13: Cut the crop marks
The crop marks must not enter the bleed area, or there’s a chance they’ll be printed on the finished document. So, with the previous selection still active, use the cursor keys to nudge the selection down and to the right until it’s just outside the red line that marks the bleed area. Then hit Backspace to delete the crop marks here. Don’t be tempted to use the Eraser tool, as this may not be recorded correctly as part of the Action.

Step 14: The finished crop mark
Here’s how the crop mark looks with the area inside the bleed deleted. Next, we’re going to copy the crop mark to the other three corners.

Step 15: Make the right crop mark
Deselect, then duplicate the crop marks layer (shortcut: Command+J/Ctrl+J). We want to flip this layer horizontally, so first Select All and then use Edit > Transform > Flip Horizontal. (If you don’t Select All first, the crop marks will be flipped in place; this method will copy them to the correct place regardless of the size of the document.) Then use Command+E/Ctrl+E to merge the duplicated layer back into the original crop marks layer.

Step 16: Make the bottom crop marks
We can use the same process to make the crop marks at the bottom. Duplicate the layer, Select All, Flip Vertically and then merge the two layers together.

Step 17: Trim the canvas
The crop marks as we’ve created them are still square boxes with one corner missing. To get rid of the stroke at the corners, open the Canvas Size dialog again, and this time set the Width and Height to -2 pixels. When you click OK, the canvas will be trimmed to lose these corners.

Step 18: Stop recording
The Action is now complete. Open the Actions panel and click the Stop icon bottom left. You’ll see every step you made set out for you; you can click on the triangles to see the details of each step if you wish.
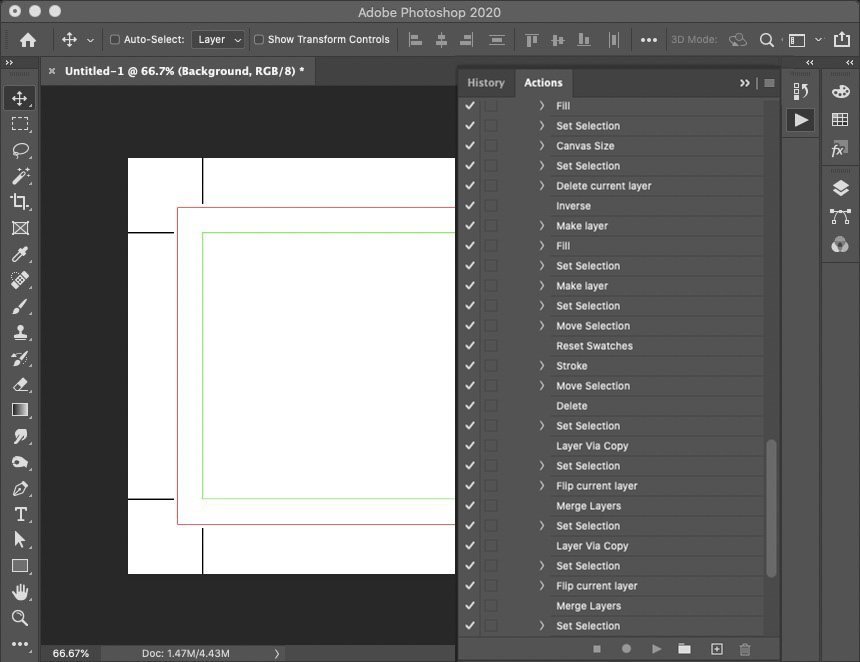
Now, when you want to add crop marks to a Photoshop document, all you have to do is hit the keystroke you set at the beginning. Because of the way the Action was created, the crop marks will be added perfectly to any size of document – provided it’s set to 300 DPI.
The red and green guides are there to help you judge the trim and bleed of the printed document; before saving for print, make sure you hide the guides layer.
You can see a video version of this tutorial here.
This article was last modified on August 3, 2021
This article was first published on May 26, 2020
Commenting is easier and faster when you're logged in!

Recommended for you

Enlarging Images in Photoshop with AI Partner Models
A comparison of techniques for increasing the resolution of images with the help...

Compositing a Scene into a Head in Photoshop
However much you may toy with people’s expressions using the Liquify filte...

Sometimes a Logo Is Just a Logo
The recent hubbub surrounding Quark’s new logo has raised several question...