
Creating Accessible eBooks with Affinity
Convert beautifully designed pages to faithful fixed-layout EPUBs for free
This article appears in Issue 55 of CreativePro Magazine.
Affinity offers the tools to create professional-quality artwork, illustrations, layouts, magazines, books, and ebooks. Affinity measures up surprisingly well to InDesign—and, even better, it’s free! Although some areas are not there yet (I’m looking at you, scripting), Affinity far exceeds the capabilities of InDesign when it comes to fixed-layout EPUBs.
Why is this so groundbreaking? Fixed-layout EPUB is the most capable format for faithfully translating fully illustrated, graphically rich pages that need to retain their print layouts into ebook form.
InDesign has not updated its support for Fixed-Layout EPUB in over a dozen years. Affinity, on the other hand, gives the format the support it deserves, making it a resource for professional ebook designers (like me) to create well-designed, more accessible ebooks.
Here are my favorite features:
- Affinity automatically picks up your document’s reading order from content position on the page, but you can also quickly adapt it in a dedicated panel.
- Your document’s heading hierarchyis honored on export, meaning the content structure you created with text styles is preserved.
- You can further enhance the meaning of text using semantic tags and lists.
- You can apply graphic effects to text, which gives you more design choices while keeping the text accessible.
- A live panel offers easy viewing, editing, and bulk application of image descriptions.
- You can add multi-language and extended descriptions.
Let’s take a closer look.
–>Reading Order Control
Complex, design-led spreads typically consist of many overlapping images and text frames. Those who can read the page visually can easily scan and connect the information, but those who rely on screen readers need the information presented in the correct reading order.
For accessibility, reading order is as important as image description. If the text is in the wrong order, it doesn’t matter whether images are described, the publication will still be unreadable.
The good news is that Affinity has a dedicated panel (Window > Layout > Reading Order) where you can both check and edit the reading order. You can even add images to the reading order: Simply pin them in the text flow (akin to anchoring in InDesign) or provide a description to be read. (See “Image Descriptions” later in the article.)
The Reading Order panel displays the reading order for the entire document and offers support for grouped objects, too (Figure 1). Better still, Affinity will apply the default reading order automatically based on each object’s page position, from top to bottom then left to right. Moving objects on the page immediately updates the Reading Order panel.
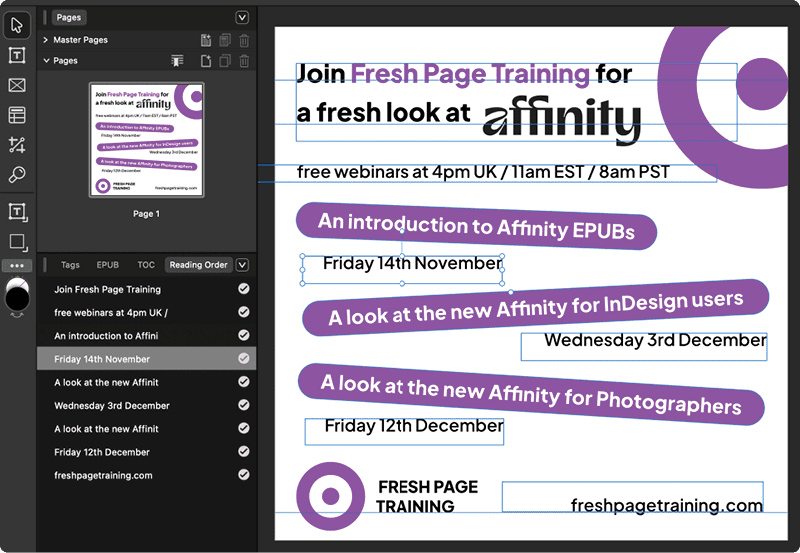
For further control, you can change the order of objects in the panel by dragging them up or down. Note that manual adjustments to the reading order will then no longer be updated by repositioning. You can also exclude content from the reading order with this panel. Click to the right of an object label to toggle whether it’s included or ignored as a decorative image.
Like in InDesign, objects on a master page (what Adobe calls a parent page) still appear in the fixed-layout EPUB output but with Affinity are excluded from reading order, because users of read-aloud and screen-reading apps commonly complain about hearing the text of the running head and page number on every page.
Unlike in InDesign, in Affinity, reading order is clearly shown and easily editable. It is separate from layer stacking order and so won’t require making structural changes to the document used for print output. The ability to control it in this way means that the same layout and the same reading order can be applied to PDF output, reflowable EPUBs, and fixed-layout EPUBs.
For me, this alone makes Affinity the better choice over InDesign—but there’s more!
Styled Structure
The Affinity Text Styles panel (Window > Text > Text Styles) is your control center for both paragraph and character styles, and is used to apply the export tags for both.
Choose Show Samples from the panel options menu to preview the font, color, and alignment of a style. To preview paragraph style order, which is determined by how your styles are used to define others in your document, choose Show Hierarchical. The Based On option is a powerful tool for quickly applying and updating styles across a document; it becomes especially powerful when working with CSS in reflowable EPUBs.
In Affinity, default styles are present when you create a new document. Before you rush to delete them, you should know they already contain export tags designed to increase accessibility.
Export tags are one of the main methods of assigning meaning to content. Applying a visual paragraph style to a heading is an obvious way to show the sighted reader its level in the hierarchy. But only by also adding the export tag does this structural information carry through to the exported EPUB or PDF, thereby aiding accessibility.
Screen-reader users often navigate a document by headings to quickly find their place. Because the default styles present in a new document already have export tags applied, you can start a fresh document with confidence that any text to which you apply the defaults (or styles based on defaults) will be accessible.
PDF export tags are fixed, but many more tags are available to EPUB in the form of HTML (the underlying language for EPUB content) applied on export. You can also edit the export tag for each style with the Text Style Editor (Figure 2).
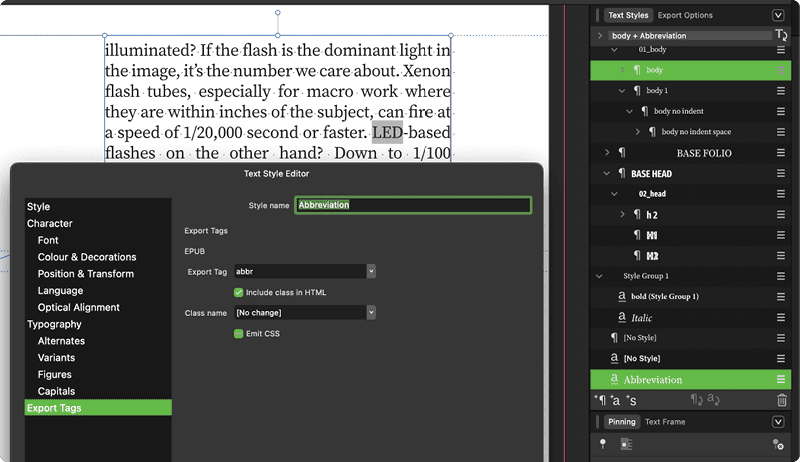
At a finer word-based level, character styles can also contain export tags. A few defaults are included, such as emphasis (italic) and strong (bold), but you can add more. When creating an abbreviation character style, for example, you could also add the semantic export tag abbr to indicate to the reader that the word is an abbreviation and to make sure it will be read out accordingly.
There’s even support for lists. Creating numbered or bulleted lists using paragraph styles will ensure they have the correct, semantic list tags properly applied as ordered or unordered lists in HTML.
Creative Live Text
Affinity offers all the typographic and text styling features InDesign users expect, plus it offers gradients, strokes, and an extra level of design treatment in the form of live warping and other creative flourishes (Figure 3). Because Affinity enables vector and pixel creation and editing (think: Photoshop, Illustrator, and InDesign combined into one program) you have more tools, features, and creative control.
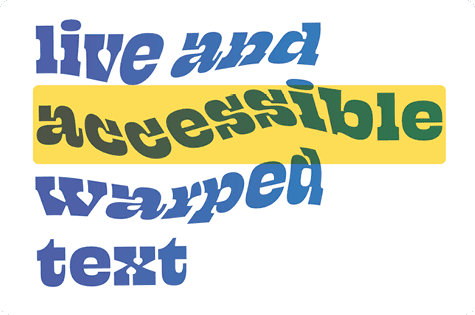
Image Descriptions
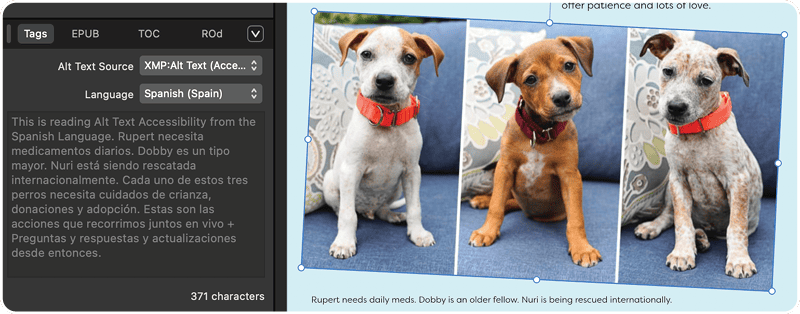
In the Tags panel (Window > Layout > Tags), you can view, edit, and manage many accessibility settings—even across multiple images. The panel reacts to your selections on the page; you can set all icons as decorative in one go, for instance. You can add descriptive alt text to images by typing into the panel.
If your workflow is set up to store descriptions inside the metadata of images, Affinity will automatically import that alt text when you place an image. Affinity also supports image descriptions in multiple languages, and you can control the wording and styling used for them in a reflowable EPUB (Figure 4).
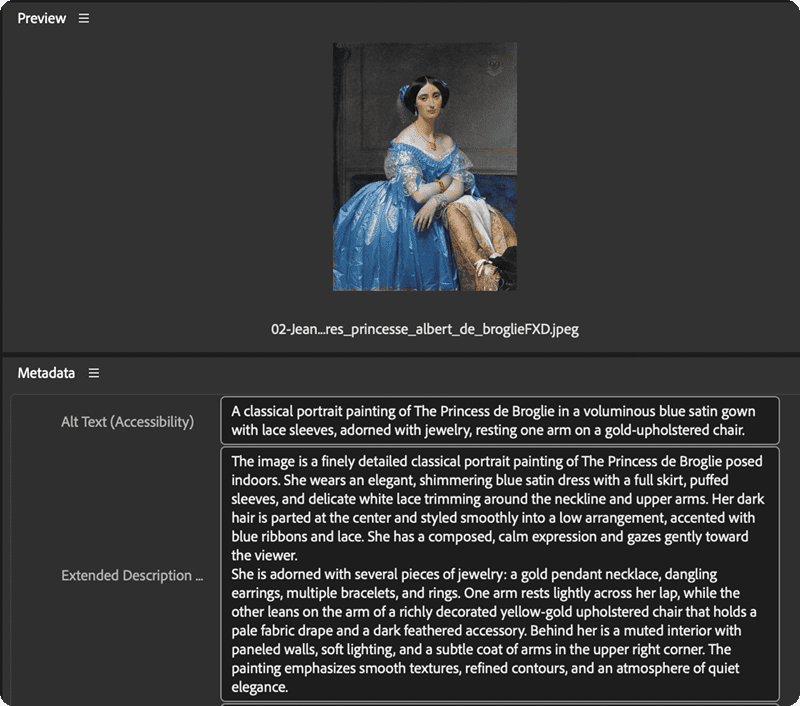
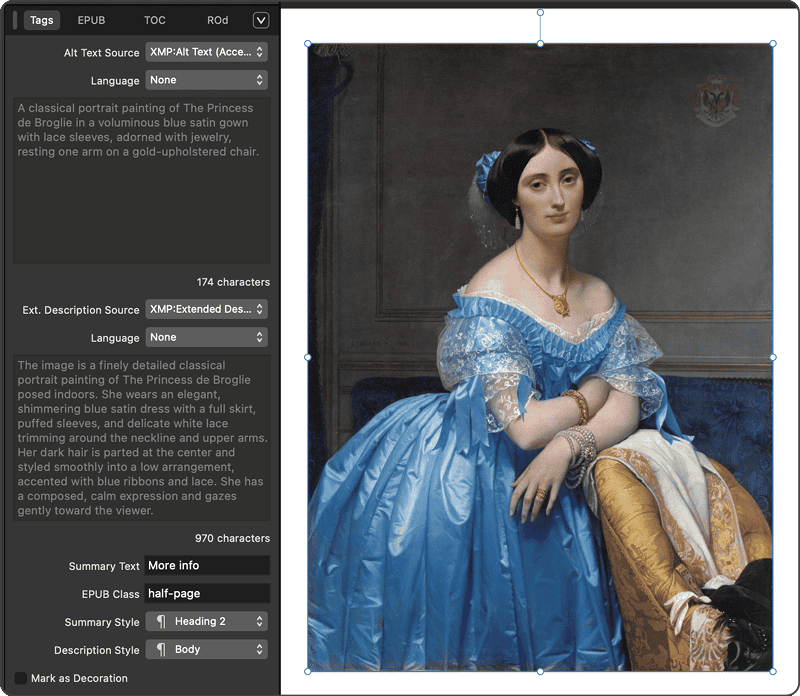
As soon as an image has a description, it becomes present in the Reading Order panel. Unlike InDesign, Affinity supports extended descriptions, which give the reader optional additional information for more-complex images. Extended descriptions are added as summaries in the reflowable EPUB format and appear as image titles for fixed-layout EPUB. So, depending on the EPUB reader used, the extended descriptions may be accessed by hovering over an image. You can enter an extended description in Affinity directly by selecting Custom in the Ext. Description menu, which reveals a field. And, by using the free Adobe Bridge app, you can create extended descriptions and embed them in your image files, then import that information when you pull them into Affinity (Figures 5 and 6), just as you would do with InDesign.
Metadata
One of the requirements for modern EPUBs (and the European Accessibility Act) is for accessibility metadata that declares how accessible or not a publication is. In Affinity, you can add this data in the Document Metadata panel (File > Document Metadata).
In the Fields panel (Window > References > Fields), you’ll find more metadata fields especially relevant for book publishers, including the ability to add an ISBN and to identify the illustrator.
These welcome additions help you avoid the need to open and edit EPUB code. All this rich information is added to the EPUB, improving accessibility and discoverability, because it is now shown by major ebook retailers. You can also create templates to apply metadata across multiple documents.
Export with Ease
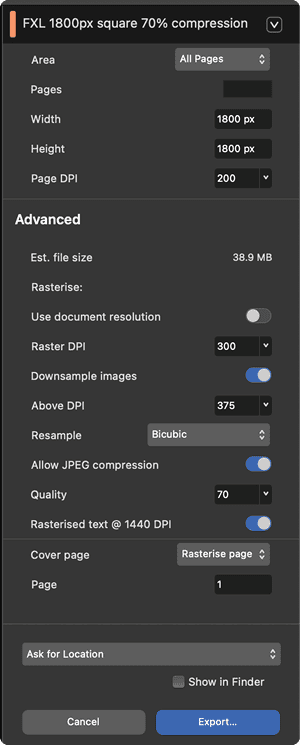
Again one-upping InDesign, Affinity offers options to set pixel dimensions on export. Why is this important? Print-centric image resolution isn’t as relevant a measurement in the digital realm; pixel dimensions are a better unit for publications that will be viewed on a variety of screens—from phones to tablets to monitors—and may be resized based on user preference.
When you’re ready to create your EPUB, choose File > Export, then select the EPUB (Fixed Layout) preset on the left to set the overall pixel dimensions for the publication’s pages, regardless of the physical size of the book.
A setting between 3 and 4 million pixels (pixel width multiplied by pixel height) is a good compromise: It provides really good image quality, but keeps files sizes compact enough that they won’t risk rejection from retailers for being too big.
The Advanced section of the Export dialog box includes additional controls, including control over JPEG compression and quality, estimated file size, and a way to increase the sharpness of any rasterized text in the exported EPUB (Figure 7).
Exporting directly from Affinity makes things easier for everyone. Without writing a line of code, designers can achieve a valid, more accessible fixed-layout EPUB immediately ready for testing and distribution. Coders looking to extend or enhance their fixed-layout EPUBs will appreciate the plethora of features and code that is cleaner than that of InDesign: Styling is separated from positioning per page, for example, and more logical sequential spans are applied per page for reading order.
Similarly, Affinity provides support for reflowable EPUBs: cascading classes, separating styles from tags, and using image classes and relative ems for image sizing.
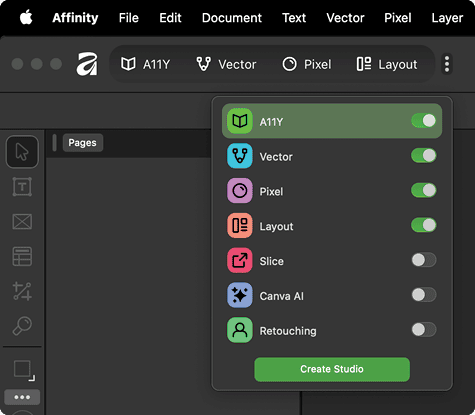
Save and Share Panels as Studios
Studios in Affinity are similar to workspaces in InDesign. When you launch Affinity, you’re greeted with three suggestions: Vector, Pixel, and Layout. These studios are a good place to start for users coming from Illustrator, Photoshop, and InDesign, respectively.
But you can also customize your work environment by creating more studios that contain the tools and panels that best suit your specific needs. Here is one I created to gather the numerous dedicated panels and tools for creating EPUBs (Figure 8).
“accessibility”).
Open InDesign Files and PDFs
For collaborative work, you can even open InDesign Markup Language (IDML) documents and PDFs in Affinity.
For best results with IDML files, make sure the InDesign documents are in good shape with hidden layers removed and all images present. After converting your IDML file, and opening it in Affinity the Resource Manager (Document > Resource Manager) and Font Manager (Document > Font Manager) can be useful for sorting out document elements.
Affinity offers great support for InDesign’s swatches, text styles, parent pages, layers, image management, and much more. But beware: Although Affinity supports footnotes, alt text, and export tags in its native documents, these are not yet supported in imported IDML files. Affinity also does not convert spanned or split columns and ignores linked XML files.
From its inception, Affinity has been able to open PDFs, giving you interesting possibilities for making existing PDFs more accessible or converting them to accessible fixed-layout EPUBs.
Give It a Try
I urge you to give Affinity a go—it’s free, after all! More importantly, it represents a great step forward for the creation of accessible fixed-layout EPUBs. With the new powers at your fingertips, you can design and publish beautiful layouts whilst making much more inclusive ebooks for all readers. I’d love to see what you make and to talk with you at CreativePro Week in Nashville.
Commenting is easier and faster when you're logged in!

Recommended for you

You’ve got to try TextStitch
How to use the free TextStitch plug-in to simplify difficult text threading task...

InDesign How-To: Add Alt Text or Artifact an Image
See two key accessibility techniques for working with images in InDesign.
Creating an Animated Bar Chart in InDesign
Editor’s Note: this post was excerpted from Diane’s handout from Cre...