

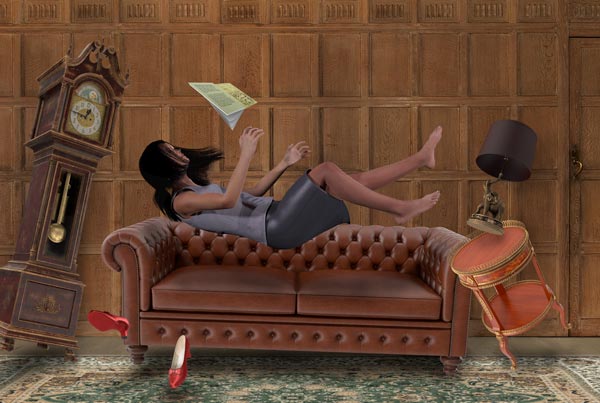
In the previous tutorial, we saw how to assemble all the elements of our underwater scene to make the objects look as if they’re floating, just like in The Shape of Water.
Now, we’ll add the finishing touches to make it look truly submerged.
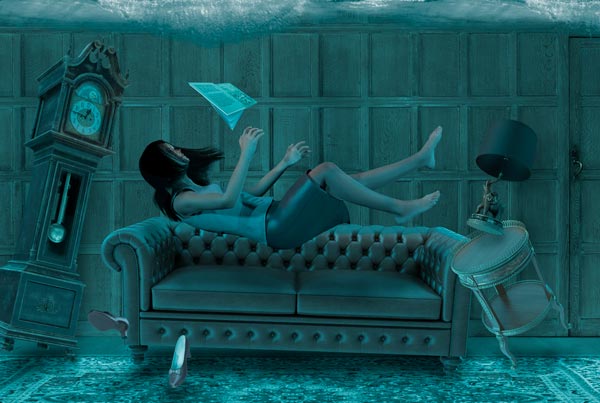
Step 10: Add Hue and Saturation
To make the underwater color, add a new Hue/Saturation Adjustment Layer at the top of the layer stack. You can do this by selecting it from the pop-up menu at the bottom of the Layers Panel, or choose Layer > New Adjustment Layer > Hue/Saturation. Check the Colorize box in the Hue/Saturation panel, and choose a suitable blue color for the scene.

Step 11: Reduce the Adjustment strength
The Hue/Saturation is effective, but rather too strong. Since it’s an Adjustment Layer, you can reduce the strength of it; I changed the opacity from 100% to 80%. To make the woman look less like a corpse, load her as a selection by holding Command/Ctrl and clicking on the thumbnail for her layer. Then, on the mask that accompanies the Adjustment Layer, use a soft-edged brush set to around 20% opacity to paint in black on her upper arms, legs and face, so hiding the adjustment in the areas, allowing some of the original flesh tone to show through.

Step 12: Add the water surface
The easiest way to make the water surface is to find a photograph of an underwater scene. This came from the free online library publicdomainpictures.net, and you can access this image here. Select the top of the water with the Quick Selection Tool, then use the Select and Mask dialog to soften the edges with the Refine Edge Tool.
Step 13: Draw a bubble
On a new layer, make a circular selection and fill it with a mid gray color. Use the Dodge and Burn tools to add shadows and highlights, to make this ball effect. You can draw it as large as you like – you’ll be shrinking it later.

Step 14: Add all the bubbles
Duplicate the bubble layer, and use Free Transform to shrink the copy to a tiny size. Setting the mode of the layer to Hard Light will make the gray disappear, leaving just the shadows and highlights visible. Select All, then switch to the Move Tool and hold Option/Alt as you drag the bubbles to various positions around the image. Create some at yet smaller sizes; and make a few larger bubbles, blurring them with Gaussian Blur to put them out of focus.

Step 15: Draw the light rays
To make the rays of light that will penetrate from the top, first make a new layer and fill a narrow rectangular selection with white. Switch to the Move Tool and hold Shift and Option/Alt as you drag the selection to the side, to make several white bands of different widths.

Step 16: Blur the light
Use Filter > Blur > Gaussian Blur to greatly soften the edges of the light. Although it’s a uniform blur, when the light is distorted the effect will be exaggerated at the widest point, producing an effective light stream.
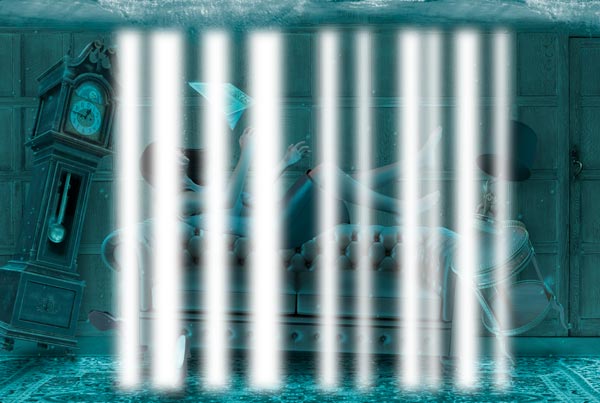
Step 17: Distort the light
Use Command/Ctrl T to enter Free Transform mode and hold Command/Ctrl as you drag the corners of the light layer. Make a tight top and a wider base, so the light appears to be streaming from a point just above the surface.

Step 18: Reduce the light effect
Lower the opacity of the light layer – I’ve set it to just 15%. Make a Layer Mask for this layer, and choose the Gradient Tool, set to Black to White. Drag from the bottom of the light towards the center, and the light will fade away towards its extremities. As a final touch, paint a blob of white at the top on a new layer to make a stronger light source.

Step 19: The final distortion
To complete the underwater effect, make a Merged Copy of the entire image using Command Option Shift E / Ctrl Alt Shift E. Then open Filter > Distort > Wave, to be presented with a dialog that hasn’t changed since 1996 (seriously). Set a high Wavelength, and very low amplitude settings – I’ve used a minimum setting of 1, with a maximum setting of 5. You’ll barely be able to see anything in the tiny preview window, so hit OK and see what happens.

Step 20: The end result
Here’s the result of the Wave filter: a subtly distorted image that really gives the impression of being underwater.

You can see a higher resolution version of this image here.
This article was last modified on April 18, 2018
This article was first published on April 18, 2018
Commenting is easier and faster when you're logged in!

Recommended for you

Creating a Panorama: Photoshop, Camera Raw, or Lightroom?
When a scene is wider than your widest lens, merging images into a panorama is a...

How to Straighten an Image in Photoshop
Since I can remember, I’ve been told I was a little off-kilter. Whether or...

Create Patterns With Adobe Capture CC
How do you create beauty? There’s the old fashioned way: First, create the...