



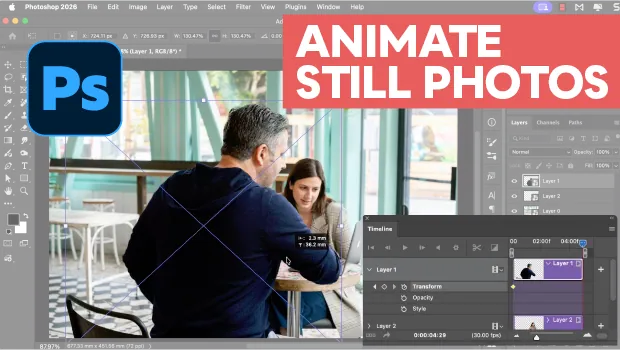
In this Photoshop how-to video, Steve Caplin shows how to create a tracking zoom effect on a still photo. Instead of using Free Transform for a simple zoom, his technique separates the photo’s subjects onto different layers. This allows him to zoom in on each subject at a slightly different rate to create a camera tracking effect.
Subscribe to the CreativePro YouTube channel for more helpful design tips!
As a designer, I’m often asked to make videos from still images. I can just use the so-called Ken Burns effect, but simply zooming and panning photographs looks rather dull. I’m Steve Caplin for CreativePro, the essential resource for creative professionals, and I’m going to show you a much better way to use Photoshop to bring still images to life.
Here’s a still image of a couple in a cafe, and I want to animate this so it zooms in as time passes. Well, we could just use Free Transform, and to make that happen, I’ll double-click the background to turn it into a regular layer, and now we can go into Free Transform and gradually increase the size. But all we’re doing is making the image bigger.
You don’t really get a sense of perspective, and I want to create the effect of a camera tracking towards these people in a more realistic way. We’ll cancel Free Transform, and instead we want to select the people from the background. If we just use Select Subject, then it’s going to select all of them together.
But here’s the problem. The man is closer to the camera than the woman, so as we track in, he wants to enlarge slightly more than she does. So let’s deselect.
Instead, we’re going to use the Object Selection tool, and let’s drag it over the man and the chair behind him. I’ll move the contextual taskbar out of the way. And it’s picked up the man and the chair well.
It’s missed his jeans, so we’ll just hold the Shift key and click in there to add that to our selection. Let’s make a new layer via Copy, and there’s the man on our separate layer. I’m going to hide him and load him as a selection by holding Command on a Mac, Control on a PC, and clicking on his thumbnail in the Layers panel.
Now we go to the Background layer and choose Remove. And now Photoshop is going to use the Firefly AI engine to remove him from the scene. And there’s the man duly removed.
The background has been rebuilt as has the left-hand side of this table, and that’s exactly what we want. We want to now merge the Remove tool edits down into the Background layer, so Command-E or Control-E will do that. Now let’s select the woman, again using the Object Selection tool.
There she is. She’s all selected apart from the laptop, so once again the Shift key will add that in. And let’s use the Lasso tool with the Shift key held down just to add these odd little bits that have got missed out.
Once again, we’ll make a new layer from this selection. Command-J on a Mac, Control-J on a PC. And again, we’ll hide the layer.
Command- or Control-click on the thumbnail to make our selection. We’ll go on to the Background and I’ll click the Remove button again. And once more, Photoshop will remove the woman and the table and the laptop from the scene and patch the Background.
Let’s merge these Remove tool edits down into the Background. So now we’ve got the Background, the woman, and the man on three separate layers. In order to animate them, I’m going to make them into Smart Objects.
We select each layer in turn and go to Layer, Smart Object, Convert to Smart Object. There’s the Background, there’s the woman, and there’s the man. And of course, we want to animate this.
So let’s go to the Window menu and choose Timeline. And we can click Create Video Timeline. And here are our three Smart Object layers showing up.
It’s kind of in the way over there, so I’m going to drag it out and move this window over to the side so we can still see what we’re doing. And I’ll move the Contextual Taskbar out of the way. So for the first layer, for the man, we’ll pop it open and click the Transform button.
And that adds a keyframe right at the beginning of the animation. If we drag to the end of the animation, we can now use Free Transform to make him bigger. And let’s move him up about there and hit Enter to apply it.
And when we scrub through the timeline, you can see he gets bigger as time progresses. Let’s go back to the beginning, open up the woman’s layer, and again click the Transform button. Before we go to the end, we need to note her position relative to his.
Her head is more or less on a level with him, but as we move in, we need her to be slightly smaller than him. And you can see that his elbow is just covering up the table support. So we’ll go to the end, use Free Transform on the woman layer.
Let’s make her bigger, but not quite as big as him. Move the layer up so that the table is in the right position relative to his elbow. And in fact, let’s make her very slightly smaller.
And that looks quite good. I’ll hit Enter, and as the time goes on, the camera tracks in and he becomes larger relative to her because he’s closer to the camera. Let’s do the same thing with the background.
We’ll pop it open, click the Transform button. You’ll notice I’ve come back to the beginning of the timeline again. We’ll scroll to the end of the timeline, and let’s go back into Free Transform.
And here, I only want quite a small amount of enlargement. So I’ll drag it so we get some movement in the background, and that looks just about right to me. Let’s go to the beginning and play, and that works well.
When we’re done, we can save the file and go to File, Export, and Render Video. You can set the name of the video, where you want it saved, the format and the frame rate, and just click the Render button. Now, having said that, this doesn’t always work.
Sometimes, Photoshop will fail to export a video, depending on the plugins that you might have installed, or depending on a few other factors. The alternative is to open the Photoshop document in Adobe Media Encoder, and this will always do a perfect job of turning your Photoshop animation into a usable video file. And here’s the finished result, far more effective than a simple enlargement.
Well, I hope you enjoyed this video. If you did, be sure to give it a like and subscribe to our channel. And for thousands more how-to articles and tutorials, visit our website, creativepro.com, and become a member today.
Thanks for learning with us.
This article was last modified on September 10, 2026
This article was first published on August 7, 2026
Commenting is easier and faster when you're logged in!

Recommended for you
Animate a Waterfall Effect on a PowerPoint Bar Chart
Stephy Hogan is back with another eye-catching animated chart design.

Animating Images With Plotagraph Pro
Plotagraph Pro is an innovative app that allows you to selectively animate still...

CreativePro Video: Resize Animations in Keynote
In this week’s CreativePro video, Darlene Shelton shows us an easy way to resize...