
Accessibility Plug-ins for InDesign
Generate PDFs that are more accessible with more ease by using these two new plug-ins.
This article appears in Issue 46 of CreativePro Magazine.
Accessible PDFs help all users, including you. How many times have you needed to copy text from a PDF to another document only to discover a mess of returns at the end of every line and lost formatting after you pasted? Tagging—one of the keys to creating accessible PDFs—would have prevented that headache.
If you’re new to creating accessible PDFs with InDesign, however, you may think you’re trading one headache for another. You now have to be mindful of many new concepts: document structure, tags to identify the semantics of your content (like headings, lists, tables, and images), alt text that describes images for screen readers, and more.
Fortunately, help is at hand in the form of Accessibility for InDesign and ALT-Text for InDesign, two new plug-ins from developer Roland Dreger. Accessibility checks your document for accessibility issues and facilitates fixes, while ALT-Text for InDesign enables you to add AI-generated alt text, write your own, and control how it’s applied.
You can find and download both plug-ins from Adobe Stock & Marketplace (both $49/year) in the Creative Cloud desktop app. Let’s dive deeper into how each plug-in can help you.
The Accessibility Panel
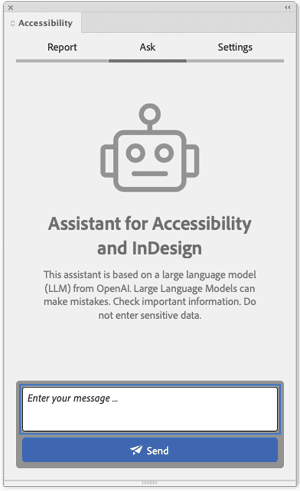
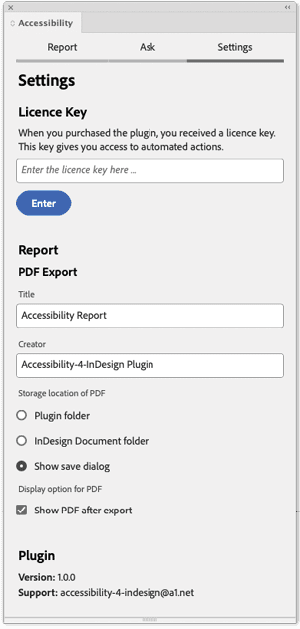
The Accessibility plug-in adds a new Accessibility panel, which contains three tabs. The Report tab features an accessibility error reporting tool (more on this in a moment). From the Ask tab, you can query a chatbot about accessibility in general and InDesign tools and functions in particular (Figure 1). Finally, the Settings tab holds your license key as well as some basic options on how you want to name and store the report files the plug-in can export (Figure 2).
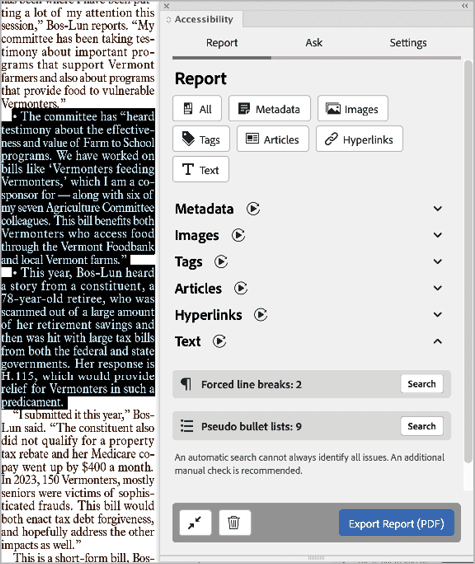
You’ll spend most of your time with the Report tab. Here you can instruct the plug-in’s accessibility checker to examine your document and highlight potential problems in its:
- Metadata
- Images
- Tags
- Articles
- Hyperlinks
- Text
You can create reports on all these aspects by clicking the All button. To create a report on a specific area, simply click the button or the play symbol next to the appropriate section (Figure 3).

Some of the individual reports can hold a lot of information, so you might want to check your document one aspect at a time. To expand or collapse a section, click its disclosure triangle (right). To collapse all open sections, click the double arrow icon (bottom left). If you need to start over, delete all current reports with a click of the trash can icon (bottom middle). Clicking the Export Report (PDF) button (bottom right) will summarize all the reports into a single PDF for easy review.
Metadata
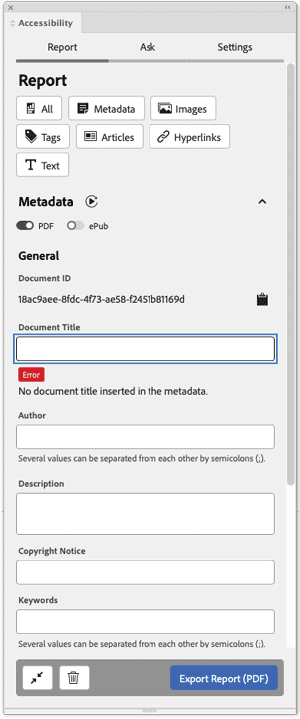
In the Metadata section, you can use the toggle switches to specify whether to evaluate the document as a PDF (the default) or an ePUB file. Accessibility will report any document information that readers will find missing when they choose File > File Info and will display an error (Figure 4). To correct the problem, simply type the missing information into the appropriate field.
Images
In the Images section, you can specify the types of problems you’d like the plug-in to report. I usually select All. When you run a report, the plug-in tells you if alt text is missing or any other problems exist, and it displays thumbnails of the affected images (Figure 5).
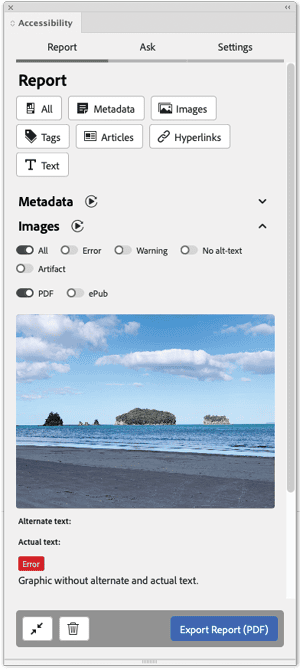
Click a thumbnail to learn more and select the image in the document. This way, you can immediately address the problem. If alt text is missing, for example, you could choose Object > Object Export Options to open the Object Export Options dialog box and add new alt text. To streamline the process, you could use the ALT-Text for InDesign plug-in to address the alt text issues Accessibilty spots. (We’ll dig into that plug-in shortly.)
Tags
Export tags define the semantics of a document’s paragraphs, indicating which are headings, lists, notes, and so on. The report for the Tags section (Figure 6) helps you identify which PDF tags or, for ePUB files, which HTML element names are applied to which paragraph. For accessible PDFs, the most important settings are the Paragraph Style and PDF toggles.
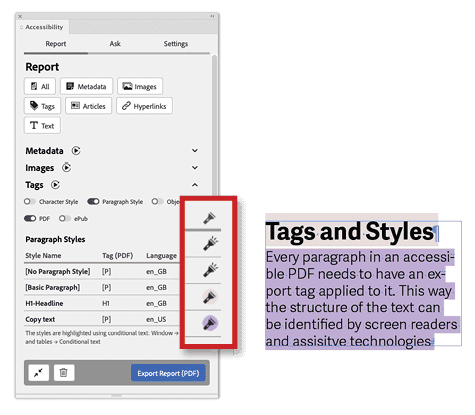
When you run a report, the plug-in provides a list of all paragraph styles and their respective export tags and applied language settings. Click a style’s flashlight icon to highlight text in the document with that style applied. By default, highlight colors are randomly generated, but you can customize them in InDesign via the Conditional Text panel (Window > Type & Tables > Conditional Text).
Articles
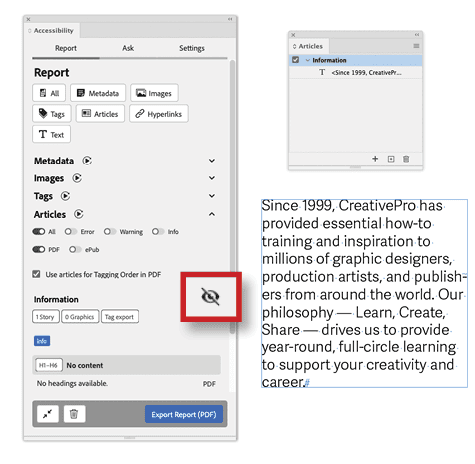
A well-structured document is essential for accessibility. Articles, which you can access and add in InDesign via Window > Articles, supply this structure. The Articles section reports all the elements included in these articles. Turning on the Use Articles For Tagging Order In PDF option activates the similarly named option in the Articles panel menu, which sets the reading order for screen readers and assistive technologies and is essential for exporting an accessible PDF.
To show or hide which elements are already part of an article, click the Visibility (eye) icon (Figure 7).
Hyperlinks
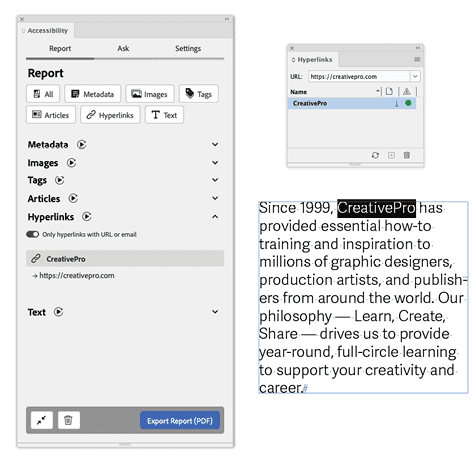
If you include hyperlinks in your accessible documents, they have to be defined as such in the InDesign Hyperlinks panel (Window > Interactive > Hyperlinks). When you run the report, the Accessibility panel’s Hyperlinks section lists all your hyperlinks and their respective destinations, making it easy to confirm they’re accurate. Click a hyperlink name in the Report tab to highlight it in your document (Figure 8).
Tip: Turn off the Shared Hyperlink Destination option when creating a hyperlink to avoid problems with your documents down the line. For more details, see Mike Rankin’s CreativePro article “Script of the Month: Remove Shared Destinations.”
Text
Finally, the Text section’s report highlights problematic text, such as empty paragraphs, forced line breaks, or lists that do not use InDesign’s List function (Figure 9).
Double-check the checks
As I do with all automated reporting,
I recommend that you also check your documents manually for problems regarding accessibility issues. The plug-in can catch a lot of problems, but not all of them. For example, the plug-in doesn’t address color contrast issues. For those, you’ll need an app like TPGI’s Colour Contrast Analyzer.
ALT-Text for InDesign
Providing alt text for images is essential when creating accessible PDFs, because screen readers and assistive technologies use it to explain the document’s visual content to readers. Unlike a caption that complements an image, alt text describes in detail what the photo, diagram, or illustration depicts.
In InDesign, you would ordinarily select an image and enter alt text for it in the Alt Text section of the Object Export Options dialog box (Object > Object Export Options). ALT-Text for InDesign makes the process easier with its clearly structured and intuitive user interface.
Using the Graphics and Settings tabs, you can check existing alt text for a document’s images, add new alt text (or use AI to generate it), specify alt text attributes, designate decorative elements (which don’t convey essential information and thus don’t need alt text), and automate actions for linked images.
The Graphics tab
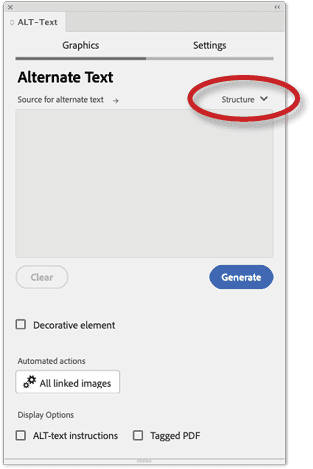
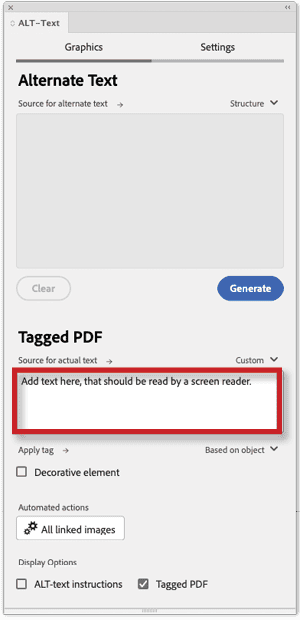
When you select an image frame, the plug-in shows you the standard object export options for the image in the Graphics tab. Usually, the source for the alt text will be set to Structure (Figure 10), which refers to XML information inside an InDesign document.
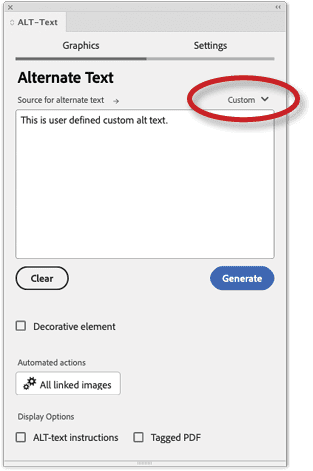
Click the text field and start typing to add your own alt text. Automatically, ALT-Text for InDesign will set the source of the alt text to Custom (Figure 11). If you prefer to let AI generate the alt text, click the Generate button instead. To clear the alt text, click the Clear button.
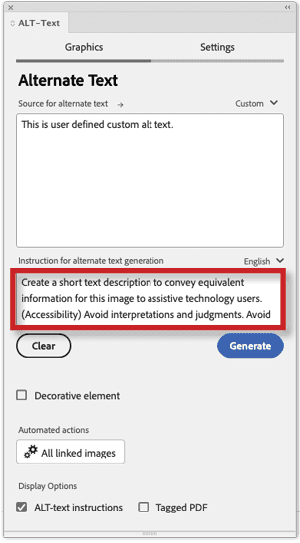
If you turn on the ALT-Text Instructions option, you can edit a prompt to specify how OpenAI’s GPT should generate alt text for the selected image (Figure 12). For example, you can tell it to limit the number of characters. (Alt text is better when it is succinct and covers only key points.)
To address copyright and licensing concerns, the plug-in uploads the image via its API (application programming interface), which prevents OpenAI from using the uploaded images to train its large language model.
If an image is merely an artifact that adds visual interest but no meaningful details to the document, you can turn on the Decorative Element option, so no PDF tag will be created. Usually, if you use the InDesign Articles panel to build a list of all elements that should be exported, the elements that are not included will automatically be ignored and don’t have to be tagged as decorative elements or artifacts separately.
Sometimes you may need to use a special feature of alt text called actual text. Suppose, for example, you have text converted to outlines to act as an image frame but you still want the original text to be read by a screen reader. The solution would be to use actual text. To do so, in the Graphics tab, click the tag icon to the right and set the Apply Tag option to Based On Object, then turn on the Tagged PDF option at the bottom of the tab. Now you can turn on the check box for Custom Actual Text and type in the original content, which will be read by screen readers (Figure 13).
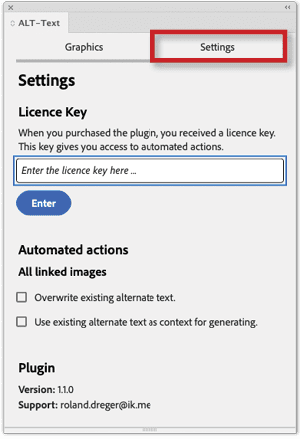
The Settings tab
As with the Accessibility plug-in, you can enter your license key in the Settings tab. Additionally, here you can specify what should happen to all linked images when you click the Automated Action button in the Graphics tab. You can choose to overwrite existing alt text or use the existing text as a basis for generating new text (Figure 14).
My Verdict
I think both plug-ins can help you immensely when preparing documents for accessibility. They are intuitive to handle, and Roland Dreger, their developer, is very committed to further improving them. You can leave feedback for him about the plug-ins on their respective GitHub repositories for Accessibility and ALT-Text for InDesign, where you can also find documentation, details about updates, and more information.
Commenting is easier and faster when you're logged in!

Recommended for you
InDesign Magazine Issue 81: Publish Online
We’re happy to announce that InDesign Magazine Issue 81 (January, 2016) is now a...

PowerPoint Add-Ins
By leveraging third-party add-ins, you can dramatically improve your workflow an...

Now available: JavaScript for InDesign, 2nd Edition
Learn how to harness the power of scripting in InDesign. And take advantage of a...