
Q: I’m working on a layout that requires a diamond-shaped text frame. I’ve attempted to rotate a square frame, but it rotates the text as well. Is there a way to rotate the frame while keeping the text straight?
A: There are actually two ways to accomplish this. One is the “official” method; the other is a handy down-and-dirty method. Let’s look at both ways, starting with the more conventional method.
In the following figures, you can see that the text frame is selected. If you rotate it with the Rotate tool, you can instantly see the problem; not only does the frame rotate, but the text goes along for the ride (Figure 1).

Figure 1: Rotating a text frame typically rotates the text as well.
So, how do you fix that? Instead of using the Selection tool (black arrow), use the Direct Selection tool (white arrow). For this to work correctly, you must be sure all of the points in the frame are selected. The easiest way to do this is to first select the frame with the Selection tool and then immediately switch to the Direct Selection tool. That should select all the points in the frame. But if you’re into the “belt and suspenders” approach, after switching to the Direct Selection tool, use the Select All keyboard shortcut Command+A (Mac) or Ctrl+A (Windows) (Figure 2).
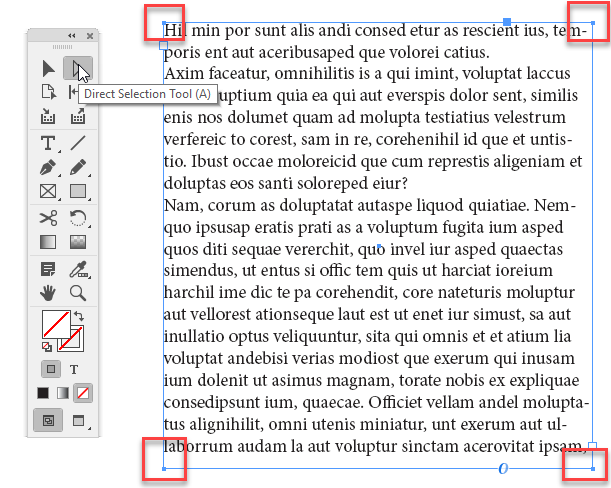
Figure 2: Using the Direct Select tool, make sure you’ve selected all of the anchor points.
From here it’s a simple matter of rotating the frame as you wish. For that, you can use the position tools in the Control panel or the Rotate
tool (Figure 3).

Figure 3: Rotating the frame has no effect on the text, which remains horizontal.
If the frame isn’t rotating exactly the way you expected, check the proxy in the Control panel (by default, it will be on the leftmost item) to make sure the frame is being rotated based on the center point or whichever point you’d prefer.
Now, how about that down-and-dirty method? I always like to have to something like this up my sleeve because that’s just the way I roll. Let’s see how it’s done.
Draw your frame as above, and rotate it as you wish. With that done, draw a second frame right on top of it with the Rectangle Frame tool but within the bounds of frame. Select both frames (Figure 4).

Figure 4: Draw a frame and rotate it. Draw a second frame, smaller than the first, being sure to fit it within the bounds of the first.
If it’s not already open, open the Pathfinder panel, and click the Add button (Figure 5).
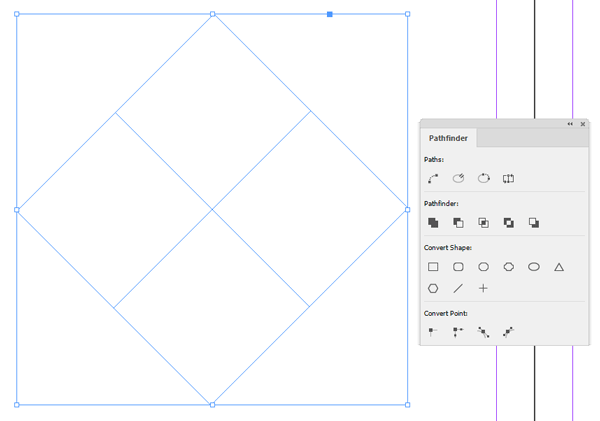
Figure 5: Use the Pathfinder panel to combine them.
Finally, switch to the Type tool, and enter your text (Figure 6).
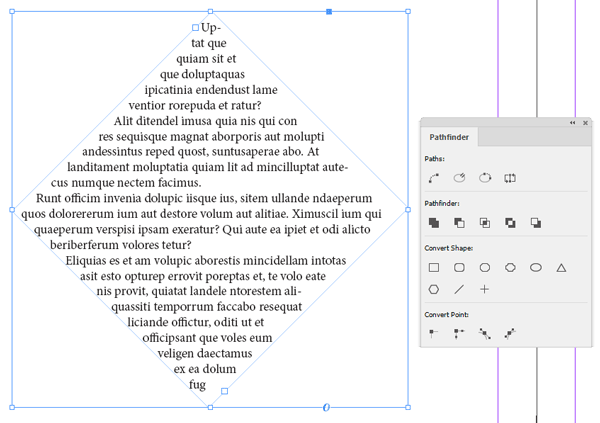
Figure 6: Adding text to the frame.
Just so we’re clear, the first method is probably going to be the best way to do this most of the time, but it never hurts to think outside the box when looking for solutions.
Commenting is easier and faster when you're logged in!

Recommended for you

Tip of the Week: Creating Automatic Run-in Headings with Numbered Paragraph Styles
This InDesign tip on creating run-in headings with numbered paragraph styles was...
Free Script to Rotate Selected Characters
InDesign allows you to rotate text characters if you convert them to outlines. B...
The Case of the Misplaced Adornment Contest Answer and Winner
Solve this InDesign mystery for a chance at winning a great prize.