
InStep: Borrowed Design Elements
A systematic approach for turning inspiration into items you can use in your layouts.


This article appears in Issue 96 of InDesign Magazine.
One of my all-time favorite keynote speeches from PePcon was the one given at the 2013 show by Austin Kleon. The author of Steal Like an Artist shared his ideas for enhancing your creativity and design skills by acknowledging the fact that nothing you make can be 100% original. He encouraged us not to plagiarize and blatantly rip off the work of others, but to take it and build on it by adding twists and new dimensions. Inspiration doesn’t come in a magical flash when you’re staring at a blank page or screen. It comes from literally everywhere else.
This idea resonated with me, since I love looking at designs in all kinds of places and figuring out how to recreate them in InDesign. That was the impetus behind my Lynda.com course, InDesign FX and the ebook that came before it. And in this InStep, I’ll sketch out a process you can use to borrow and adapt design elements for your work.
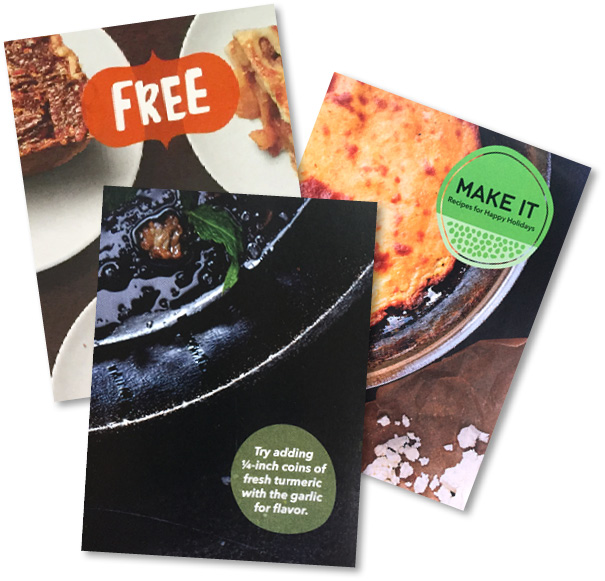
For an example, I’m using something I thought was pretty nifty: a little graphic from a Whole Foods recipe booklet.

It’s the kind of periodical that lots of grocery stores put out for free to promote seasonal items, sales, and so on. Most folks would page through this booklet and be drawn to items like “nutty vegan stuffing” and “horseradish-chive mashed potatoes.” I, on the other hand, love the lumpy “violators.”
Whole Foods is a company that puts a strong emphasis on design to create their brand image, so
it’s no surprise that even a freebie item like a recipe booklet is meticulously crafted. It’s full of photography, graphics, and type that all work together to reinforce their message that “this is a friendly place to shop, and we feature natural, wholesome goods.”
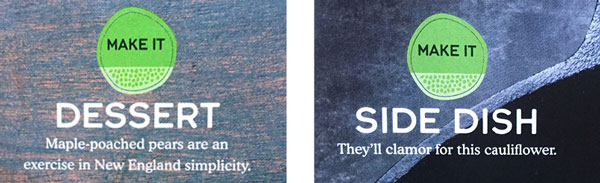
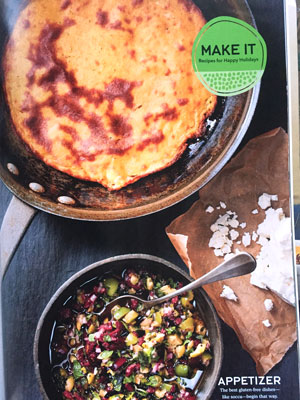
I admired how a simple item like the “Make It” violator is subtly effective at evoking an earthy, organic vibe, with its green colors and asymmetrical jumble of seed-like shapes. It’s reused throughout the recipes section of the booklet.
So let’s see how to deconstruct this “lumpy violator” and adapt it to our own needs.
1. Take photos
Once you’ve found an item you want to borrow, start by grabbing some pictures of it with your camera or cell phone. Make them as clear and accurate as you can. If it’s a page from a magazine, rip it out if you can, so it lies flat. Find a good source of light that won’t distort the colors as you’re taking the photos. Get it in sharp focus and try to eliminate any glare. Position yourself so you don’t cast shadows on the image you’re taking.
2. Save shapes with Adobe Capture CC
Capture CC is one of Adobe’s many mobile apps for creatives. As its name implies, it allows you to capture assets wherever you go, and then use them in Creative Cloud desktop apps. For example, you can use Capture’s Shapes feature to create vector versions of images.
With your photo open in Capture, use the controls to refine the shape by erasing unwanted elements. Then you can render the shape, give it a name, and save it to a CC Library.

3. Save colors with Capture or Photoshop
You can also use Capture to quickly grab a set of colors and save them as a color theme. Select an image from your camera roll. At first, the color samplers will position themselves automatically, but you can drag them elsewhere if you like. From there, you can tweak the sampled color values with sliders. When you have a set of colors you want to keep, save them as a color theme in one of your CC libraries.

If you want even more control (and don’t mind taking a little more time), you can use Photoshop instead of Capture to grab colors and save them in a CC library.
With your inspirational image open in Photoshop, sample colors with either the Eyedropper or the Color Sampler tool.
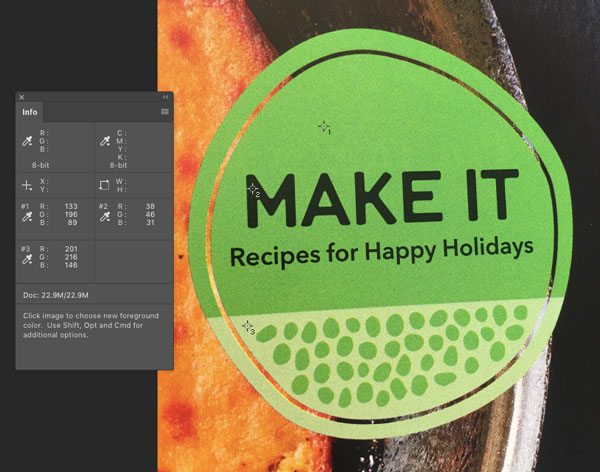
Be sure to use a sample size that’s larger than Point Sample to average the color of the pixel you click on with its neighbors, especially if you’re working from a printed image (where the dot pattern can cause Photoshop to sample colors that don’t match what your eyes are seeing). Alternatively, you can blur the image before sampling colors to average them out, or apply color adjustments to the image to alter the results.
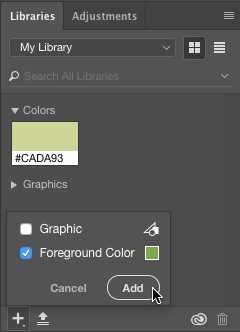
When you have a color you want to keep, open the Libraries panel (Window > Libraries) and click the Add Content button at the bottom left of the panel. Select Foreground Color, and click Add. Repeat for each color you want to borrow from the image.
4. Bring shapes into InDesign (via Illustrator)
With the magic of CC Libraries, you can bring your captured shapes into InDesign, though if you want live vectors that you can edit, you have to bring them into Illustrator first. Captured shapes placed directly into InDesign from a CC library are converted to PDF and, as such, are uneditable in your layout. So instead, make a quick detour through Illustrator.
Create a new Illustrator document, and show the Libraries panel (Window > Libraries). From the drop-down menu, choose the library in which you saved the shape from Capture. In the Graphics section of the library, locate the shape, and drag it onto the artboard of your Illustrator document.

Then copy it and paste it into InDesign. You may need to ungroup and release compound paths (Object > Paths > Release Compound Path) to get the exact set of objects you want.
From there, use the Pen tool and Direct Selection tool to clean up any distorted shapes, deleting unwanted elements and adding back anything that didn’t quite get captured. In some cases, you may also want to put the captured object on its own locked layer, and then trace it to create clean new paths on an overlying layer.
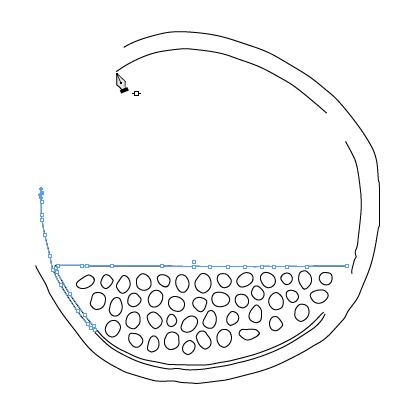
When you’re done with this step, you should have a nice set of vector paths ready to format with fills and strokes.

5. Bring colors into InDesign
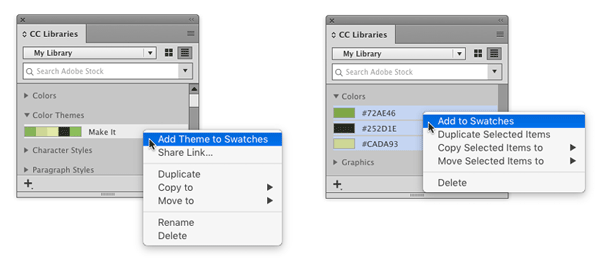
From the CC Libraries panel, select either the color theme you saved from Capture or the individual colors you saved from Photoshop. Then right-click, and chose Add To Swatches.
6. Finish formatting the object
Apply the colors to your object. To match the original graphic in this example, I needed to put the seeds into an area that was colored differently from the rest of the oval shapes.
To do this, first I made the three ovals into a compound path by selecting them and choosing Object > Make Compound Path. I drew a rectangle over the area where the seeds would go, and filled it with the color I wanted. Then I positioned the seeds and grouped them with the rectangle. Finally, I cut the group, selected the compound path, and chose Edit > Paste Into.

7. Add text
Create a new text frame, and add some dummy text. Then choose your own type treatment, or if you want to mimic the original graphic, Typekit can help. Click the Add Fonts From Typekit button at the top of InDesign’s fonts menu.
Once you’re logged in to your Typekit account, use the Classification and Properties filters to find a suitable match. You can also search on specific terms like “rounded” or browse the lists curated by Adobe staff.
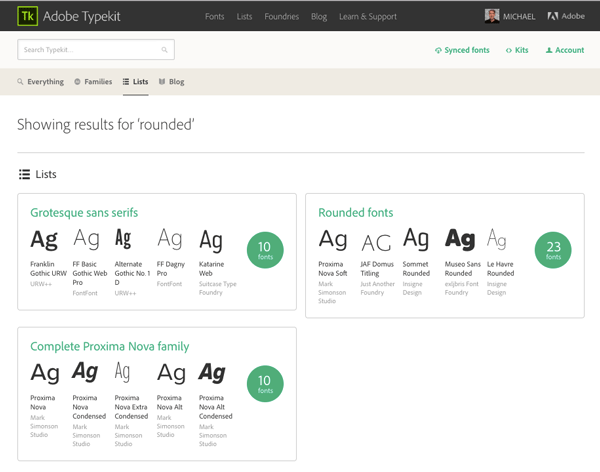
If you have specific words or characters you intend to use, type them in the preview field to see how they look in each font. When you find the one you want, click the Sync button to sync that font to your computer and use it.

8. Adapt and reuse
Now it’s time to tweak the graphic and add your own touches. Experiment with different strokes and fills. Try new colors, patterns, or gradients. Apply different blend modes. Transform objects by scaling, rotating, or skewing. Or reshape them manually by using the Direct Selection tool. Have fun and enjoy your contribution to the never-ending stream of human creativity.

Commenting is easier and faster when you're logged in!

Recommended for you
Making Yearbooks With Jostens Monarch
Scott Citron profiles a company bringing innovation and efficiency to high schoo...

Interview with Guillermo Flores Pacheco, Art Director and Illustrator
The artist behind the Photoshop splash screen shares his process and perspective...

Building Presentations in InDesign
Mark Heaps shows how to craft presentations in InDesign that are both beautiful...