
How to Fix Missing Content Problems in Premiere
Learn what the media warnings in Premiere mean and how to address them

This article appears in Issue 57 of CreativePro Magazine.
Now, look closely. Although the text on the yellow and red warnings looks similar, the yellow placeholder presents a Media Pending message whereas the red placeholder presents a Media Offline message. Neither is necessarily fatal, so take a breath and read on.
In this article, I’ll explain the difference between these warnings and share steps for restoring your assets (told you it would be okay).
Media Pending Warnings
The yellow warning placeholder in Premiere lets you know that your media is pending (Figure 1). In other words, Premiere is in the process of trying to display your assets. As soon as the assets load, your content will replace the Media Pending message.

Sometimes, however, the warning won’t go away. A variety of factors could prevent Premiere from loading your content, so fixing the issue may require investigating multiple solutions. To help Premiere load your assets, you could:
- Work locally
- Disable/re-enable clips
- Make an adjustment to a clip
- Copy content to a new sequence
- Delete media cache files
- Move media cache files
- Delete previews
Work locally
Not working locally is one the most frequent causes of content-loading problems, especially for beginners.
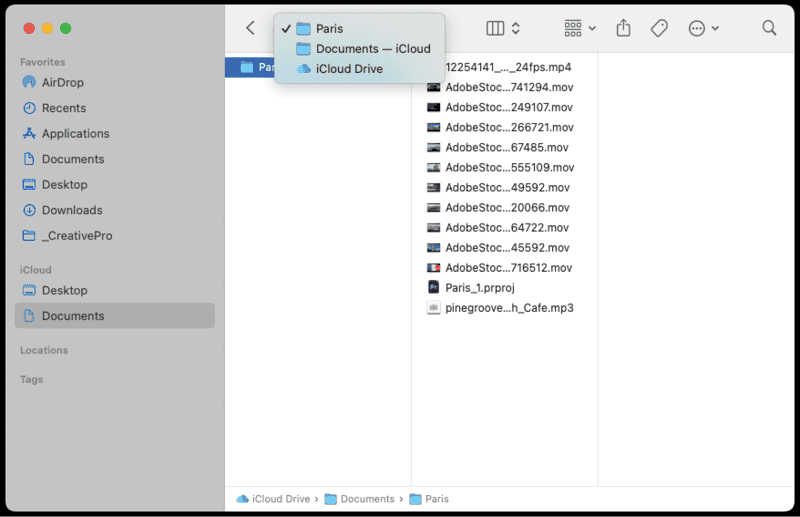
I often see my students mistakenly think they’re working from their local Desktop, Document, or Downloads folders to store their video assets and Premiere projects, but they are actually using those folders on iCloud (Figure 2). Cloud-based file-sharing systems like iCloud, Dropbox, Google Drive, or OneDrive require a local folder for syncing, but they aren’t standard local folders. The speed at which cloud-synced folders can serve your content depends on factors such as internet speed and sync status and can prevent content from loading properly.
If you’re working on an external hard drive, across a network, or from removable media, you could run into speed issues as well as other errors. For more information about working locally, see Adobe’s Knowledge Base article “Networks and Removable Media with Digital Video.”
If your files aren’t on your local hard drive and you’re getting the Media Pending message, try moving them to your local hard drive. You’ll need to relink the files by updating their location; otherwise, the red Media Offline placeholder frame will replace the yellow one.
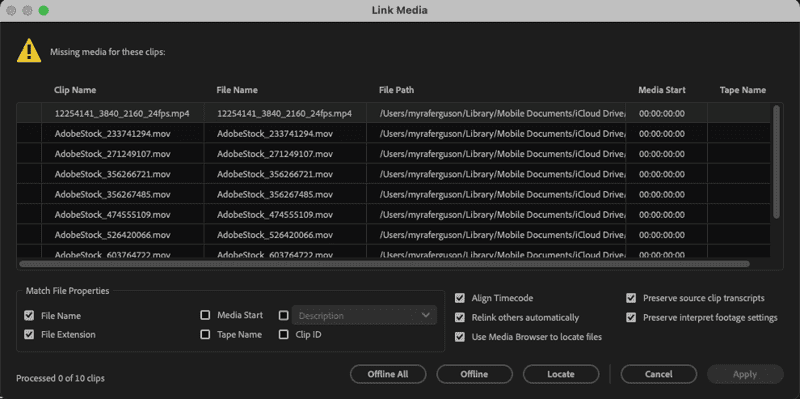
When you need to relink files, the Link Media dialog box should automatically appear with a list of the files that have been moved (Figure 3). You can also go to File > Link Media. Click the Locate button at the bottom, and navigate to the folder on your local hard drive where you moved the files. If they’re all in the same location, Premiere will find the others even if they aren’t selected.
Disable/re-enable clips
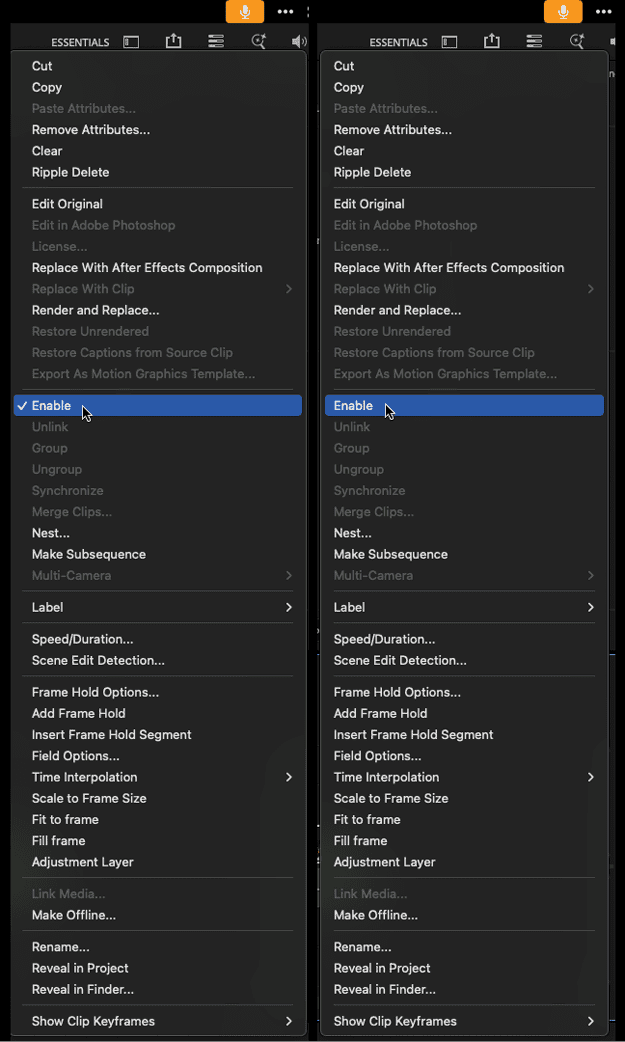
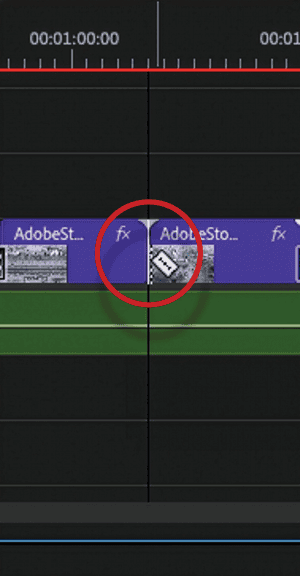
By default, your clips in Premiere are enabled, meaning that they should appear in your timeline. If you see the Media Pending placeholder, then you can try toggling the clip that has been replaced with the yellow placeholder (or all the clips on the timeline) to disabled and back to enabled—like you’re turning them off and back on again. To disable one or more clips, select the clip or press Command/Ctrl+A to select them all, right-click, and select Enable from the context menu (Figure 4). When clips are enabled, there’s a checkmark next to Enable in the menu; disabling removes the checkmark. To re-enable the clip or clips, make sure they’re selected, right-click, and select Enable again.
Copy content to a new sequence
If there is a problem with your sequence that is causing you to see the Media Pending placeholder, try making a new sequence and copying all the content from your timeline to the new sequence.
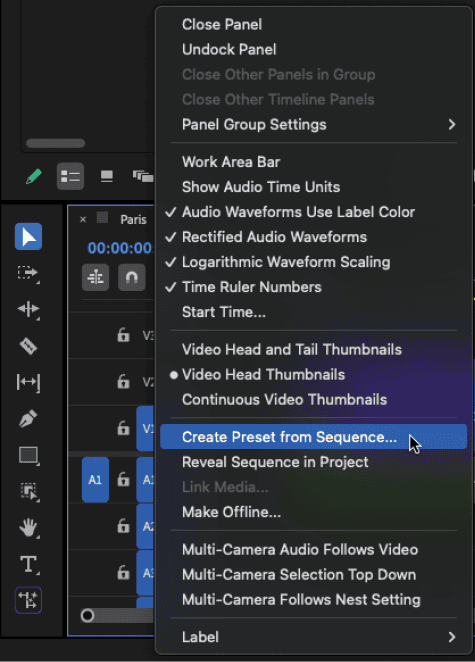
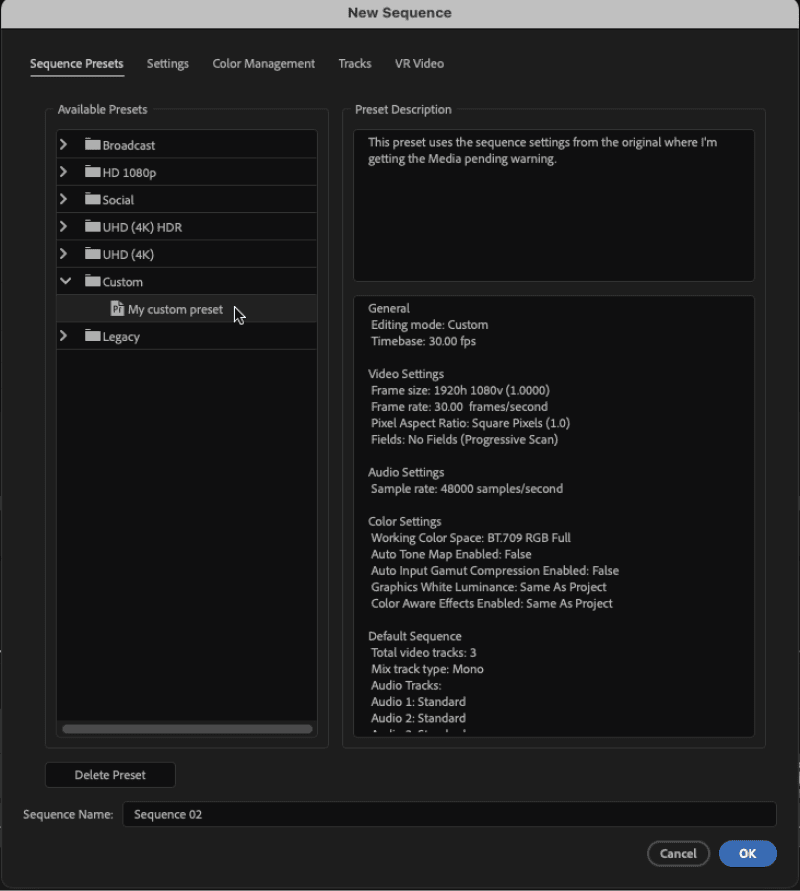
In case the original sequence is corrupt, however, don’t duplicate it (that would bring all its problems along with it). Instead, select Create Preset From Sequence in the timeline’s panel menu to preserve the original sequence’s settings. Give the new preset a name (Figure 5), then choose File > New Sequence to create the new sequence. In the New Sequence dialog box, select your preset from the Custom folder (Figure 6) to apply the settings. Finally, select all the content from the old sequence using Command/Ctrl+A, paste it into the new sequence, and delete the original.
Address media cache files
Building or locating media cache files may be a problem for Premiere, causing it to replace your content with the yellow Media Pending placeholder. Media cache files are temporary files that improve editing performance in Premiere. They can become corrupt, although that’s more likely with larger projects.
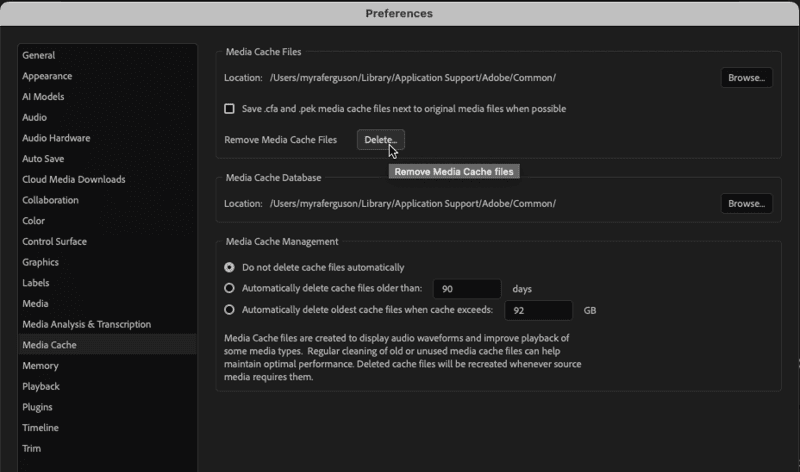
If other solutions haven’t helped to remove the Media Pending placeholder, you can delete the media cache files. To delete them, close your project, choose Premiere > Settings (macOS) or Edit > Preferences (Windows), and select Media Cache (Figure 7). In the Media Cache Files section, click Delete. In the Delete Media Cache Files dialog box that appears, select Delete All Media Cache Files From The System, click OK, and restart Premiere.
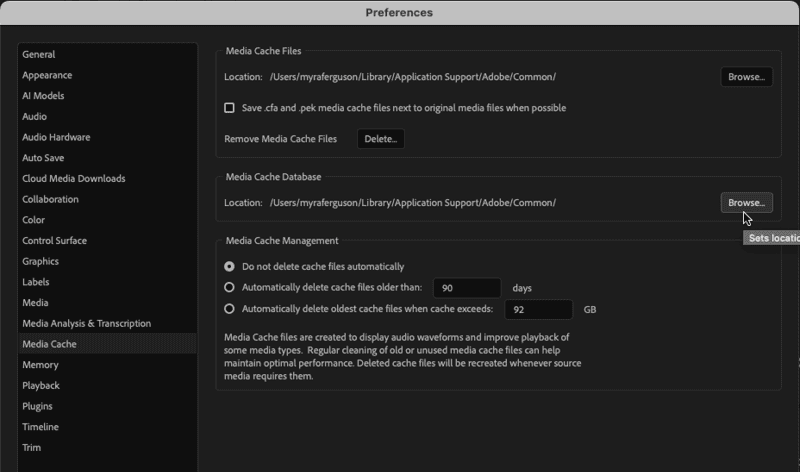
If the media cache files are located on a slow hard drive, you could also try moving them to a faster drive. To move them, choose Premiere > Settings (macOS) or Edit > Preferences (Windows) and select Media Cache. In the Media Cache Database section, click Browse, navigate to the new location, and click OK (Figure 8).
Delete previews
Similar to media cache files, previews in Premiere help display your content faster. They are temporary render files that can become corrupt, especially with larger, complex projects.
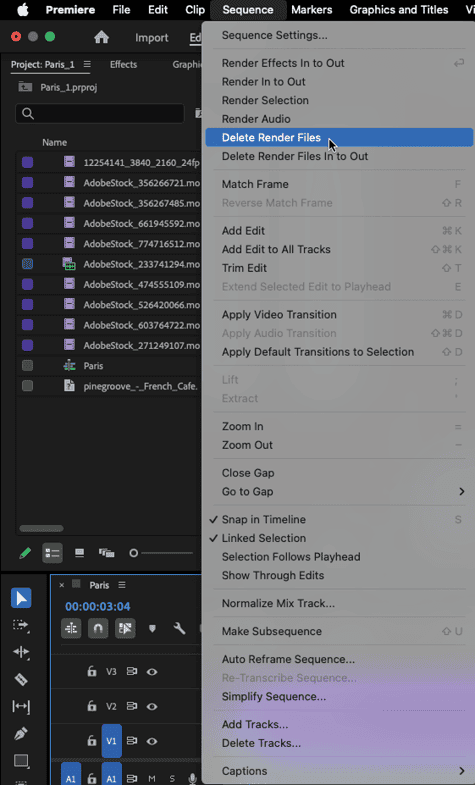
Deleting the previews may help with a Media Pending warning. To delete all the preview files for your currently open sequence, choose Sequence > Delete Render Files (Figure 9). If the option is grayed out, Premiere didn’t render any preview files.
Make an adjustment
If Premiere has trouble processing a clip and shows the Media Pending placeholder, then try making a slight adjustment to the clip that doesn’t make a difference visually, such as splitting it using the Razor tool (Figure 10). Dividing the clip may make it easier for Premiere to process it. This approach is more commonly used on dynamically linked files (peach clips) from After Effects and nested sequences (green clips).
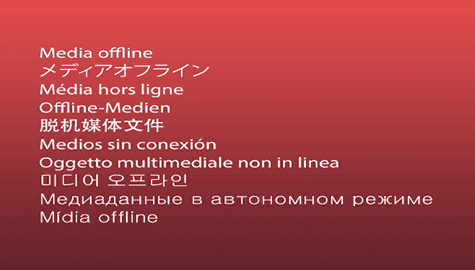
Media Offline
Whereas the yellow Media Pending warning lets you know that the issue Premiere encountered is likely a temporary one, the red Media Offline warning (Figure 11) could indicate something more serious. It means that the link to your content has been severed permanently—but that doesn’t mean it can’t be fixed.
You can:
- Relink renamed or moved files and folders
- Move or relink cloud-based files
- Restore deleted content (sometimes)
Relink renamed or moved files and folders
It isn’t possible to embed assets in Premiere, so all content in your timeline is linked to external assets. Renaming any of your files or the folder containing your files or moving any of the files or folders that contain them will break the link to those files. To address the Media Offline message, you can relink to the content with the updated name in the file path or with its new location. Relinking files uses the same process as when you move them locally to address the Media Pending message (see “Work locally”).
Move or relink cloud-based files
If you haven’t renamed, moved, or deleted your content, check if your content has been saved to the cloud using services such as iCloud, Dropbox, Google Drive, or OneDrive. Unsynced files, internet issues, or other cloud-related maintenance could also break the link to your assets. You can relink to these files where they are in the cloud, but you may need to relink them for each new session. You can save yourself the hassle of relinking at the beginning of each session by moving these files to your local hard drive (again, see “Work locally”).
Restore deleted content
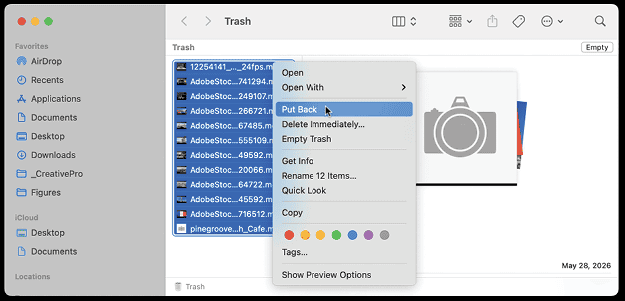
If the content has been deleted, then check your trash to see if it is still there. If it is, you can restore it. To restore content from the trash on macOS, open the Trash from the Dock. Select the file or files you want to restore and either choose File > Put Back or right-click and select Put Back from the context menu (Figure 12).
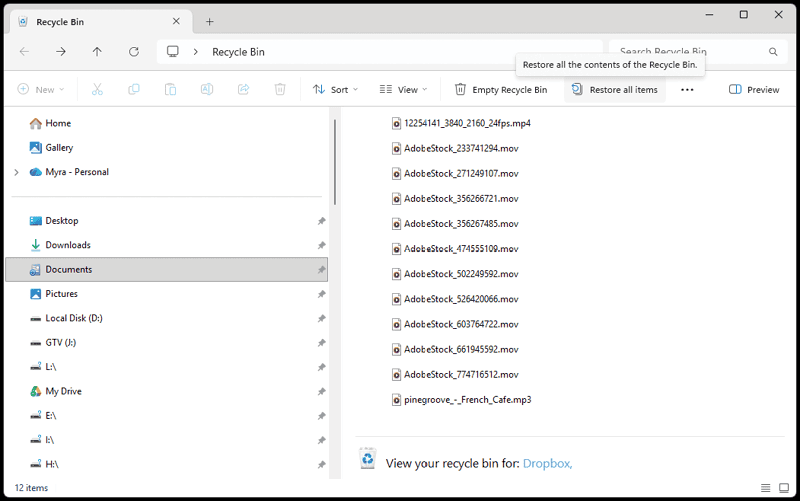
To restore content from the trash on Windows, open the Recycle Bin from your Desktop. From the command bar, either click Restore All Items or select specific files and click Restore All Items (Figure 13).
You can also select the items you want, right-click, and select Restore from the context menu. In either operating system, you can also drag a file out from the trash to another location to restore it. If your content isn’t there, then check if you have a backup. If you don’t have a backup, then you could try data recovery software.
Yellow and Red—No Need to Dread
Unexpectedly seeing the Media Pending or Media Offline placeholder warnings in Premiere can be a little unnerving, especially for new users. These solutions should help give you some peace of mind and ways to get back to creating your projects in Premiere.
Commenting is easier and faster when you're logged in!

Recommended for you

The Digital Art Studio: Patching Text without the Fonts
How do you fix a typo when you don’t have the correct font? After my beloved stu...

New Contest! The Perplexing PDF
Solve this InDesign mystery for a chance at winning a great prize.

Navigating and Customizing the Premiere Interface
Are you a Premiere beginner? Get started and customize your workspace with Myra...