


Here are some quick tips for centering and aligning objects to your InDesign page. Turns out there are several ways of accomplishing this task. Choose the one that suits you best.
Use the Control Panel
Select your object(s) and choose Align to Page from the align options in the Control panel.
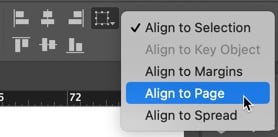
Then use the adjacent buttons to center your selection horizontally and vertically.
Copy and Paste
Select the object(s) and cut it to the clipboard (Command/Ctrl+X).
Press Command/Ctrl-0 (zero) to go to Fit in Window view.
Paste (Command/Ctrl+V).
If you use this method, note that it’s not always entirely precise. Sometimes (depending on the actual percentage view when you’re in Fit in Window), InDesign pastes the object slightly off center—though it’s typically within a hundredth of an inch, so you probably wouldn’t notice the error.
Use Guides
Drag a guide out of the horizontal ruler, select it with the Selection tool, press Command/Ctrl+6 (to jump to the Control panel) and type 11in/2 (or whatever the page height is /2). Then repeat with a vertical guide. Now you have two guides that meet in the center of the page. You can drag the center point of any object (or objects, if they’ve been grouped) to that point and it will snap into place.
Now that you’ve made these center guides, save them to use at a later date. Select the guides on the page, choose File > Export, and pick InDesign Snippet from the Format popup menu. This way, the next time you need those “crosshairs,” you can simply drag the snippet file you made onto your page and the guides are centered automatically.
Use Math
Here’s another method a couple of people suggested: Use the Control palette fields to mathematically position objects (Figure 1). If you want to center one or more objects on the page, select the object(s), make sure the transformation proxy on the left side of the Control palette is set to the center point, and then type “8.5in/2in” the X field and “11in/2in” the Y field. (This is for an 8.5-by-11 inch letter-sized page, of course. Replace those values with your respective page width and height.)
Reader Sandy Campbell suggested an alternate (and very clever) way of using math: “Select the object to be centered and snap it to the bottom right corner of the page. Now in the dimensions, type “/2” after the X and Y coordinates. This will divide them exactly in half, perfectly centering the object on the page.” This works because each side of the page acts like a guide, so as long as you’ve turned on View > Grids & Guides > Snap to Guides, the objects will snap to it.
Use a Script
Olav Martin Kvern, noted InDesign ScriptMaster and my co-author on Real World InDesign, wondered why I bothered with any of these workarounds when a script called AlignToPage ships with InDesign.
You can find it in the Scripts panel (Window > Utilities Scripts), inside the Application > Samples > JavaScript Folder.
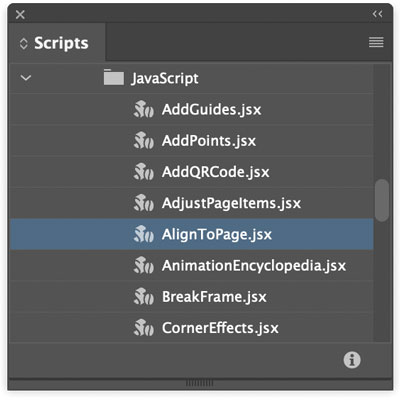
The script is easy to use: Just select the object(s) you want to center on the page, then double-click the script in panel and choose Center from the Vertical and Horizontal options.

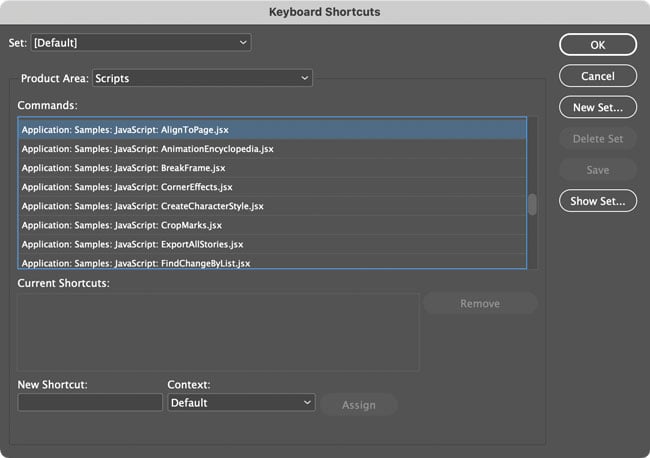
And, of course, it’s easy to add a keyboard shortcut to a script by choosing Edit > Keyboard Shortcuts. Choose Scripts from the Product Area menu and scroll down until you find the script. Select it, and then type your desired shortcut in the New Shortcut field.
Use an Object Style
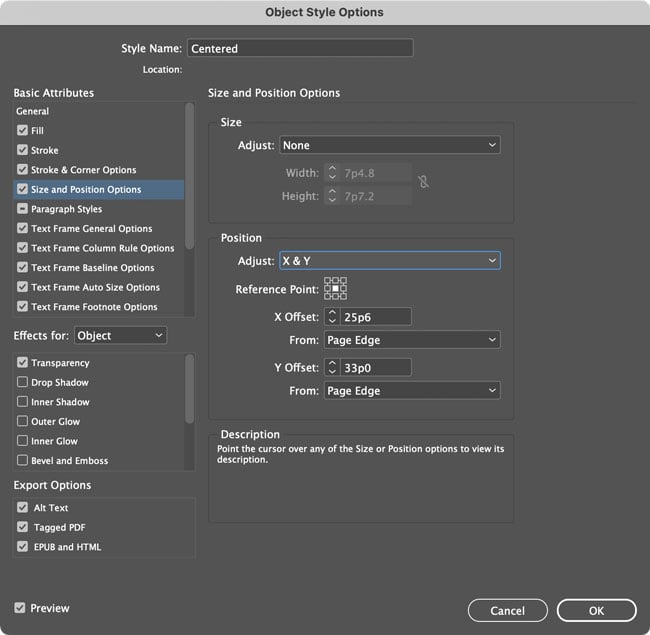
OK, this one’s obviously overkill for one or two objects, but if you regularly have to center stuff, you can create an object style that will do it, using the Size & Position options.
Choose Adjust: X & Y.
Set the Reference Point to the center.
Then for the X and Y Offsets, take the height and width of your page and divide by 2.
Finally, choose From: Page Edge.
Learn ’em all
Learning more than one way to do the same thing may seem frivolous and redundant, but it’s actually a great path toward InDesign mastery. And remember: The more you know, the more fun it is!
This article was last modified on February 16, 2022
This article was first published on March 22, 2021
Commenting is easier and faster when you're logged in!

Recommended for you

Adobe Releases Major Bug Fix for InDesign 2021
The fourth release of InDesign 2021 addresses almost 30 issues related to crashe...

How to Uninstall or Reinstall InDesign CC
Adobe keeps fine-tuning the Creative Cloud app. One recent change that you may h...
A Free Script to Invert Selections
Ever wish you could quickly invert a selection like you can in Illustrator or Ph...