


Use these handy shortcuts when working with guides in Photoshop.
- To move a guide, drag it with the Move tool. Hold Shift as you drag to snap to ruler units.
- To delete a guide, click it with the Move tool and press Delete/Backspace.
- To Show/Hide guides, press Command/Ctrl+;
- To Lock/Unlock guides, press Command+Option+;/Ctrl+Alt+;
- Set the color and style of Canvas, Artboard, and Smart Guides in Guide, Grids, and Slices Preferences. Double-click a guide to open those preferences.
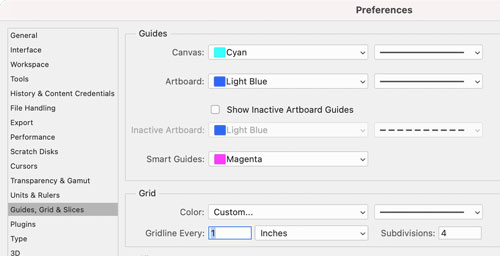
- Click the large color squares on the right side of the Preferences dialog box to open the Color Picker and choose any color for your guides.

- Option/Alt-click a guide to convert it from horizontal to vertical and vice versa.
- While dragging a guide with the Move tool, hold Option/Alt as you release to convert a horizontal guide to a vertical one and vice versa.
- With the Move tool, Option/Alt+Shift-click a guide to open the dialog box where you can position a guide precisely, and change its color.

- To move multiple guides at once, Option/Alt-Shift click the guides and immediately drag without releasing.
- To add a guide at a specific location, choose View > Guides > New Guide.

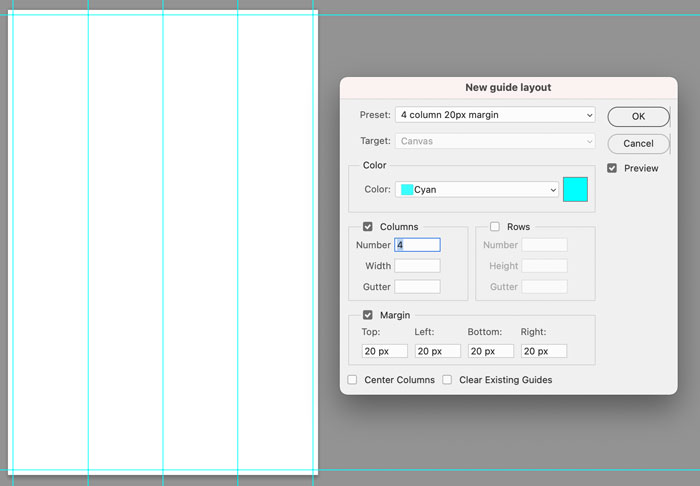
- To add multiple guides at once (including columns and rows) choose View > Guides > New Guide Layout. You can choose a preset or customize the number of columns, rows, margin, color, etc.

- To apply the same guides in multiple images, set them up in the New Guide
Layout dialog box and save them as a new preset. Then use the same dialog box in a different document to apply the preset.

- To create a set of guides based on a layer, shape or type, choose View > Guides > New Guide From Shape.

Commenting is easier and faster when you're logged in!
Loading comments...

Recommended for you

Article
Creating Dramatic Circular Text Effects in Photoshop
Learn two methods for creating circular text in Photoshop, plus how to enhance t...
Article
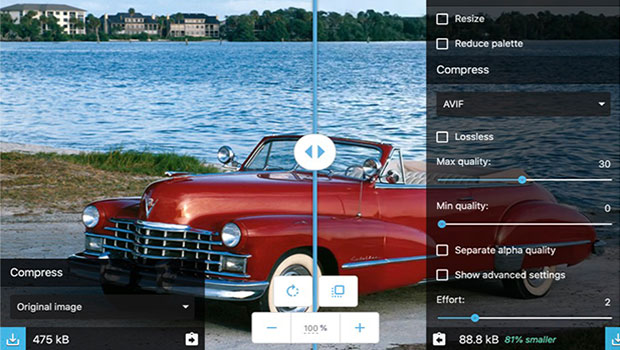
WebP and AVIF: Image File Formats You Need to Know About
There are new image file formats on the way that promise the same image quality...
Article
How to Create a “Stolen Letter” Effect in Photoshop
See the steps for making this fun effect where the subject of a photo interacts...