
Web How-To: Starting up with Streaming Media

Everybody’s doing it. The advertisements say it’s easy. Yet posting video content on the Web stymies many creative professionals, especially those who aren’t naturally conversant in the ways of the Web. In this article you’ll learn some of the basic skills and products necessary for creating, encoding, and playing streaming media.
By taking advantage of the dynamic nature of both video and the Internet, streaming media — digital movie clips played over the Web — can add communication and community to your Web site and enhance the visitor’s experience. Your video content could be as varied as nature footage you shot last summer, a demonstration of a product in action, or a live feed of a local band in concert.
The tools you use to add streaming video to your own site usually walks you through the process step by step. They are no more difficult to set up and work with than your e-mail, word-processing, or Web-browser software. Once you’ve got it all in place, the process of adding streaming video to your Web site is relatively simple, fast, and a lot of fun.
What’s Entailed
The main streaming media platforms are RealMedia, for RealOne players from RealNetworks; Windows Media, for Windows Media Player; and QuickTime, for Apple Computer’s QuickTime Player.
Regardless of platform, you will need to have several products installed on your computer to develop streaming media. These should include:
- Editing software, such as Adobe Premiere or Pinnacle Studio. You will use these products to import source video to your PC, and then edit it on your computer.
- Streaming media encoder software to convert video into a format compatible with one or more of the major streaming media formats. Popular encoding software includes the new Helix Producer, for RealMedia content; Windows Media Encoder, for Windows Media Player content; or Sorenson Squeeze and Sorenson Broadcaster, both of which encode content for the QuickTime streaming media platform.
- Streaming media player, to view your streaming content before you post it. Examples include RealOne Player, Windows Media Player, and QuickTime Player.
- Streaming media server, such as Helix Universal Server, Windows Media Server, or QuickTime Streaming Server 4. A server is also necessary to Webcast your stream. You can obtain these products directly from vendor Web sites and run them on your Web server, or rent streaming server space on your streaming media or Web hosting service.
Understanding Bandwidth
To prepare your video files for streaming, it will help you to have a basic understanding of bandwidth.
When you create your video clip, you’ll need to understand that only a certain amount of data can pass through a network connection per second to your site’s visitors. These limits affect how well your visitors see or hear your sound or video content. If you plan for this, you can make the online experience more enjoyable for all your site’s visitors.
Total bandwidth is the upper limit on how much data can pass through a network connection each second. A 56 Kbps modem, for example, can receive data at any speed up to around 50 Kbps. Think of bandwidth as lanes on a highway. The wider the highway, the faster the traffic can move — but sometimes, there’s congestion. A presentation’s bit rate is analogous to a car’s speed. If the weather is bad or there’s too much traffic on the road, a car may only be able to travel at 30 miles an hour. If there’s lots of congestion on the Internet, a 56 Kbps modem may be able to receive 48 Kbps of data one minute, but 37 Kbps the next.
When you drive on a highway, you have no control over weather and traffic conditions that make you slow down. The same situation is true with your streaming video or audio presentation. You can, however, ensure that your presentation does not exceed the bandwidth capacity of your users. On the highway, breaking the speed limit gets you a ticket. On the Internet, exceeding bandwidth stalls your presentation.
For example, a 56 Kbps connection can still play a presentation encoded for a 284 Kbps connection. But the modem takes several seconds to receive the data that RealPlayer plays every second. In other words, data has to be displayed faster than it comes in over the modem.
Because of this, streaming media software does not begin playback until it receives and “buffers” (stores) enough data to play the presentation without halting. For a long presentation, this may take a few minutes.
Site visitors probably are not going to wait that long for your clip to come up. That’s why it’s crucial for you to design content suitable for their available bandwidth. Just because everyone you know is on a 1.544 Mb T1 line at work and has a broadband connection at home, don’t overlook the fact that many Internet users still have dial-up modems.
Producing Streaming Video
In producing streaming video, there are five basic steps: making, capturing, editing, encoding, and delivering.
1. Making The Video. Because video loses image quality when it’s compressed for streaming, you should always start with the best video source available.
It’s important to use a high-quality source format. Whether you’re shooting a video yourself or digitizing pre-existing material, you should start with a high-quality video format. The best video formats are generally believed to be Betacam SP (or just “Beta”), which is commonly used by video production pros; DV, miniDV, DVCam or DVCPro, and Super-VHS or HI-8mm. Additionally, some video content is sourced from older VHS or 8mm.
You should minimize movement. The less that changes from frame to frame, the sharper the image will appear in the encoded video. That’s because streaming media compression technology reuses existing data when frames are similar. If you ever wondered why a video with relatively stationary subjects (such as a “talking head”) looks better than a music video with rapid scene changes and lots of movement, now you know it’s a matter of compression technology.
Finally, use uniform colors and good lighting. If you use bright lighting at a constant exposure, you’ll be able to keep the foreground detail crisp. Use uniform, dark colors for backgrounds, but uniform light colors (but not whites) for clothing. Complex textures such as paisley and stripes reduce the quality of your image, and degrade your video with unwanted visual effects.
2. Capturing Your Video. You have several choices here. To start video production, you can, for example, capture video by shooting tape with a camera, or gathering recorded content from tape, satellite, or laser disc. If you’re capturing video you should have a video-capture card installed in your computer. A video-capture card allows you to pull video directly into your computer. You need it if you want to broadcast live, or if you want to create a streaming media file directly from your video camera. You can get a video-capture card through mail order, or at higher-end computer stores.
3. Editing Your Video. With your preferred video editing software you can then edit the video as necessary. If you’re broadcasting live, you’ll encode the streaming video directly from the source. Since you will not have the chance to edit your video, you make sure that the production of your event has the technical quality that will sustain it during the Webcast. You also should ensure that this high level of quality begins at the live venue. The time-worn phrase “garbage in, garbage out” applies here. For example, if you place the microphones in inappropriate locations, your live event source feed will suffer from poor quality as a result. Unfortunately, the finest streaming audio encoding tools won’t be able to do much to improve the situation.
4. Encoding Your Video.Once you’ve edited your digital file, or have a live broadcast ready to be streamed, you need to encode your source as either a RealMedia, Windows Media, or QuickTime file. When you do this, you target a network bandwidth or set of bandwidths, and choose a codec for the audio track (see figure 1)
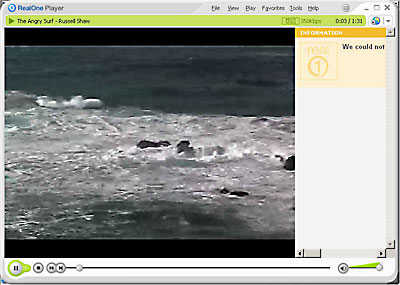
Figure 1: This video of the “angry” Pacific Coast near Mendocino, Cal., was encoded with RealNetworks Helix Producer.
5. Delivering Your Video. With your presentation now prepared, you’re ready to make your clip or broadcast available through your Web site (see figure 2).

Figure 2: Another scene from the California’s Mendocino Coast, prepared for streaming
with Windows Media Encoder.
Most streaming media encoding tools have settings that enable your content to be uploaded to a streaming media server maintained by your hosting service. Often, you will choose this server yourself, and then upload it to your hosting service, as you would a regular file.
If you are planning to hook up to a streaming media server at your hosting service, you will want to know some key information in advance. Ask your service provider for the name and Web address of the server you will be Web-casting your stream from. You will also need to know your user name and password to access your server, as well as your Server Port number.
In Helix Producer, for example, you will enter this information in the Media Server dialog box. The Media Server box has several smaller fields.. You enter the Destination name of your Helix Server address (such as server.myhostingservice.com), the Stream name your audience will use to access your Webcast (such as the title of your clip, followed by the RealMedia .rm extension), the Server Port (80 is the extension), plus the user name, and the password you need to log on to your server at your hosting service.
These are the basic steps involved in creating streaming video. The next series of articles will describe in more detail how to encode and serve streams using RealNetworks’ Helix Producer, Microsoft’s Windows Media Encoder, as well as several encoding tools used by QuickTime streaming content developers.
Russell Shaw is an author, journalist, and multimedia content creator and developer based in Portland, Oregon. He has written three books about streaming media. Russell has worked on a consultant basis for several streaming-media companies, including RealNetworks. His Web site is www.russellshaw.net.
This article was last modified on January 8, 2023
This article was first published on December 25, 2002
Commenting is easier and faster when you're logged in!

Recommended for you

Understanding Mobile First Web Design
As technology evolves, so do the ways we experience information and media. With...

Interview with Sabine Lenz, The Paper Queen
Q&A with Sabine Lenz, who is presenting at CreativePro Week 2025

Typographic Checklist for Top Notch Typography
One of the challenges of setting type, a major component of most design work, is...