
Virtual Photography
Tools and techniques for creating photorealistic objects and scenes that never existed in real life.

This article appears in Issue 19 of CreativePro Magazine.
You may have seen the term virtual photography bandied about more and more over the last few years. According to the hype, this is something entirely new— a disruptive advance in technology that will change Life As We Know It. The truth is, depending on how you define it, virtual photography has been around almost as long as “real” photography.
A well-known publisher once asked me, skeptically, what the point of virtual photography was. “Why would anybody bother?”
Let’s find out.
Getting Real About “Virtual”
“If you wish to converse with me, define your terms.” —Voltaire
Search for virtual photography on YouTube, and you’ll see that a very popular use of the term is to describe an in-game screenshot. There are entire tutorials on how to capture and post-process stills from video games. That is definitely not what we’re going to talk about.
The exact meaning of virtual photography, however, depends on context, so we’d better be clear what we mean.
For our purposes, we call something “virtual” when it appears as if it exists somewhere in the real world, but was in fact created in software. (By this definition, a “virtual meeting” is not virtual. It is a real meeting with real people; only the “meeting room” is virtual.)
If you started to think, “Hey, isn’t that CGI?” you’re right! CGI (computer-generated imagery) is a broader term, and much of what Adobe likes to call “virtual photography” is, by definition, CGI.
CGI, as a term of art, includes plenty of stuff that doesn’t look at all real (think, every Pixar movie), so I’ll use the term virtual photography here to distinguish it from the broader field.
The difference
A virtual image is different from a “real” one because at least some of what it contains was never in the real world for anyone to touch or experience. This differentiates it from composites, in which all the elements are photographs of real objects.
When a created image has the quality and appearance of a single photograph, we call it photorealistic and generally ignore the fact that artists have been creating virtual, photorealistic images for a very long time—with paint (Figure 1).

Figure 1. Photorealism is a genre of painting, and yes, this is a painting!
In films, videos, and photographs or on the screen of your mobile device, parts of a scene can be real but have virtual images overlaid. Think of Who Framed Roger Rabbit? or Pokémon Go (Figure 2). Pikachu and friends, even though you can see them clearly in your device’s camera view, don’t really exist. (Yes, I know. Just accept it and move on.)
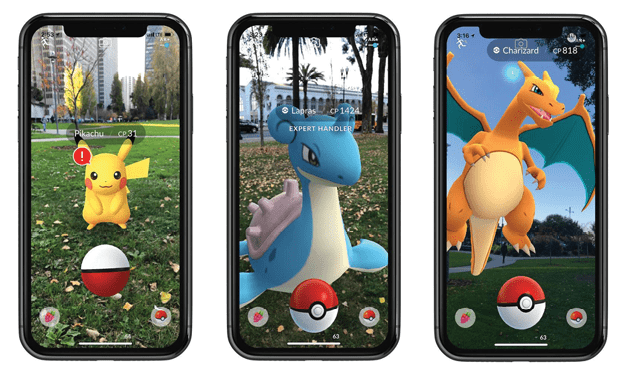
Figure 2. Pokémon characters seen in augmented reality view
When the virtual object is visible in a live camera view, we call it augmented reality, or AR for short. Adobe Aero and Microsoft’s HoloLens are examples of AR tools.
Writing with light
The word photography combines two ancient Greek words that mean writing with light. Whether that light is written on photographic film or a digital sensor doesn’t matter. If something existed in the real world at the time it was captured, that is a “real” photograph.
Almost all commercial or art photographs since the dawn of photography have been adjusted, retouched, or manipulated in some way. Techniques such as forced perspective (your “tiny” friend standing on someone’s hand, or holding up the leaning Tower of Pisa), multiple exposures on a single frame, several composited images, hand-painted alterations, and other techniques have all been part of the photographer’s craft since the 19th century (Figure 3). If you have never searched the term trick photography, I highly recommend it for humbling examples of what people were doing with film-and-plate photography 150 years ago.
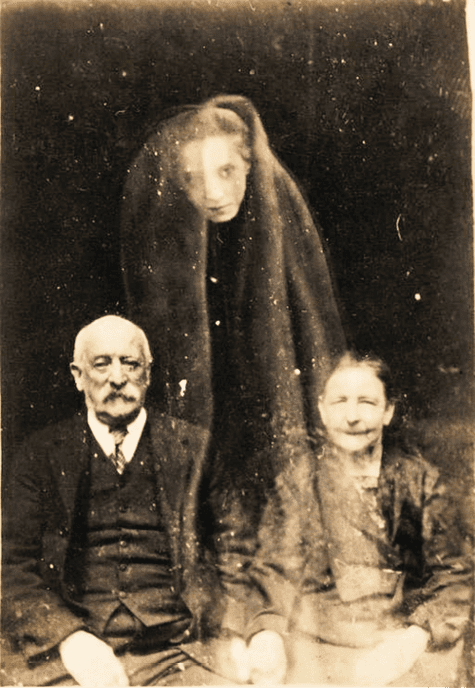
Figure 3. A Victorian-era multiple-exposure trick photo
So, virtual photography is… what, exactly?
When an imaginary object or scene is rendered so that its detail, lighting, texture, and quality make it appear to be a photograph of the real world, it’s virtual photography.
Notice that I didn’t use the word digital in that sentence. Although that is how we use the term today, virtual photography isn’t new. There is an entire field of art, matte painting, that has been crucial to making believable movie backgrounds since the early days of cinema. As recently as the Star Wars movies, it was virtual photography using paint (Figure 4).
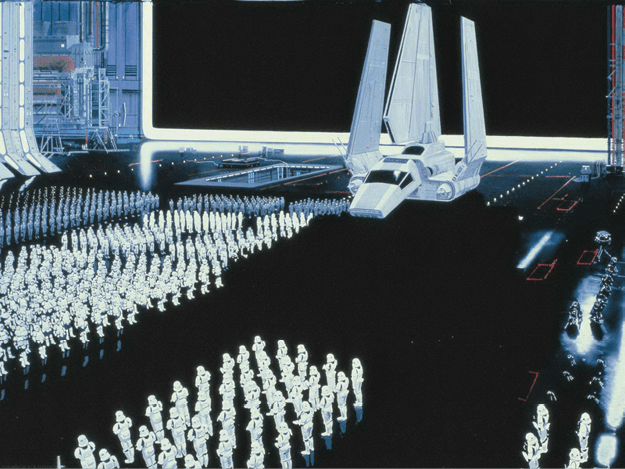
Figure 4. Scenery in the original Star Wars trilogy was hand-painted by masters of the art.
A 1970s advertising photo I admired shows a white horse standing on the far side of a small mountain pond. On the water surface, where the horse’s reflection should have been, is the reflection of a giant bottle of White Horse scotch (Figure 5). The lighting, sky, lake, horse, and reflected bottle all fit so perfectly that the final result was photographically real, without the help of a computer.
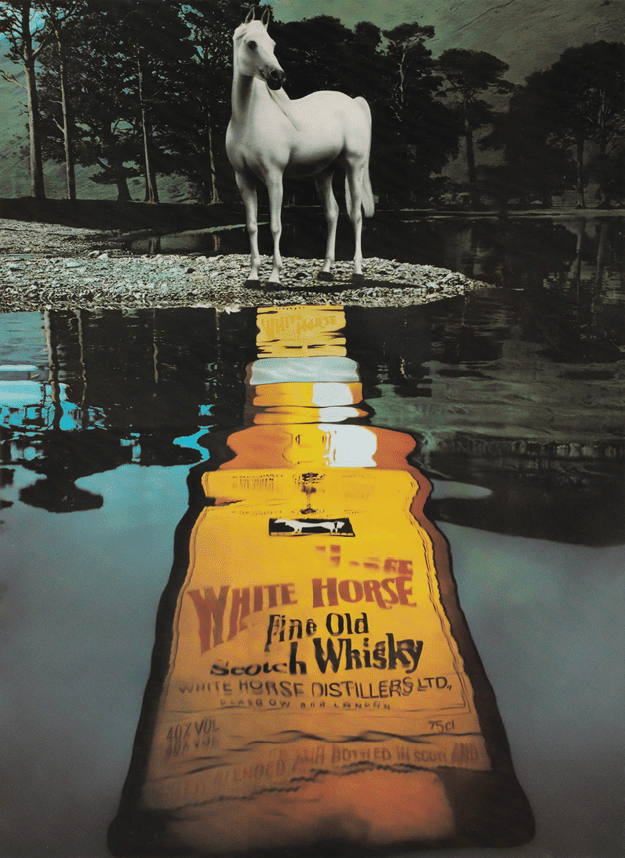
Figure 5. This image is a composite of two 8 × 10 transparencies, one with the horse and another showing the “bottle” reflection (an elaborate “flat” distorted and painted in mirror-image to reflect correctly), composited with the help of a razor knife.
Digital tools
Fast forward to today: Photoshop and its rivals, along with 3D tools like Maya, Blender, Autodesk 3ds Max, Adobe Substance 3D Stager, and others, have opened up a new virtual photographic world. The original definition still applies, but the ease and speed of creation have changed dramatically.
Who Needs Virtual Photography (and Why)?
An advertising photographer’s day rate is at least $3,000, plus expenses, and that’s just for the easy stuff, so the glib answer to “who needs this stuff?” would be, “Anyone who can’t afford to hire a photographer.” True enough, but that doesn’t even scratch the surface.
Common use cases
Here is a by-no-means-exhaustive list of situations where virtual photography has already transformed professional workflows.
Marketing and advertising: Ad campaigns for a product launch are designed well in advance, and the agency or in-house design team often doesn’t have a physical product available to photograph. Designers can use the manufacturer’s CAD models to create fully usable advertising “photographs” before manufacturing even begins, cutting weeks out of the launch timeline.
Even when a physical prototype is available, capturing a perfect image is hard. Setting up a studio or set takes skill, time, and money. Tiny defects stand out in a photograph in the most alarming ways, requiring skilled retouching, whereas a virtual image rendered from the CAD model is always perfect.
Fun fact: Every advertising close-up of a Rolex watch you’ve seen in the last 20 years or so, all those moody images of iThings on the Apple website, and new cars you see in ads are virtual objects generated from CAD drawings. None of them are actual photographs. Figure 6 is an example.

Figure 6. This Rolex isn’t a watch, it’s a virtual photograph of a watch.
The entire field of product photography is going through a revolution, but it started much, much earlier than you probably realized. See the link at the end of this article to explore fascinating insights into this field.
Product design: If Acme Toys wants Disney to approve their Star Wars figurines, a virtual image avoids the time and expense of creating a prototype before the basic design has been approved. This is true for most product development, because it’s far quicker and cheaper to iterate on a design in digital form than building prototypes or scale models.
Sal Velazquez of Mattel gave a fascinating presentation at Adobe MAX 2020 on how he designs and gets approvals on new packaging with no physical mockups or photo shoot.
Exhibition and environmental: Visualizing the final look of graphic displays for a building, a trade show exhibit, or a large interior space can be hard for a client if all they have is a set of individual flat designs (Figure 7).
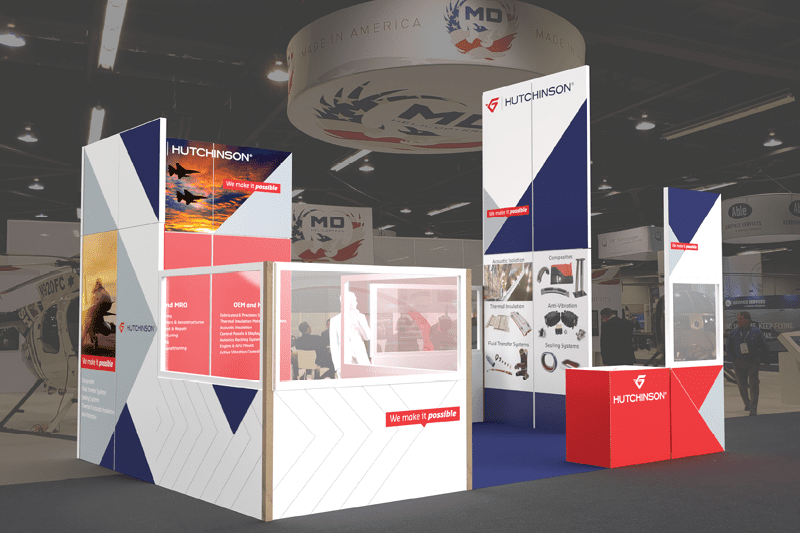
Figure 7. A trade show exhibit stand rendered in Stager for client approval
Except in the case of large institutional or architectural projects, the cost of a detailed model isn’t justifiable, but virtual photographs of the finished item or scene are fast, affordable, and higher quality than a Styrofoam or Foamcore mockup.
Retail and e-commerce: Virtual photography provides product images for websites, mobile apps, and print. Think of all those shopping websites where you flip through the same image of the same item in different colors or fabrics.
Architectural visualization: Architects use photorealistic renders and even “fly-through” animations of buildings long before construction begins, both to get approval from stakeholders and for use in advertising a property to potential tenants.
Film and TV: Photorealistic renders of set designs for approval, or even for use in actual production, can drastically reduce the cost of getting a project off the ground (Figure 8).

Figure 8. Virtual photograph of a television newsroom set
Automotive industry: Nowadays almost all car ads use 3D renders of the vehicle composited into a location photograph or video. In many cases, even the location is virtual and only the people (photographed in a studio) are real.
It’s Not Always 3D
Many websites have ready-made Photoshop templates available for download, either free or at a modest price. Sites like Envato, Mr.Mockup, Mockupworld, and Adobe Stock have hundreds of assets.
Smart Objects rule!
Photoshop templates really took off after Adobe introduced Smart Objects in Photoshop CS2, and all modern templates use Smart Objects to work their magic, including those that members can download from CreativePro.com.
A template like the shopping mall billboard in Figure 9 is great for quickly showing a client how a design will look in the wild. Inside Photoshop, you’ll find the customizable element(s) in one or more Smart Object layers, with easily identifiable names like the [YOUR IMAGE HERE] layer in Figure 10.

Figure 9. Photoshop templates contain Smart Objects where the user can place content.

Figure 10. The Smart Object layer is easy to spot.
Because the template creator has already built in any masking, warp, scaling, or other adjustments, all you have to do is replace the placeholder in the Smart Object.
This is great when you want to show a client a stationery design as part of a new identity program, to add a poster design to your portfolio, or to make a client presentation. Figure 11 is a typical example.

Figure 11. A Photoshop template for demonstrating branding on common stationery objects
DIY templates
You’re not restricted to downloading a ready-made template. If you have a repeating gig that requires periodically changing out a layout in illuminated retail displays or an outdoor venue, for example, you can photograph what is already there, add your design elements as Smart Objects, and transform them to match the perspective and lighting of the scene.
This works great for billboards where, because of how outdoor advertising works, the changing ads are always on the same physical billboards.
Templates make it easy to present alternative designs in a specific context, such as a client’s boardroom or lobby, a store interior, or wayfinding signage for a city.
In Issue 3 of CreativePro Magazine, Steve Caplin published an excellent introduction to Smart Objects and how to use them. It covers what you need to know to work with Smart Objects effectively. I wrote about producing ads for billboards and other large media in Issue 121 of InDesign Magazine.
The disadvantages of Smart Objects
Regardless of how many layers it has, a Photoshop template is a two-dimensional image. While you can change the content of a Smart Object, there’s little you can do to change its perspective, and you can’t spin it around to show it from a different angle.
To take things to the next level, we have to break out into another dimension.
Out of Flatland
Sometimes you need to show an object from different angles or a range of different settings, for a catalog or an ad campaign, or a series of posters or web banners. Or the art director may decide that the product package in the hero shot needs to be rotated. Or the item may not be available yet in physical form and all you have available is a model.
Whatever the reason, this is your cue to create a virtual photograph, and move out of Flatland into the Third Dimension!
A big caveat here: Venturing into this new dimension is like switching from driving a car to flying an airplane. You’ll run into a raft of new terms and concepts and techniques to wrap your head around. I’m going to avoid most of them in this article, but I don’t want to downplay the learning curve.
From model to scene
A key part of virtual photography is the 3D model. A model is a digital representation of an object as it might exist in three-dimensional space. It can be created from scratch in a CAD or 3D modeling program, or scanned from a physical object using lasers or multiple photographs from which a computer algorithm creates a digital representation. Figure 12 shows three models: the lamp, bottle, and mat, in the Stager viewport (akin to the artboard or canvas you’re familiar with from Illustrator or Photoshop).
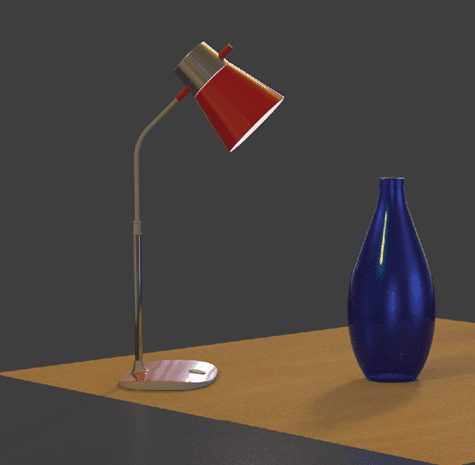
Figure 12. 3D Models in the Stager viewport
A model can be placed, manipulated, and animated in a virtual 3D environment referred to as a scene, which usually includes elements like lights, cameras, backdrops, and other objects that interact with the 3D model and with one another. You can think of a scene as a movie or theater stage: It might be elaborately dressed or minimal, but it provides visual context for the subject of the virtual photograph. Figure 13 shows the models from Figure 12 rendered in a scene with a photographic background.

Figure 13. A virtual photograph showing 3D models in a photographic environment
From scene to photograph
Once the 3D scene is set up, the final step in the process is to output an image (or an animation, but we’ll leave that for another day). This is rendering, and it involves calculating the light, colors, reflections, and shadows in the scene by tracing rays of light from their source through all the ways they interact with the objects in the scene. Ray tracing is what makes photorealistic rendering possible.
Needless to say, ray tracing is computationally intensive and can take a long time to complete on a slow computer. If you plan to do a lot of this kind of work, invest in the most powerful CPU and GPU combination you can afford. Intel and NVIDIA rule this space as of this writing, which is why you’ll see most 3D creators working on Windows or Linux PCs.
The Virtual Photograph
The whole point of virtual photography is to create digital images that look like images of the real world, so you’ll often see 3D renderings composited into real photographs (or virtual scenes that look like real photographs).
Let’s take a look at a simple project to see how a virtual photograph can help in a real project.
Anyone for coffee?
Let’s say that you’re designing the packaging for Caffè Natura, a new hipster-ish line of coffee. You have an idea worked out for the branding, and now you want to present it to the client in a way that shows what the finished article will look like. You also want to be able to create promotional materials, point-of-purchase displays, web banners, and so on ahead of the product launch, so you’re going to need photographs.
Doing it the hard way
You can do this: Find a similar coffee bag, set it up on a tabletop in a studio, light it and photograph it from various angles, review the raw images, retouch the ones you plan to use, overlay the bag with your design in Photoshop in each of those images, then make copies to share with the client.
It’s not going to be easy, and it is absolutely, definitely, positively not going to be there tomorrow.
The smarter, faster, and much less expensive way is to build a virtual photograph.
It starts with a model
This isn’t a tutorial on building 3D models, so I’m going to skip, or at least gloss over, the range of available tools, from CAD programs like AutoCAD and SketchUp to 3D authoring apps like Cinema 4D and Maya.
In many commercial projects you won’t be creating any 3D models. The client may provide a model that you can bring into a staging app like Adobe Dimension or Substance 3D Stager. Often, however, you’ll be able to download suitable models from one of the sites I mentioned earlier.
You may even find that something suitable already exists in Stager or Dimension. Both come with a collection of starter assets that include such common objects as bottles, product containers of various sorts, and other useful models. Figure 14, shows a few of the 86 models in the starter set.
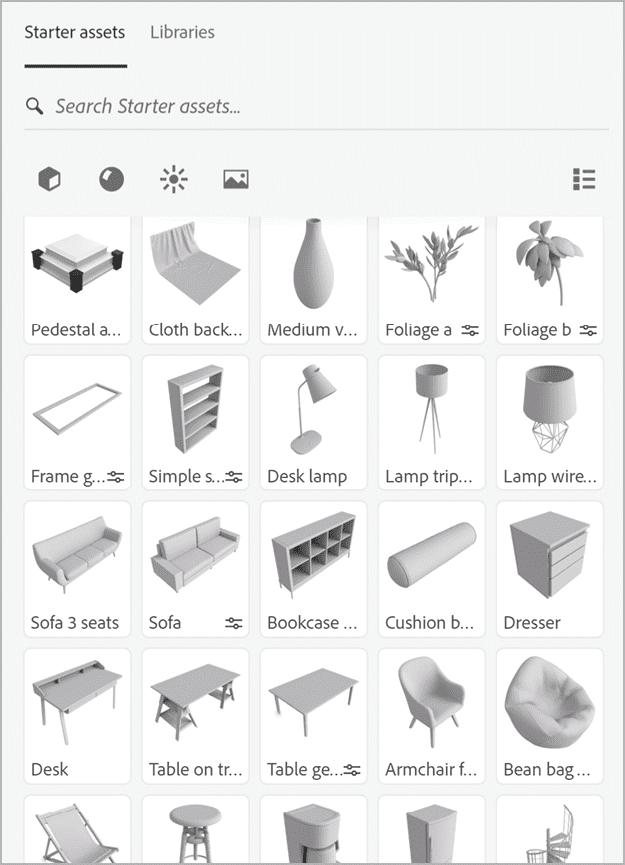
Figure 14. Some of the ready-to-use models that come with Stager
In this case, we’re going to grab a typical coffee bag from Adobe Stock and bring it into Stager (Figure 15). A closer look at the model, Figure 16, shows that it already has a realistic paper texture and enough subtle wrinkles and folds to “sell” it as a real object.
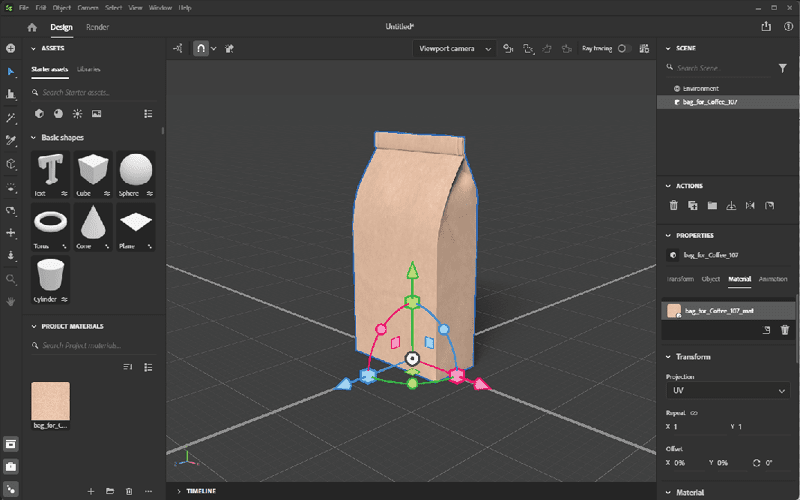
Figure 15. The coffee bag placed in Stager’s viewport
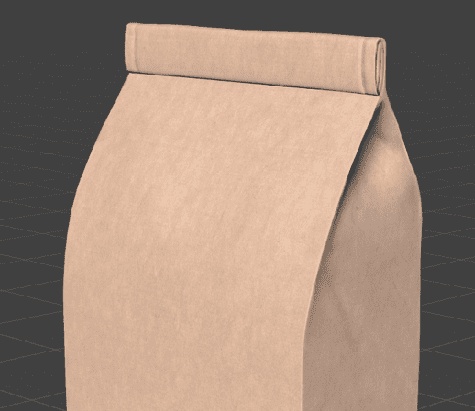
Figure 16. A closer look at the coffee bag showing the subtleties of texture
Our design uses a coffee leaf and bean vector graphic you can find here on Adobe Stock. We’re going to use a couple of items from this collection and recolor them to match the palette of the product branding (Figures 17 and 18).
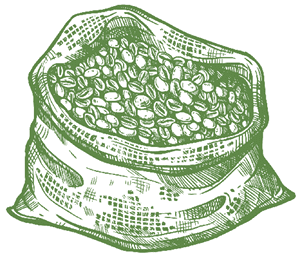
Figure 17. Graphic decoration for the coffee bag, recolored in Illustrator

Figure 18. A coffee leaf drawing for the coffee bag
For the sides, we’ll use another Adobe Stock graphic, this time a seamless pattern (Figure 19). We’ll take that into Illustrator and change the fill to white because it will be reversed out from the brand green.
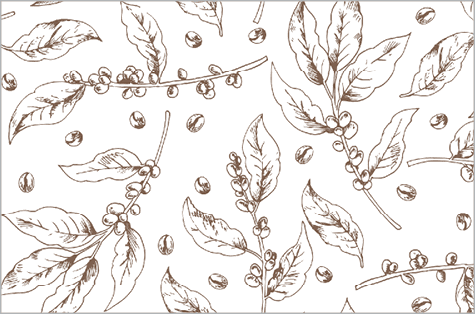
Figure 19. This pattern will be recolored white for the sides of the bag
Applying the pattern
In a 3D app, the way to get your flat design onto the surface of a 3D model is a technique called UV mapping. This needs some explanation.
We’re used to X and Y coordinates from Illustrator, Photoshop, or InDesign. It isn’t a stretch to understand that in 3D space there’s a third, Z coordinate, for height.
Then there’s the surface of an object. Think of a cube. It exists in three dimensions, but its surface has two dimensions. When you “unwrap” it, you have a flat surface with what you might think of as X and Y coordinates. Because X and Y were already taken, early 3D artists had to call them something different, so they chose U and V to represent the horizontal and vertical, and the names stuck.
This flat UV map will wrap around the object so that any point on the UV plane matches exactly one point on the object. In mathematical or geographic terms, it “maps” to the surface of the object in the same way that a flat map of Earth maps to the surface of a school globe.
What a UV map looks like
If you thought, “That sounds horrendously complicated,” you’re right. Spare a thought for the folks who had to figure these things out by hand when computers were too slow and simple to do it for them.
We’re much better equipped today, because 3D apps like Stager can do the heavy lifting by creating and exporting a UV map for our model. The export is an editable Photoshop document as shown in Figure 20. The white shapes show where artwork will appear on the model.
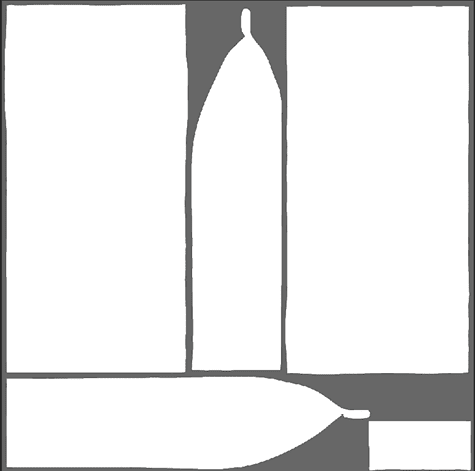
Figure 20. The basic UV map for our coffee bag. White areas map to the surface of the model. The gray areas are out of bounds.
Stager’s exported PSD includes a special hidden grid layer that helps to identify what parts of the UV map will show up on which part of the model. You can see that in Figure 21. Although not vital for simple objects, this grid is often the only way to decipher the UV map in more complex situations.

Figure 21. Every UV map comes with an optional grid to help identify where the artwork will appear.
Even here, the map doesn’t tell you which of the large rectangular panels is the front of the bag and which is the back. For that, you have to save the PSD and apply the image to the model, with the result you see in Figure 22.
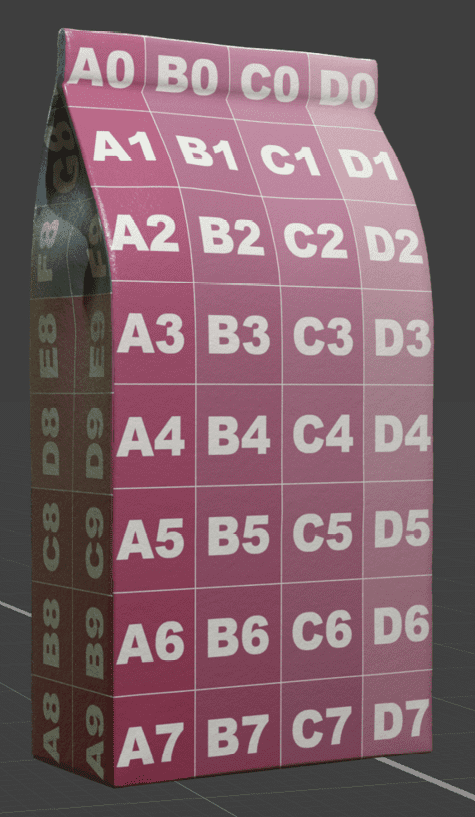
Figure 22. The grid squares show which parts of the model map to which parts of the UV graphic.
Completing the product model
By comparing the numbered squares that show on the model with where they are in the UV map, we can tell which artwork to put where.
Figure 23 shows the artwork applied to the UV map as a series of vector Smart Objects, and (finally!)
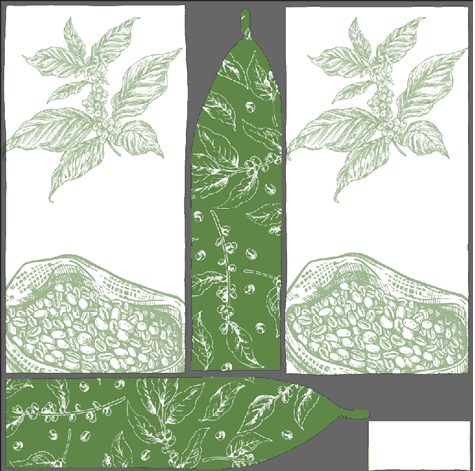
Figure 23. The artwork applied to the UV map
Figure 24, shows it applied to the model. The product label is a separate graphic, a decal in Stager’s terminology, applied on top of the base surface artwork.
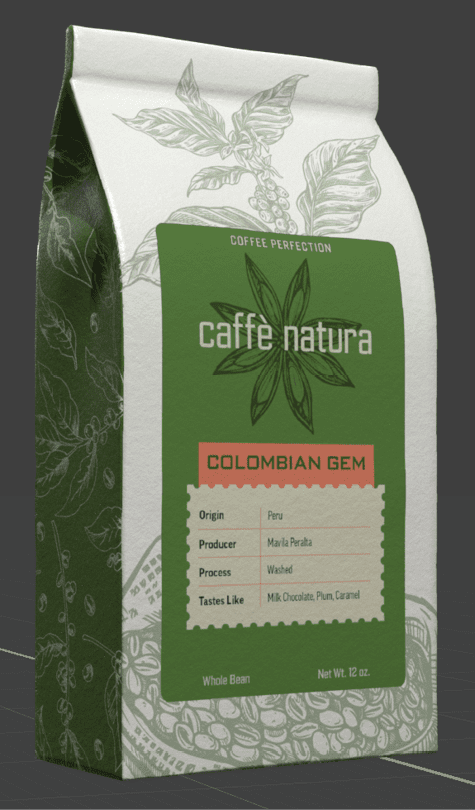
Figure 24. The coffee bag with its graphics and product label
Now we have something that we can place in a photographic setting.
Finishing up
To put the product in context, we’ve added a tabletop (3D object with a wood texture applied), a coffee cup (3D model from Adobe Stock recolored to match the product), and a few coffee beans just for fun, also from Adobe Stock. Figure 25 shows the final result.
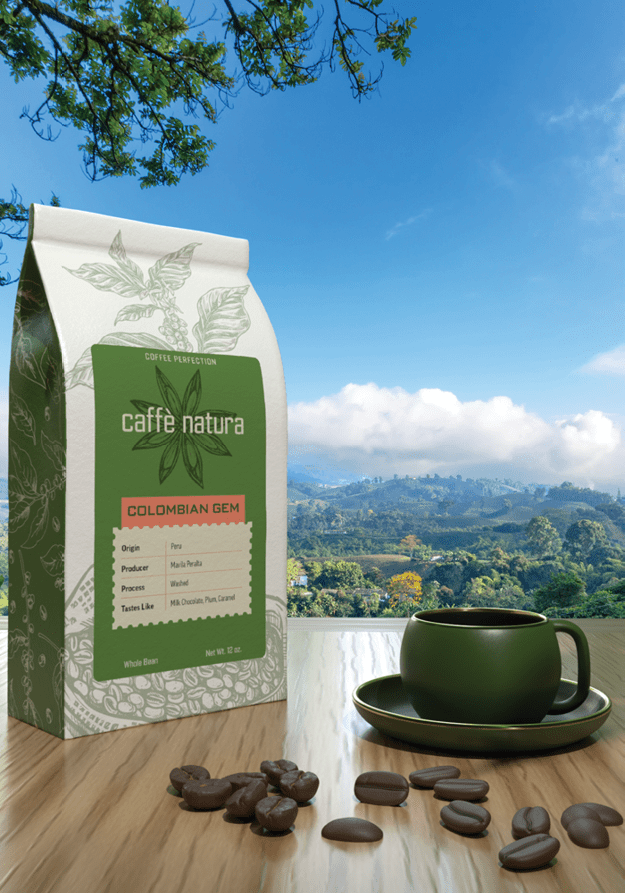
Figure 25. A fully rendered scene for our coffee product
The background photograph is of a Colombian coffee plantation, and I’ve adjusted the lighting in the scene so that it matches the view. I also added a spotlight to illuminate the foreground.
The final render can be a PNG or, more usefully, a 16-bit or 32-bit PSD that comes with several very useful layers to allow you to select different items in the scene for post-production tweaking in Photoshop.
The layer named “Material selection masks” colors each material in the scene with a unique color (Figure 26) so that it can be accurately selected for adjustment with Curves, Levels, or other tools. The Object selection masks layer (Figure 27) does the same for individual objects (notice the cup and coffee beans), and the Depth layer is a grayscale layer for use with Lens Blur.
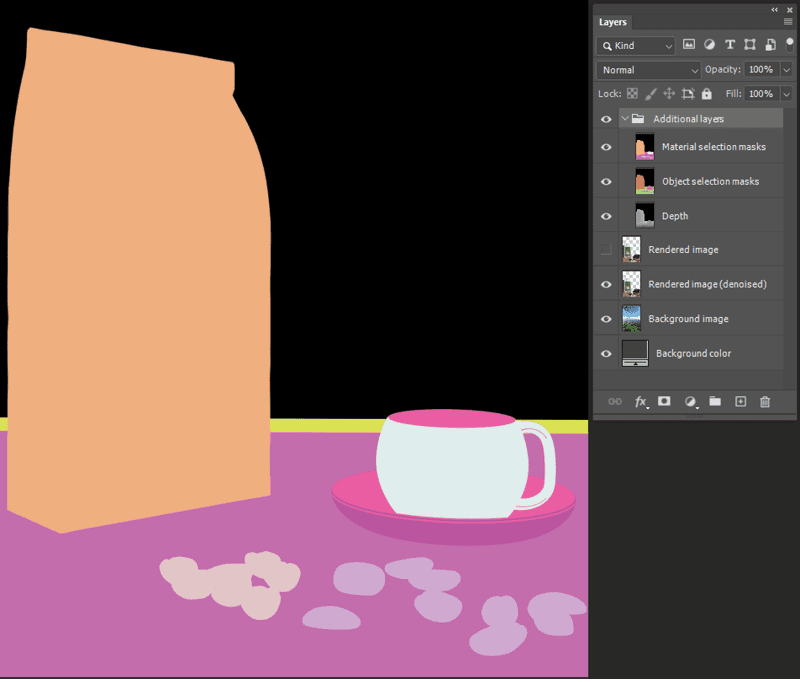
Figure 26. The Material selection masks in the rendered PSD
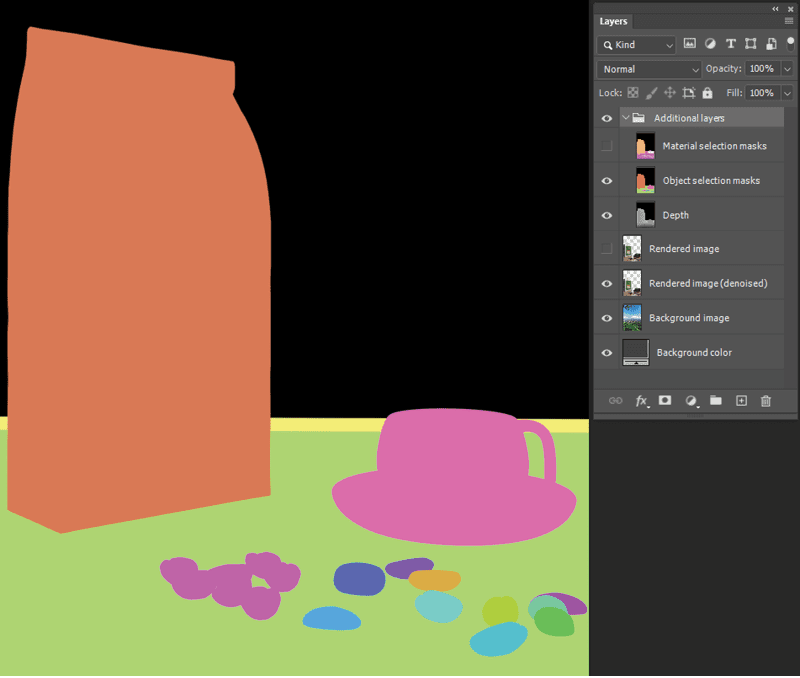
Figure 27. The Object selection masks
More Resources
Now that you have an idea of what virtual photography is and why you might want to know about it, check out these resources to learn more.
British professional photographer and educator Karl Taylor has a superb presentation on YouTube that compares virtual and real product photography from a production standpoint. He demonstrates why you must understand lighting, camera angles, perspective, and all the factors that go into creating real-world images, if you are to create believable virtual photographs. I strongly recommend watching this all the way through.
If you get all the way through this article and Karl’s presentation and still aren’t convinced that you need to learn these skills now, I will happily get off your lawn and not bother you further.
Adobe Vietnam (for whatever reason, it’s not on a US site) has a good introduction to creating product mockups in Photoshop. There is also a well-done Adobe primer on virtual product photography workflow here.
The Value of Virtual
Whether you’re a designer, marketer, or just someone interested in exploring the world of computer graphics, understanding the basics of 3D rendering and virtual photography is only going to become more important. The time to start learning the tools is now.
Have fun learning them. Have even more using them!
Commenting is easier and faster when you're logged in!

Recommended for you

Member-Only Video: Actually, There’s a Script for That
Must-have free and low-cost scripts for InDesign, Illustrator, and Photoshop, as...
Members-Only Video: Using Firefly Boards
Kat Kremser explores the features of Firefly Boards, a versatile tool from Adobe...

Free Webinar: Cross App Power Hour with Illustrator, InDesign, and Firefly
Explore practical AI-powered tools in Illustrator, InDesign, and Firefly that wi...