

In recent CreativePro articles you learned about the many options available to customize strokes. We covered the Stroke panel in detail for controlling a stroke’s weight, ends, and gaps for creating dots or dashes. In another article you learned about the Paintbrush tool, which produces complex stroke appearances that can look like patterns, objects, pen marks or paint brushstrokes. There’s one more tool in Illustrator’s arsenal for editing your strokes: The Width tool.
Starting Out with a Stroked Path
Draw a path on your artboard with your favorite tool – it can be a shape, or a freehand path made with the Pencil or Pen. Set the path’s stroke to a value greater than zero. It’s helpful to have the Control bar showing by choosing Window > Control, and to show the Stroke panel; Choose Window > Stroke, if necessary. I used my drawing tablet to write this word with the stroke set to 5 pt. 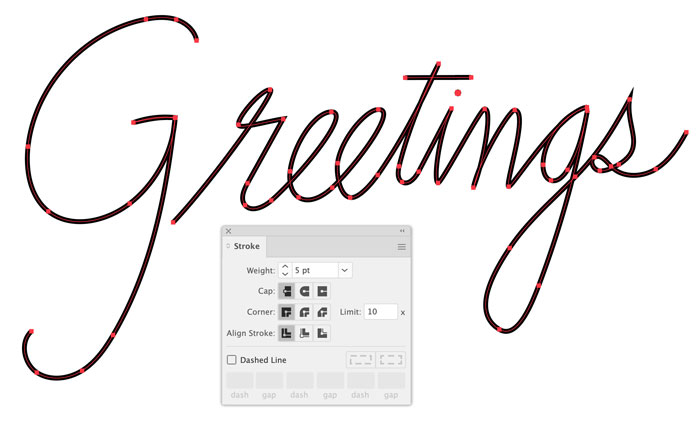
Editing the Width along a Path
Select the Width tool in the toolbar or type Shift+W to activate it.  Hover over your path and notice the + symbol alongside the cursor. Click and drag in a perpendicular direction outward away from the path, or inward toward it. When you release, you’ll have added a width point and changed the weight of your path segment. Dragging outward makes the path bulge, inward makes it taper. Notice how Illustrator eases the transition from the original weight to the width you set at the new point.
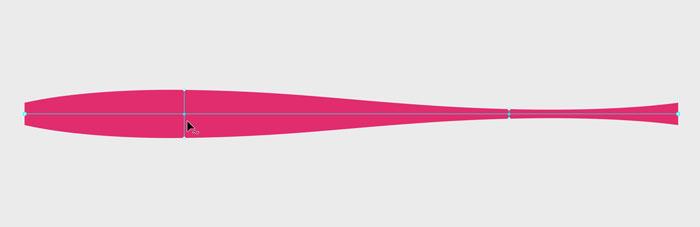
A 10 pt. straight line stroke featuring two Width Points. On the left the
path is widened to 21.5 pt. On the right it’s narrowed to 4.25 pt. The line ends are unchanged.
 By default, when using the Width tool to modify a stroke, the width is altered by the same amount to either side of the path. Hold down the Option/Alt key to drag a handle at either end of a width point to adjust that side only. Width points have smaller diamond-shaped anchors to distinguish them from regular square path anchors. Click and drag the center anchor of a width point or between its anchors to reposition it along the path. Width points cannot cross over each other when repositioned. Hold down Option/Alt while dragging a width point along the path to duplicate it. You can press Delete (or Forward Delete) on your keyboard to remove a width point.
  When you have Smart Guides turned on (View > Smart Guides), hovering over a width point displays its values as shown above. Double-clicking a width point brings up the Width Point Edit dialog box, where you can precisely edit widths on either side of the path and choose whether to adjust nearby width points to ease the transitions. As you work in the Width Options dialog box your changes update immediately on the selected path.
Saving the Stroke Profile
As you add, move, and modify width points along a path, you’re changing the stroke’s profile. You can see the results of these changes in a couple of places when the Width or Selection tools are active and the path is fully selected:
- To the right of the Stroke weight field in the Control bar
- At the bottom of the Stroke panel (Select Show Options from the panel menu if necessary) where it’s labeled Profile
- In the Properties panel, where it’s labeled Stroke Profile.
Alongside the profile in each of these locations is a drop-down menu; Click it to reveal pre-loaded profiles and a Save button at the bottom: 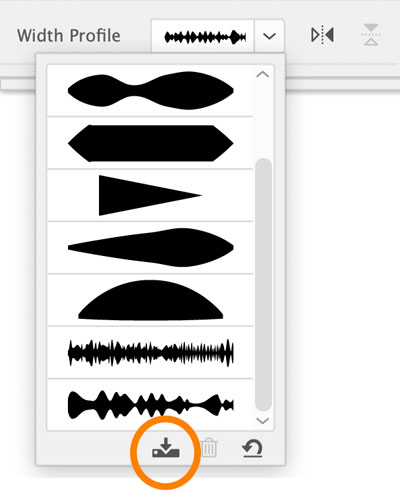 Click the Save button and name your profile. If you’ve placed and modified many width points the profile thumbnail will appear as an undulating shape. Stroke profiles are saved by the application and become available in all your other Illustrator files. Here are my final width edits to the word I drew earlier, underlined with an arc that has the saved profile applied:
  As you can see, the Width tool is perfect for varying the weight of strokes, and quickly giving plain lines and curves character and contrast. With the ability to save stroke profiles, your extensive work with width points can be re-used.
Commenting is easier and faster when you're logged in!

Recommended for you

How Resolution Affects Image Proxy Quality
When working with images into your InDesign layouts, did you ever notice how som...
Three Tips for Using Illustrator’s Pattern Brushes
If you haven’t delved into making custom pattern brushes in Illustrator, y...

Creating Quick Mockups in Illustrator
How to use the Mockup panel in Illustrator to preview what your art will look li...