

The following content is excerpted from The Adobe Illustrator CS6 WOW! Book by Sharon Steuer. Copyright © 2013. Used with permission of Pearson Education, Inc. and Peachpit Press.

To create these stylized science-fiction robots, Raymond Larrett saved extensive tedious rendering by building the robot limbs using a custom pattern brush. Working this way allows him to quickly and easily make alterations to his art by adjusting the weight of the brush stroke, modifying or replacing the various brush elements, or even replacing the entire brush itself.
1. Creating the robot arm parts.
Larrett’s robot arm required four distinct elements: a “shoulder” piece where the arm joins the body, an “elbow” connecting the upper and lower arm, the “hand” (in this case a claw), and an “arm link” segment that replicates as it connects and forms the majority of the robot arm. He created these pieces individually, then turned each into a separate pattern swatch. These swatches become the “tiles,” that together make up the robot arm pattern brush.
To create the shoulder piece, he first modified a shape made with the Ellipse tool. Using the Pen tool, he drew a lighter, unfilled path with a Round Cap for the highlight to complete the shoulder. He then dragged the shoulder art into the Swatches panel, naming it “shoulder” so he would recognize it as he built the pattern brush. In the same way he created the arm link, hand, and elbow swatches for the pattern brush tiles. He made sure that the various pieces were facing in the correct direction relative to the pattern tiles, which run at right angles to the path, before individually dragging each one into the Swatches panel (alternatively, you can select art and click the New Swatch icon, or choose Object > Pattern > Make).

Creating the various robot arm elements, oriented in the outward-facing position that pattern brushes use for their tiles

Dragging objects for pattern brushes into the Swatches panel and naming them
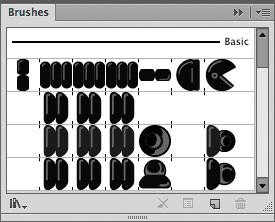
2. Making and using the pattern brush.
To build the pattern brush for the robot arm, Larrett opened the Brushes panel, clicked New Brush in the Pattern Brush Options dialog, and then clicked OK. He enabled the first box in the panel (the Side Tile), and when prompted selected the pattern swatch for the arm link. Next he placed the other tiles in the appropriate position: the shoulder to the Start Tile box, the hand in the End Tile box, and the elbow in the Inner Corner Tile box. He named the new pattern brush Robot Arm, and clicked OK.
To use his new pattern brush, Larrett selected the brush in the Brushes panel, then drew a path for the robot arm using the Pen tool (P). He clicked where the Start Tile (the shoulder) should go, clicked again to place a corner anchor point (necessary for the elbow tile, the Inner Side Tile, to load), and finally clicked to place the hand element (the End Tile) at the end of the path. He also sometimes drew with the Paintbrush tool or applied the brush to a drawn path.

Selecting the Pattern Brush option from the New Brush dialog

Creating a new pattern brush by placing the swatches in the appropriate tiles
3. Creating variations in the pattern brush.
Larrett then modified the art by varying the pattern brush line weight and stroke profiles. To adjust the width of a selected robot arm, he changed the line weight in the Control panel or Stroke panel by clicking in the numeric field and using the up arrow and down arrow keys to increase or decrease stroke weight as desired (adding the Shift key alters the weight by increments of 10). To manually adjust only selected portions of the robot limb, Larrett used the Width tool (Shift-W). Placing the tool over a point on a path, he moved the diamond-shaped handles to widen or narrow a portion of the path. Lastly, he combined some old and newly-made swatches to create additional brushes for other robots’ limbs.

Using the Stroke panel to widen or narrow the pattern brush line weight

Using the Width tool to introduce variations in the width of your pattern brush line
Recombining and building new swatches to create new pattern brushes
Adjusting pattern brush fit
After you’ve applied a pattern brush to a path, you can still scale, flip, and modify its fit along the path. Modify all these settings in the Pattern Brush Options dialog, or manually reshape and scale the pattern by changing the stroke weight or using the Width tool.
Raymond Larrett is a designer, illustrator, cartoonist and raconteur, whose enthusiasm for digital publishing led him to found the Puzzled Squirrel publishing imprint (puzzledsquirrel.com) dedicated to advancing the art of fine ebookery one pixel at a time. He lives and works in San Francisco, CA.
This article was last modified on March 22, 2013
This article was first published on March 22, 2013
Commenting is easier and faster when you're logged in!

Recommended for you

The Digital Art Studio: Illustrator’s New Crop Image Button
The 2017 release of Adobe Illustrator added a new feature you can use to permane...

The Digital Art Studio: 5 Favorite Illustrator CC Features
If you’ve ever experienced a power outage, you’ve also likely found yourself ref...

Pattern Making in Adobe Illustrator
Learn how to create a pattern or edit an existing one by adjusting repeats, vary...