
Using Location Data in Lightroom
Use location tools in Lightroom to pinpoint your favorite photo spots.

This article appears in Issue 12 of CreativePro Magazine.
“Where did you take that?” comes up a lot when sharing photos. It’s a complicated question. Some people are satisfied to learn the city or region, while others (especially photographers) are looking for the exact spot where you stood to get the shot. The where is often as important as the what in the photo.
It used to be far more difficult to assign location information to images. Now we have smartphone cameras in our pockets that automatically record specific GPS coordinates when they capture a photo. Plus, Lightroom Classic and Lightroom desktop include several ways to easily tag images with locations.
Capture Location Data
Both Lightroom apps include ways to define locations for photos, but it’s better if you can capture that data when you’re shooting.
Some camera models include the ability to communicate with your smartphone via Bluetooth: When you take a photo, the phone’s location is transferred from the phone to the camera, which saves the data in the image file.
Most cameras, however, can’t record geographic data at all. My preferred option is to take a snapshot using my phone whenever I stop to take photos with my other cameras. It doesn’t need to be the best image—just one that includes the GPS coordinates of where you’re photographing. Think of this shot as a location Polaroid.
Or you can use the Camera function in the Lightroom for mobile app to take the snapshot, which synchronizes this reference image to your Lightroom library (Figure 1).
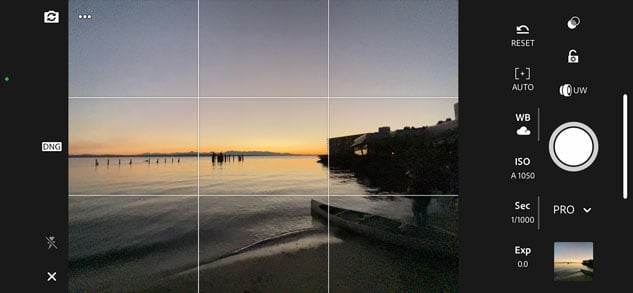
Figure 1. When you use Lightroom for mobile’s Camera mode, the location is tagged and the photo automatically appears in your Lightroom library.
Another alternative is to generate a tracklog using a dedicated app that records your locations over time, such as Geotag Photos Pro 2 (available for iOS and Android). When you begin a hike, for example, start recording in the app, which notes your location at specific intervals. When you finish the hike and stop recording, the app creates a GPX file that Lightroom Classic can use to tag the photos you made (Figure 2).
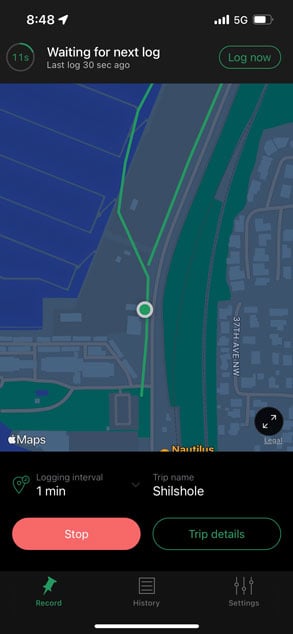
Figure 2. Geotag Photos Pro 2 records your movement and generates a GPX tracklog.
Tip: If you intend to use a GPX file with Lightroom, make sure to first sync your camera’s clock with the app for accuracy later.
Sync Location Metadata in Lightroom Classic
Lightroom Classic includes an entire Map module for working with location-tagged photos. It’s a great way to look at a city and see where your images were taken. First, though, you need to add that data, which you can do in a few ways.
Let’s start with the scenario above, in which you’ve captured a snapshot with your phone and then shot a series of photos with another camera in the same spot.
To easily identify the phone image, look for a little pin icon in the lower-right corner of the thumbnail image to indicate that it has location information. You can also look in the Metadata panel; its GPS field includes coordinates. When you select the phone’s image in the Filmstrip, the location appears on the map (Figure 3).
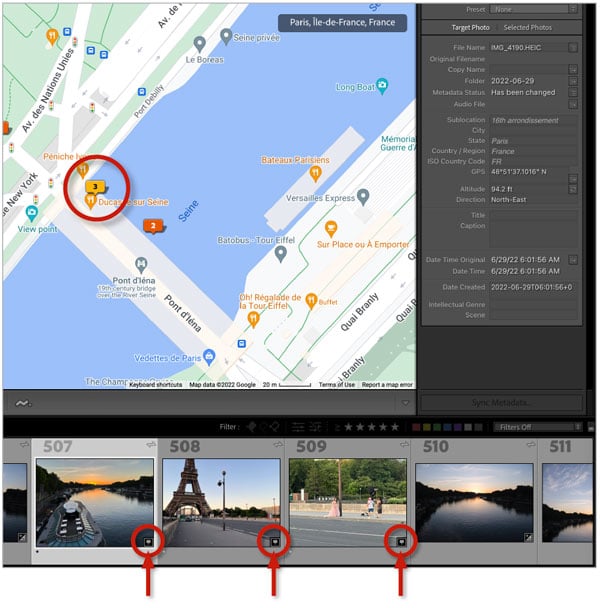
Figure 3. This is one of three iPhone images shot at this location; the pin icons highlighted on the Filmstrip indicate that the images include GPS metadata.
To copy that data to the other untagged images, do the following:
- Select the other images you want to tag in the Filmstrip. Make sure the phone image is still selected and is the primary selection (its border will appear brighter than the others).
- Click the Sync Metadata button at the bottom of the Metadata panel.
- In the Synchronize Metadata dialog box that appears, select the checkbox next to the GPS field. You can also select the Altitude and Direction boxes, too, if that information applies to the images (Figure 4). Make sure no other options are selected here to ensure that the other metadata isn’t affected.
- Click the Synchronize button. The other images appear at the same location pin (note the number on the pin increases).

Figure 4. Select the photo with the GPS coordinates along with the untagged ones, then click Sync Metadata to apply the tags.
You can also copy the coordinates in the GPS field from a tagged image and paste them into the same field of an untagged image. However, that works only one image at a time.
Add Photos to the Map in Lightroom Classic
To find the spot where you took photos, use the Map module in Lightroom Classic if you don’t already have GPS coordinates. The Search Map field is also helpful for narrowing down locations by searching for cities, landmarks, neighborhoods, and other named areas.
With the destination visible, select the images in the Filmstrip, then drag them to that location on the map (Figure 5). A quicker option, again with the photos selected, is to Command/Ctrl-click the spot on the map to assign the images there.
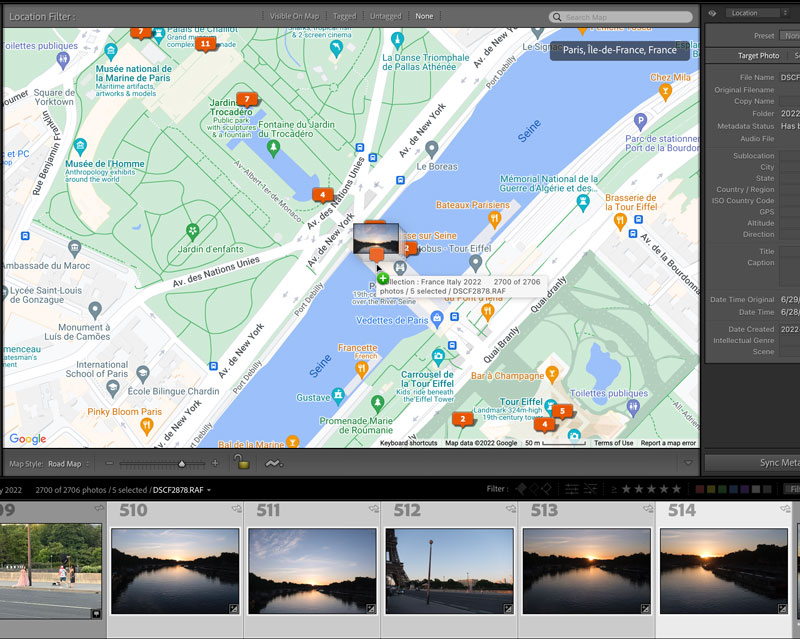
Figure 5. Drag photos from the Filmstrip to a location on the map.
You can also do your search in an outside tool such as Google Maps or Apple Maps. When you find the location, copy the GPS coordinates from there and then paste them into the GPS field in Lightroom Classic.
Import a Tracklog into Lightroom Classic
So far, these techniques work well when you have several photos from the same location. But when you’re on the move, it’s nice to know exactly where an image was captured. This is where the tracklog mentioned earlier comes in.
- In the Map module, choose Map > Tracklog > Load Tracklog and locate the GPX file created by the app you used to record your positions while shooting. The path appears on the map.
- In the Filmstrip, select the photos you shot during that time.
- Choose Map > Tracklog > Auto-Tag Photos. Lightroom matches the timestamps on the photos with the timestamps in the tracklog and assigns locations to the photos (Figure 6).
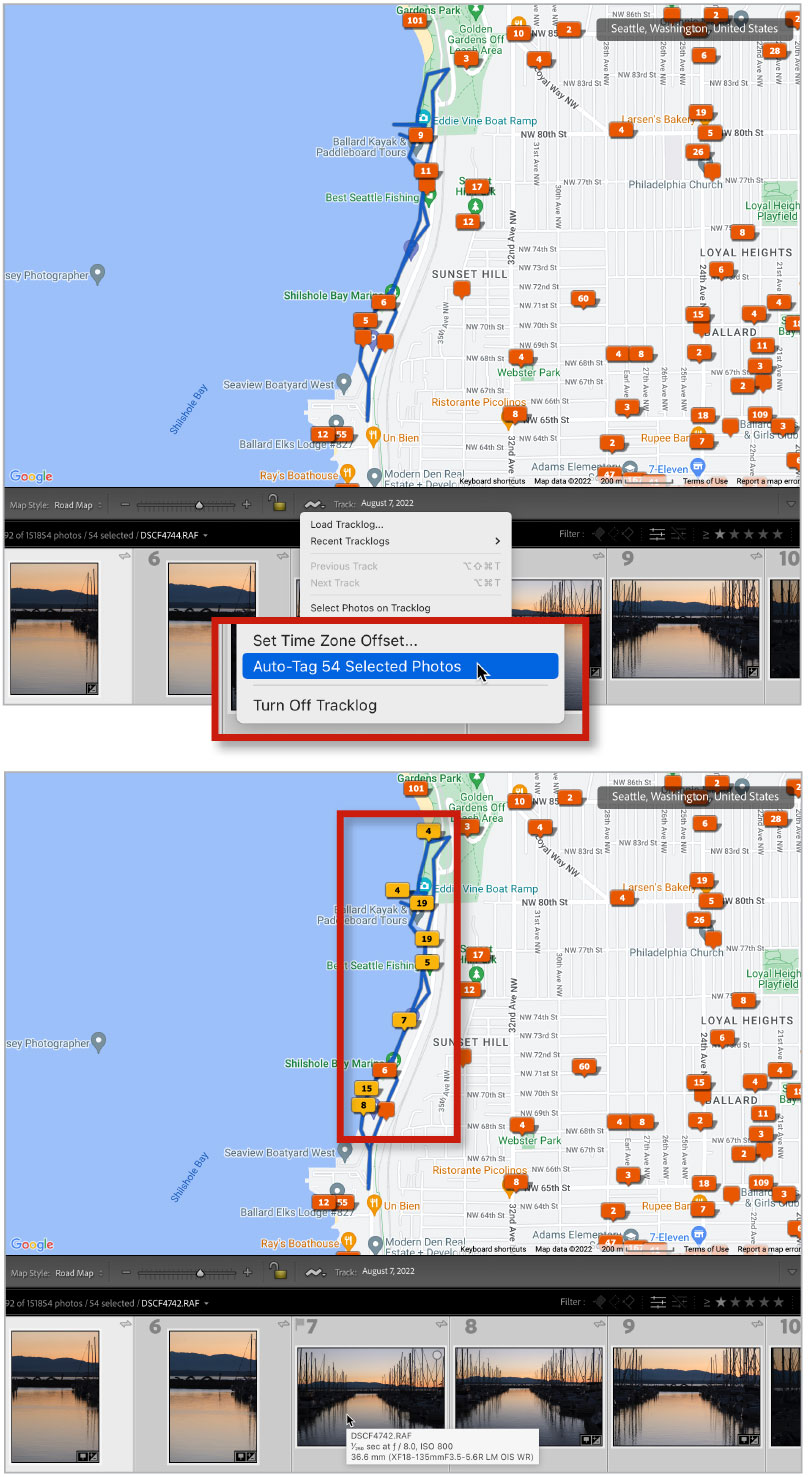
Figure 6. With a tracklog loaded, Lightroom Classic tags photos shot during the same timeframe based on their capture times.
Add Location in Lightroom Desktop
What about the cloud-focused Lightroom desktop? It still honors location data, but in a much more modest way.
Open the Info panel (choose View > Info, press the I key, or click the Info button) and select an image. If the photo includes location information, a small map appears with the GPS field filled in (Figure 7). Depending on the location, the City, State/Province, and Country fields may also be populated. Note that the map is not interactive: if you click it, Lightroom hands off the coordinates to Google Maps in your web browser.
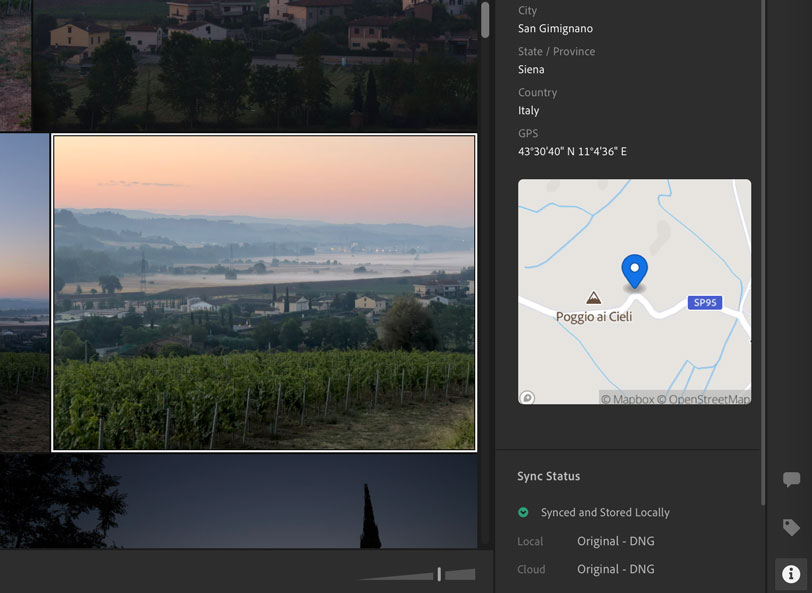
Figure 7. Lightroom desktop displays a small map in the Info panel for tagged photos.
To apply the same coordinates to untagged images, do the following:
- Copy the contents of the GPS field in a photo that has location data. (Or, if you used Google Maps or another tool to find the location, copy the GPS coordinates from there.)
- In the Grid view, select the untagged images you captured at the same location.
- Paste the coordinates into the GPS field in the Info panel (Figure 8). They’re added to all of the selected photos.
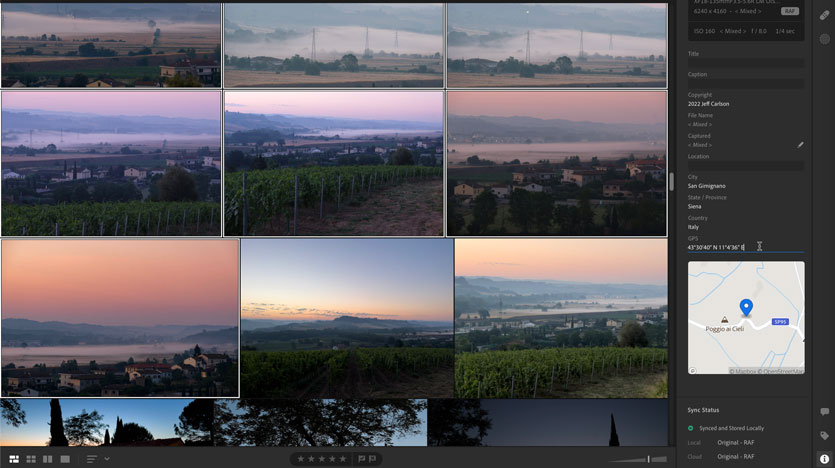
Figure 8. Paste GPS coordinates onto untagged images to mark them at a location.
If you’re in the Detail view (with just one image visible), copying and pasting the GPS coordinates works only on the primary selection, even if multiple thumbnails are selected in the Filmstrip.
The other method of applying location data is to type in the fields in the Info panel. Enter a named place in the Location field, and fill in the City and State/Province fields. (Usually just the Location and one of the other fields is necessary to pin down the right location.) Or, if you don’t need to be that specific, fill in the City and Country fields.
Found Me
Is it necessary to tag your photos with locations? Not always. But having that data can be very helpful when you want to find all the photos you took in a particular city, or if you want to return to a specific spot or share a great vantage point with someone else.
In Lightroom Classic, in fact, there’s one more location feature that’s great for this. In the Map module, select one or more photos on the map and then open the Saved Locations panel. Click the + button to create and name a new location, and then set a radius that encompasses all the photos you shot there. For example, you could create a saved location for Paris.
When you want to quickly view all the photos you’ve made in the City of Lights, open the Saved Locations panel and click the arrow that appears to the right of the location name when the pointer is over it (Figure 9). Then you can drill down to specific neighborhoods or monuments.
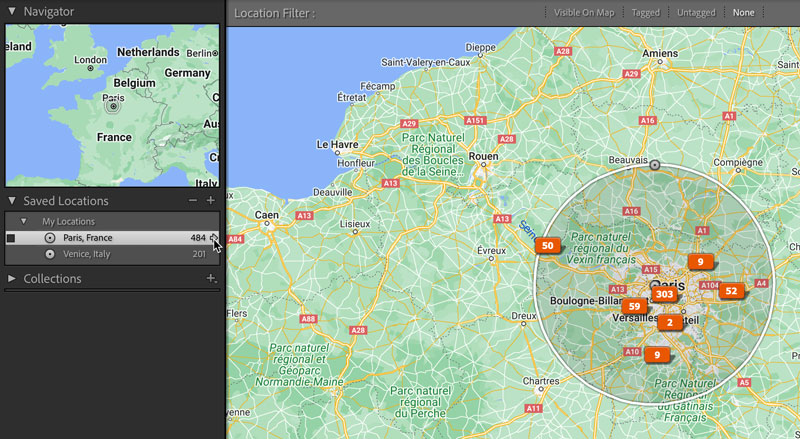
Figure 9. Saved Locations in Lightroom Classic group photos into a general area of your choosing.
The next time someone asks where you shot a favorite photo, you can tell them exactly. In fact, you can export the photo (making sure the option to save location data is turned on), and send them the image so they can use that on their phone’s map the next time they visit.
- This article from CreativePro Magazine is for members only. To continue reading, please log in above, or sign up for a membership today! Thanks for supporting CreativePro!
Commenting is easier and faster when you're logged in!

Recommended for you

Take Your Shot in Lightroom
With a handle on the fundamentals of Lightroom—in its multiple forms—you can wor...
Adobe Releases Lightroom 6 and Lightroom CC
This week (April 21, 2015) Adobe Released Lightroom 6 and Lightroom CC 2015, pro...

A Film Technique for Your Digital Photography
Before Picture Elements (“pixels” for short) were a gleam in some IB...