

Working with links
Working with links is where the concept of InDe-Illu-Shop really takes off. You may be working in InDesign for example, but you’re only a click away from Illustrator or Photoshop.
Modifying links
Let’s say you’re working on a layout in either InDesign or Illustrator and you realize you need to change something in the original file. Both InDesign and Illustrator have Links panels for artwork where you can choose to edit the original image. But it’s much faster and easier to just Opt/Alt-double-click the linked image. It automatically opens in either Photoshop or Illustrator. This is why you always want to launch all three programs when you start working.
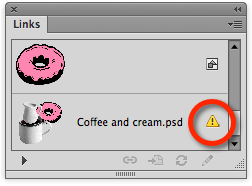
Once the external artwork is modified, save it. When you come back to the layout you’ll see the yellow triangle icon that indicates the file needs to be updated. In InDesign you can choose Update Link or double-click the yellow triangle in the Links panel to update the file. Or you can click the links badge on the file’s frame. In Illustrator, you can only choose Update Link in the Links panel.

Yellow alert symbol on the frame or the Links panel in InDesign
Yellow alert symbol in the Illustrator links panel
Finding missing links
There may be times when a linked file goes missing. You’ll see the red question mark icon for missing images. Inst
ead of putting up “Lost File” fliers in your neighborhood, choose Relink from the Layers panel and navigate to the folder or directory where you think the missing file is located. Once you’ve found the file, choose it. Power tip: In InDesign if other missing images are found in the folder, those too will be updated.

The red missing icon in InDesign’s Links panel and on the frame edge
Embedding files
Both InDesign and Illustrator let you embed files into the document. When you embed a file, you don’t have to send the original to the print shop. Most people don’t do this often as it adds to the size of the file. However, there are times when you do want to embed files.
Embedding into InDesign

Some people will tell you never, ever to embed an image into an InDesign file. But let’s say you have only one image, like a corporate logo, in the file. You might want to embed the file in the document instead of needing to maintain a link to an external file. A file like a logo is small enough that you can embed it without problems.
When you embed a placed file in an InDesign document, (choose Embed Link from the Links panel menu), all the information is contained inside the embedded image. The image is listed in the Links panel, and be displayed with an embed icon. But the embedded file is still enclosed in a “protective shell.” You can’t go into to modify the individual colors, paths, or layers in the file. You need to unlink the file, (choose Unlink Link from the Links panel menu), and open it in Photoshop or Illustrator.
Embedding into Illustrator

Illustrator has the ability to embed and unembed files like InDesign and offers some additional options when working with layered Photoshop files. If you place a layered Photoshop file and keep the Link checkbox enabled (the default setting), then the image comes in just like InDesign. All the layers are contained together. You can embed or unembed the file. You don’t have the option to re-link to the original file, but you can just write over the original.

The Links panel in Illustrator with a file embedded in the document as well as linked to an external file
Placing or pasting into Photoshop

I don’t know many people who use Photoshop as their main page layout program. I did meet a book cover designer who had created a Photoshop files with upwards of 200 layers. He found it was too difficult to work with that placed image in InDesign. He also wanted the flexibility to put text between the layers of the Photoshop document. For him, Photoshop was the best layout choice.
Vector smart objects
We’ll cover this topic in more detail in a future article but for now, just recognize that when you place or paste Illustrator artwork into Photoshop, you have the option to choose a vector smart object. But you can’t create a vector smart object using the Place command in Photoshop. You have to paste the artwork. Vector smart objects are almost like placing linked images into InDesign or Illustrator.
A vector smart object comes into Photoshop on its own layer. If you double-click the layer, it opens Illustrator where you can edit the document. However, unlike the linked files in the other programs, the actual vector information is stored within the Photoshop file—not as a separate Illustrator file. So you can send the Photoshop file to someone else and they can edit the vector information without needing an external file.

A vector smart object thumbnail in the Photoshop Layers panel
You can create vector smart objects by pasting Illustrator or InDesign artwork into Photoshop. However, both types of vector smart objects are edited in Illustrator. Photoshop treats the InDesign artwork as if it came from Illustrator.
In conclusion
Understanding how to get files in and out of the other programs can help you decide which application to use as your page layout tool. Then you can confiedntly place or embed files from the rest of InDe-Illu-Shop.
This article was last modified on October 21, 2013
This article was first published on October 21, 2013
Commenting is easier and faster when you're logged in!

Recommended for you

Download Second dot-font Book for Free
From digital to print to digital again—that’s the path John D. Berry...

Free Add-a-Page Script
InDesign expert Peter Kahrel wrote a free script for InDesign users that solves...

Enfocus' Free, Popular Enhancing Your PDF Workflow Seminar Series for Designers, Printers & Publishers Continue to be in Demand
Enfocus, the world leader in PDF quality management solutions for the graphic ar...