

Editor’s Note: This article is part of a 4-part series on using Alternate Layouts and Liquid Page Rules. Read the other articles here:
Part One
Part Two
Part Three
Well, my little chickadees, this week I’ll be covering the last of InDesign’s Liquid Layout Rules: Guide-based. This rule is a bit contradictory in that in theory it’s so simple, yet in execution it can be a little mind-boggling. It’s certainly not the easiest to put into words, but I hope it becomes apparent with visual examples.
With the Guide-based rule, you create special Liquid Guides (which we’ll discuss in just a few moments) that tell InDesign to stretch or constrict page objects, as if they were a rubber band. A Liquid Guide spans the entire length or width of a page and will affect every single item that it touches. A vertical guide will expand an object, such as a text frame, horizontally, while a horizontal guide will expand the object vertically. And because Liquid Guides will affect every object they touch, you may need to get creative with their placement, or with the sizing and position of your object frames. Sounds confusing, right? Don’t forget that like the previous rules we’ve discussed, using the Page tool is the best way to preview results of your page and object transformations.
Liquid Guides
Now, about those special Liquid Guides. What makes them so liquid, you’re probably asking. Even if you didn’t, I’m still going to tell you. The guides aren’t liquid, but they do control the fluidity of the items they touch when using the Guide-based Liquid Layout rule.

Setting both vertical and horizontal Liquid Guides on a text frame will grow or shrink it both horizontally and vertically.
To create a Liquid Guide, you have a few options. The first way is to create a guide the normal way—either by dragging it out from the rulers, or by double-clicking on the rulers—or you can always convert an existing guide. For guides destined to be Liquid Guides, you probably won’t be concerned that it sits at exactly 4 inches from the page edge, so much as making sure it touches the items you want to affect. Using the Selection tool, select all guides you want to convert, then right-click to bring up the contextual menu. Move down to Guide Type and choose Liquid Guide. Alternately, you can click on the little icon that appeared on the guide when you selected it. That lets you toggle between a Ruler Guide (guides we’ve been using since the dawn of time) and a Liquid Guide.

Setting the guides to be Liquid or Ruler Guides.
If you happen to have the Page tool active when you’re ready to start adding Liquid Guides, things get even easier. Any guides you create with the Page tool active automatically become Liquid Guides. You can still toggle them back to a Ruler Guide using either method above. Use either the Selection tool or the Page tool to move a Liquid Guide. If you need to delete a Liquid Guide, you can just select it with the Selection tool and hit the Delete key. However, if you are currently using the Page tool, you’ll need to add the Command/Ctrl key to the routine to clear the Liquid Guide from the page.
The Results
I can hear you squawking now, “I don’t quite get it…we need those visual examples.” Well, I wouldn’t want to leave my dear nestlings without the worm I promised you. The following examples show how objects are—and are not—affected when you apply page transformations.

You may notice that, if you constrict the frame across a guide too much, your item suddenly becomes full-size again. I like to think that the frame felt like it couldn’t shrink up anymore and simply gave up. Truth is, I’m not really sure exactly when and why that happens. The guides move along with the page transformations, keeping a set proportional distance from the original page position. I assume the reset on page items comes from the position exceeding a set limit. Or something as equally math-induced and head-scratching to a designer like me, or yourself. I’ll just remind you here that the Page tool is your friend for previewing results, and that no Liquid Layout rule is 100% magic.

Image frame with Auto-fit off (left) and on.
Another thing to point out when using the Guide-based rule is that the guides will adjust the size of the frames and reflow text in the process, but won’t affect the content fitting in image frames. If you want your images to continue to fit as they have inside their frame, you’ll need to set the image to Auto-Fit. You can select the image with either the Selection tool or the Page tool and choose Auto-Fit in the Liquid Layout panel. If you’re using the Selection tool, you can also select the option in the Control panel. With this option turned on, images will continue to adhere to any fitting options you’ve set as you make page transformations.
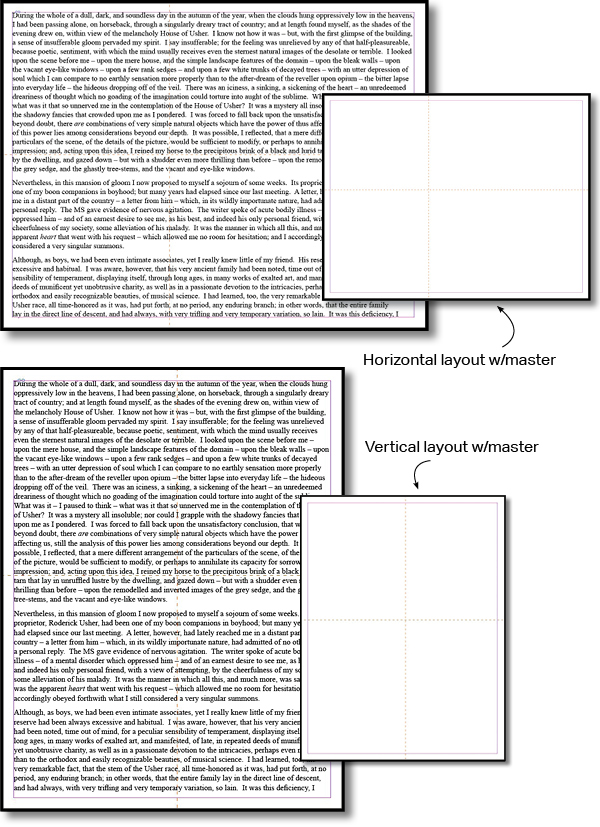
Using Master Pages
One of the advantages to using this rule is that, unlike the Object-based rule, it’s easy to set the controlling devices (in this case, Liquid Guides) on a master page, to save having to do the work on every single document page. If you go this route, the main thing to remember is: Choose the rule on the page that has the guides you want to use. So, if you’ve set up your guides on the master page, set the Liquid Layout rule to Guide-based while you are on the master page. That lets InDesign know that the guides on the master page are doing the controlling. In addition, on each document page with that master applied and that you want to be in control of the transformation, you’ll need to also apply a rule. On the document page, choose Controlled by Master. The page will look to see what rule is being used on the master and the Liquid Guides there will dictate the transformation results. In addition, when creating an Alternate Layout remember to choose Preserve Existing to keep all these rules intact.

Setting the Object-based option on the master page (left); and choosing Controlled by Master on the document page.
You might decide you want to use the objects from a master page, but don’t want to use the guides—or even the Guide-based rule—from the master. Apply the master to the current page like usual. If you’re changing up the rule completely for this page (opting for Object-based instead), choose that rule in the Liquid Layout panel and work with objects as necessary for that rule. If you still want to use the Guide-based rule, with a new set of Liquid Guides, choose Guide-based in the panel. Since you set the rule on the document page, the guides placed on the master will have no effect. Place new Liquid Guides as needed on the document page to get results. You can also selectively override and “borrow” guides from the master with the usual Command/Ctrl+Shift+click command using the Selection tool.
Liquid Guides are transferred to new master layouts.
For most pages I create, I find it easier—though more time consuming—to use Liquid Guides on my document pages, since I often don’t know exactly where page elements are going to sit. If you have a consistent layout, putting guides on the master may make more sense. One situation where I opt for master page placement of Liquid Guides is when I have pages of text, inside text frames that fill to all page margins. Why wouldn’t you use a Primary Text Frame to accomplish this? Well, I could, but creating a new Alternate Layout creates a new master, where I then have to adjust the placement of the Primary Text Frame. And sometimes, I’ve already got a Primary Text Frame on the page and I’m stuck with using a regular master text frame for my text flow. As with everything else, your mileage may vary, so use the technique that works best and most efficiently within your workflow.
Other Considerations
The Liquid Guides you place can be on any layer and they will still be in control. I like to place mine on a separate layer that I can hide when I’m not thinking about or previewing how my page transformations are going to look. Even if the layer is hidden or locked, the Liquid Guides are just as effective.

Using the Layers panel to separate Page Guides and Liquid Guides on their own layers.
Speaking of previewing, you might find yourself running out of pasteboard when checking out transformations using the Page tool. You can change the size of the pasteboard in Preferences, if you’d like. I prefer to just zoom way out, since the Page tool ignores the end of the pasteboard and let’s you drag out the page size as far as your Application Frame will allow.
Lastly, don’t forget to use some of the more liquid options found in Text Frame Options. Namely, flexible width columns and auto-sizing of text frames. Using the former to set a maximum column width keeps your text columns from too wide for easy reading. By using auto-sizing, you can take advantage of re-defining Paragraph Styles in a new layout without worrying that you’ll end up with overset text.

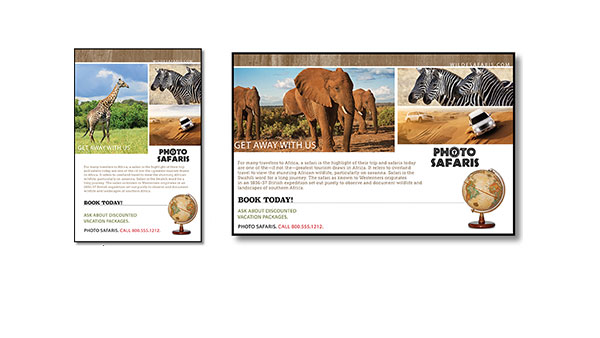
Using Flexible Column Width settings to go from one column of text in a portrait layout (left) to two columns when switching to landscape.
Ready for Takeoff
Well, my little fledglings, I’ve been chirping on about Liquid Layout Rules for a few weeks, now. I hope that you can see their potential, whether you’re creating Alternate Layouts for digital publishing, combining print and digital in the same document, or just want a way to easily re-size documents without having to start over from scratch. With a bit of planning, they can save you time—and provide consistency—in so many of your projects. And now, the time has come for you to leave the nest, flap your newfound Liquid Layout wings, and to soar above the InDesign landscape like a pro. Now fly away! Fly away!
This article was last modified on May 28, 2015
This article was first published on May 28, 2015
Commenting is easier and faster when you're logged in!

Recommended for you

Techniques for Copying Pages between InDesign Documents, Part 2
Let’s continue our look at ways to combine pages or objects from one or mo...

How to Set Vertical Text Alignment in InDesign
Learn how to set vertical type alignment, based on the first line baseline setti...

Weathering a Production Challenge on a Calendar in InDesign
A production challenge from a calendar project can teach us about becoming bette...