
Uncovering InDesign’s Hidden Files
Learn about the obscure but important files InDesign uses every day that you probably didn’t know about.


This article appears in Issue 145 of InDesign Magazine.
You already know that InDesign is a complex application with great power and flexibility. But, you might not realize that behind the scenes InDesign relies on a bunch of hidden files. Admittedly, the word hidden is a bit of a misnomer, because it implies that someone was deliberately trying to keep you from finding these files. Obscure is probably a better word. But the notion of uncovering hidden stuff is more fun, so let’s roll with that.
Understanding a bit about these files will allow you to tweak your settings, and then share them with other users. You can also create backups for use if you ever need to re-install InDesign or reset your preferences.
Let’s take a closer look at where these hidden files live, what they do, and how you can take advantage of them to help you work more efficiently in InDesign.
Hidden File Locations
InDesign’s hidden files can appear in one of two primary locations, which vary slightly depending on whether you’re using macOS or Windows. The first location is in the Applications folder (macOS) or the Program Files folder (Windows). Take a look at Figure 1 to see where those locations are. These are the folders where the InDesign application lives on your hard drive, but they’re also where some really useful files reside.

Figure 1: The paths to the Applications folder for macOS (top) and the Program Files folder for Windows (bottom)
The second place to look for hidden files is in the Users folder. Each user with an account on the computer will have their own user folder within the Users folder. See Figure 2 for the full file paths to these folders on macOS and Windows. Note that the language and version number folders in the file path depend on which version of InDesign you have installed and which localized language version you’re using. In my case, that’s US English version InDesign 2021 (16.0). From this point forward, I’ll refer to the above location simply as the User folder.
Figure 2: Within the Users folder for macOS (top) and Windows (bottom), each user has their own folder. Within that folder, you’ll find the subfolders that house some of InDesign’s hidden files.
Accessing the User folder
If you’re looking at that folder path and feel like getting a shovel to start digging, I don’t blame you. After all, that path goes eight or nine levels deep. Even I don’t want to dig that deep for a folder if I can help it. So here’s a trick to jump right to that folder with a single click: Start by opening the Scripts panel in InDesign. You’ll find the Scripts panel in Window > Utilities > Scripts. With the Scripts panel open, simply right-click the User folder in the panel and choose Reveal in Finder (macOS) or Reveal in Explorer (Windows), and you’ll be immediately transported to the User folder where your hidden files are found.
Well, to be accurate, you’ll actually be looking at the Scripts folder, but that folder is inside the User folder, next to all the other goodies that you’re trying to access (Figure 3).
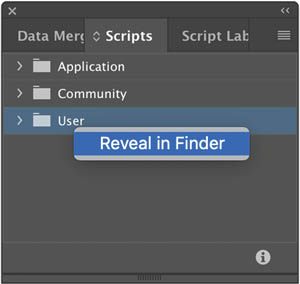
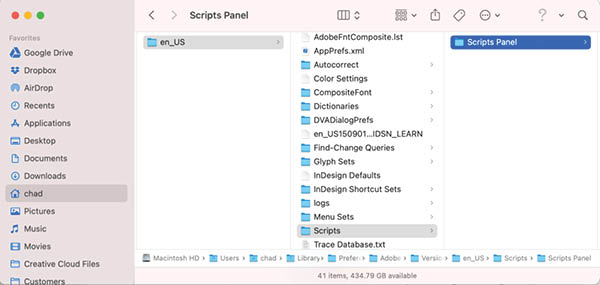
Figure 3: Accessing the InDesign User folder from the Scripts panel
Unfortunately, if you work for a large organization, you may not have permission to access or alter the application folder or the User folder. This is a bummer for sure, but unfortunately there’s not much you can do about this aside from asking your IT department to grant you access. As long as you have administrative access to your account, you should have no problem accessing the InDesign User folder.
Editing preference files
Most (but not all) of the hidden files we’ll be working with are XML files. You don’t need to know much about XML to edit and work with these files, but you’ll want to maintain the file’s structure exactly, for the files to continue doing their jobs. You can edit these files using any text editor that you prefer. TextEdit (macOS) or Notepad (Windows) will do the trick. Some third-party programs, such as BBEdit (macOS) or Oxygen (for both macOS and Windows), present the code with intelligent highlighting to make it much easier to read and edit.
However, note that it is critical that you do not apply any real formatting—such as font, size, or styling—to the text. These files must remain as text only. That’s why I don’t recommend using a word processor. I’ve even seen problems when people open these in TextEdit, as the app sometimes switches into “rich text” mode.
A note about preferences
You may notice, when comparing the User and application folders, that some preferences may appear in both locations. The files in the Applications or Program Files folder are included when you install InDesign. However, if you make any adjustments to the InDesign preferences—for example, by choosing InDesign > Preferences (macOS) or Edit > Preferences (Windows)—or if you change any defaults within the InDesign application, the file in your User folder will be modified. When a preference exists in both locations, the file in the User folder will take precedence. The preference file that stores all of your settings in the User folder is called InDesign Defaults.
There are a number of things that can go wrong with preferences files that can cause InDesign to misbehave. The good news is that you can delete the InDesign Defaults file at any time; when you quit and relaunch InDesign, it will create a fresh new preferences file for you. The downside, however, is that any of the customizations that you’ve done within InDesign will get lost. For this reason, it’s always a good idea to make a copy of your preferences file when it’s in good working order so you can restore it should things go awry.
Unlocking the Secret of InDesign Lock Files
Every time you open an InDesign document, a peculiar new file will appear in the same folder as the InDesign file with an IDLK extension (for “InDesign lock”).
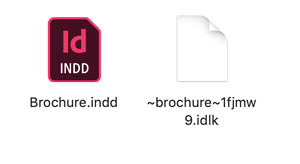
Figure 4: The InDesign lock file appears in the same folder as any open InDesign document.
The facts that they appear out of nowhere with almost the same file name as your document and cannot be opened by any means tend to cause some confusion among new users. Don’t be alarmed! These files are critical to preserving the integrity of your InDesign documents. This stems from the fact that InDesign files are actually databases, and as such they can (and might) be opened and altered by multiple users at the same time. Obviously this would cause havoc, so Adobe devised a system whereby every open InDesign document spawns a corresponding lock file that prevents anyone else from opening the layout. The moment you close an InDesign file, the lock file disappears, making the layout available for anyone to open.
The one exception to this rule is when your team uses Dropbox or similar cloud-based file-sharing services that cause the lock file system to break down. If you’re sharing InDesign files via Dropbox you might want to adopt a workflow where everyone agrees to drag the file to a “checked out” folder before opening it as a message to your colleagues that they should leave it alone.
Another potential source of confusion is how the lock files for documents that were open at the time of a crash sometimes get left behind. Don’t worry though, when you relaunch InDesign and the document gets recovered, you can simply save and close the file and the lock file will disappear. If you do come across an orphan lock file, simply quit InDesign and you can safely delete it. Some folks mistakenly think that lock files contain the data that InDesign uses to recover your work after a crash. But this information is actually stored elsewhere.
By default, for macOS it’s at:
Users/[User Name]/Library/Cache/Adobe InDesign/Version[#.0]/InDesign Recovery
For Windows it’s at:
Windows: C:Users[User Name]AppDataLocalAdobeInDesignVersion [#].0en_USCachesInDesign Recovery.
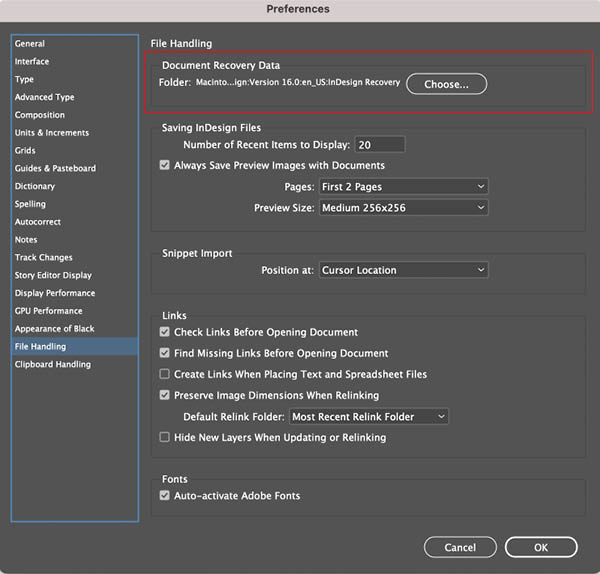
If you ever find yourself crashing each time you try to open a particular InDesign document, deleting the recovery data in these locations should end the crashing loop. Note that you can also change the location where the recovery data is stored in the File Handling area of InDesign’s Preferences dialog box
Hidden Settings
You can customize a number of settings in InDesign to suit your needs. Each one of these settings has its own file that stores the settings for future recall. However, InDesign itself doesn’t offer any interface that would let you share those settings with others or manage them. Let’s explore some of the settings, and which file saves them, so you can share them with other users when needed. All you have to do is copy the file in question and put it in the same location on another computer.
Workspaces
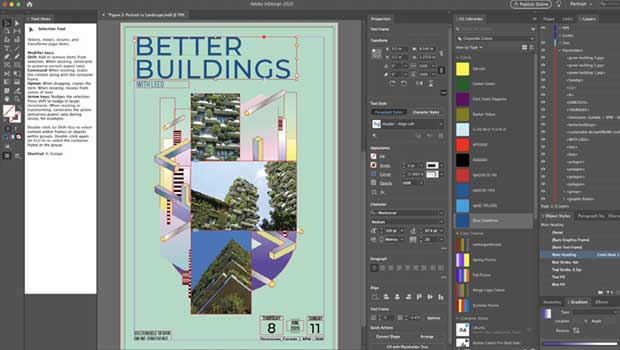
The ability to create custom workspaces is one of my favorite features in InDesign. By creating a custom workspace, everything goes easier because I have all my panels exactly where I want them. If I ever get sloppy and make a mess of things, I can tidy them back up in an instant by choosing Window > Workspace > Reset Workspace.
If you’re like me and work on more than one computer, you don’t want to go through the process of re-configuring your workspaces on each machine. It’s much easier to copy your workspace files to all your machines. It’s also helpful if you’re trying to create a department-wide workspace or simply want to share your workspace with another user. InDesign stores workspace files in the User folder within a folder called Workspaces. Each saved workspace is its own XML file that you can copy to the same folder on any other computer to make that workspace available. Note that InDesign actually saves two files for each workspace: one with the panels arranged as you currently have them and one in the pristine state that was recorded when you saved the workspace (Figure 5). This allows the program to remember exactly how you left the panel when you switch between workspaces.
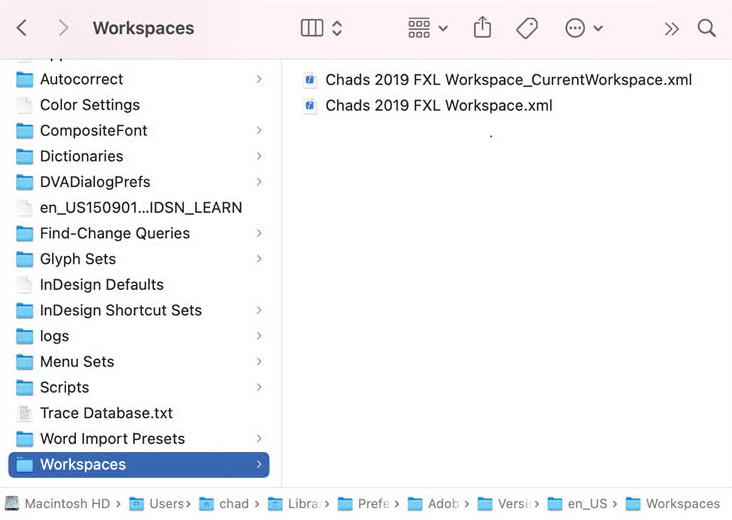
Figure 5: The Workspace folder showing the saved workspace along with the modified workspace
Keyboard shortcuts
InDesign does a pretty good job providing keyboard shortcuts for commonly used commands and dialog boxes, but for many semi-obscure commands there is no default shortcut. Furthermore, even when shortcuts are provided, sometimes they’re hard to remember or not very intuitive. Raise your hand if you’ve ever pressed Command/Ctrl+I when you wanted to open the Info panel or Command/Ctrl+K when you wanted to make a hyperlink.
Creating your own custom keyboard shortcut set is a great way to become more efficient in InDesign. To share your shortcuts with other users (or to copy them to another computer), head to the InDesign Shortcut Sets folder within the User folder. Each keyboard shortcut set that you create will be represented by an INDK (XML) file in this folder.
Create your own custom keyboard shortcuts poster
See Jean-Claude Tremblay’s article in Issue #77 for how to use the amazing power of GREP styles to make a poster with all your custom keyboard shortcuts.
Menu sets
By creating a custom menu set you can colorize entries in each of InDesign’s menus and hide items that you never use. This feature can be helpful for new InDesign users to point them to specific features as they’re learning the application. Even for seasoned users, highlighting common menu commands and hiding unnecessary ones can be helpful (Figure 6). Or you can just use this feature to pull an April Fool’s prank on an unsuspecting co-worker (not that you heard it from me).
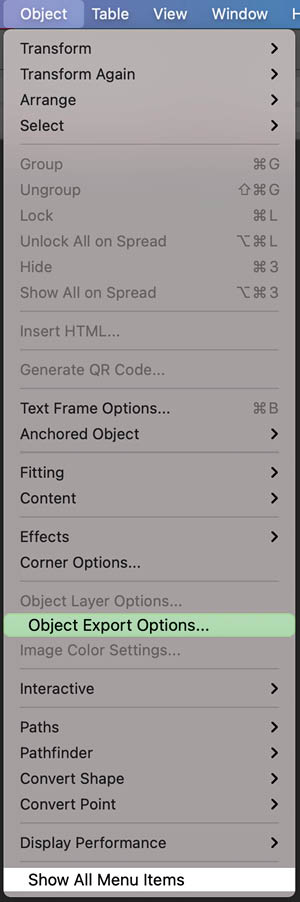
Figure 6: A customized Object menu with the Captions and Clipping Path commands hidden and Object Export Options highlighted
Custom menu sets are also found in the User folder, in a subfolder called, you guessed it… Menu Sets. These menu set files are XML code (with an INMS file extension) ready to share with any of your colleagues.
Word import presets
If you regularly import Word documents into InDesign and want to control the formatting, you can define presets that control how the content from Word is formatted when it is placed into InDesign. This includes whether formatting is removed or maintained, as well as whether Word styles map to InDesign styles.
Many workflows rely on this process to streamline flowing content into InDesign and to maintain consistency among all users within an organization. The best way to do this is by saving a Word Import Preset and distributing it to all of your colleagues who have to place Word docs into InDesign. You’ll find these preset files in your User folder, inside a folder called Word Import Presets. These files have a SMP (Sangam Import Preset) file type but once again, these are really just XML code which you can tweak and edit if desired (Figure 7).
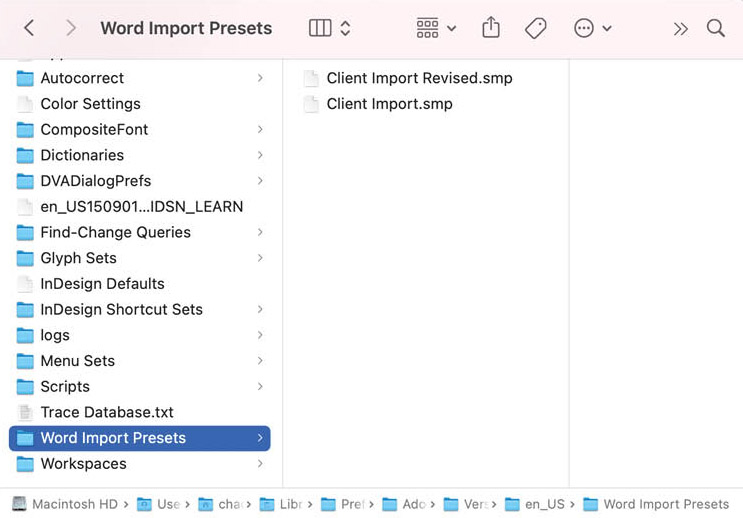
Figure 7: The Word Import Preset files allow you to save your settings when placing Word files in InDesign.
Autocorrect settings
Those of us who do any amount of typing in InDesign appreciate the Autocorrect feature which corrects commonly mistyped words automatically as you type. For example, I’m notorious for typing the word the as teh. Apparently, that’s a common mistake other users make too, because it’s one of the default corrections provided by InDesign when you enable Autocorrect. Each of us is different, however, which is why you can add your own personal devils to the list of words that InDesign autocorrects (Figure 8).
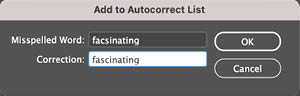
Figure 8: Add a word that you commonly mistype to the list of words that InDesign will autocorrect.
You’ll find the Autocorrect preference file in the User > Autocorrect folder. The file for US English users is called English USA.xml. Depending on your language, the file may be called something different. This XML file is easily editable, and it’s a slick way of adding words without having to do them one by one in the InDesign Autocorrect Preferences dialog box. If someone created a list of autocorrect words in a word processor, you can copy them and paste them (with proper structure) into the XML file (Figure 9).
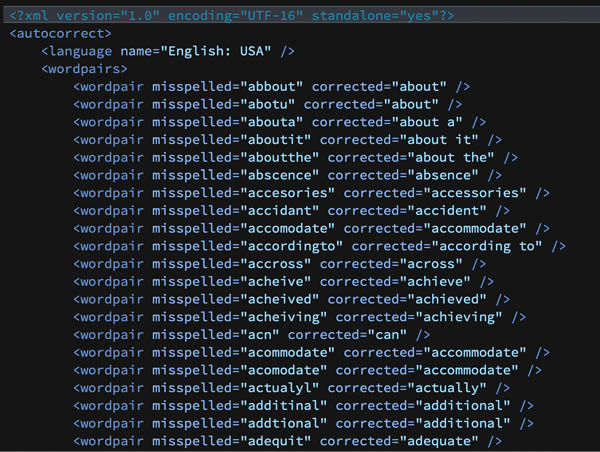
Figure 9: You can easily add autocorrection fixes by editing the XML file that stores the Autocorrect settings.
Tip: You can also edit the autocorrect file to make InDesign type commonly used phrases and special characters. See this article by Anne-Marie Concepción, and this one by Keith Gilbert for details.
Find/Change queries
InDesign’s Find/Change dialog box is an absolute powerhouse for cleaning up text and objects in your layout. For a deep dive into all you can do with Find/Change, see my article in Issue #97.
You can save any find/change routine in InDesign as a query, and then access these queries from the menu at the top of the Find/Change dialog box. If you’ve gone to the trouble to make queries that save a lot of manual work, it only makes sense to share them with your colleagues (or just back them up so you never have to recreate them). Find/change queries are located in the User > Find-Change Queries folder. Saved queries are XML files and are located within subdirectories within the Find-Change Queries folder. Simply open either the Color, Glyph, GREP, Object, or Text folder to find the saved query that you need (Figure 10).
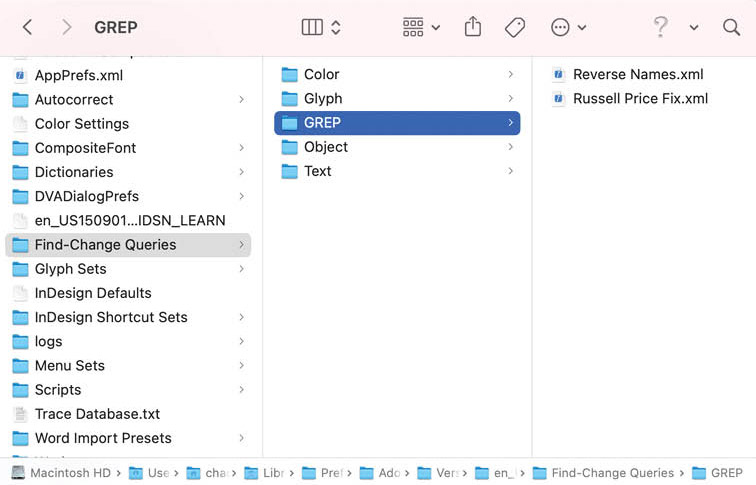
Figure 10: Find/change queries are organized by type in the User folder. You can back up or share them as needed.
Glyph sets
InDesign’s Glyphs panel provides access to any character in any font that you choose. It also gives you the ability to save a custom glyph set to make it easier to quickly access the ones you need for a particular task.
To access your saved glyph sets, go to your User > Glyph Sets folder and find the file for the glyph set you’re looking for (Figure 11).
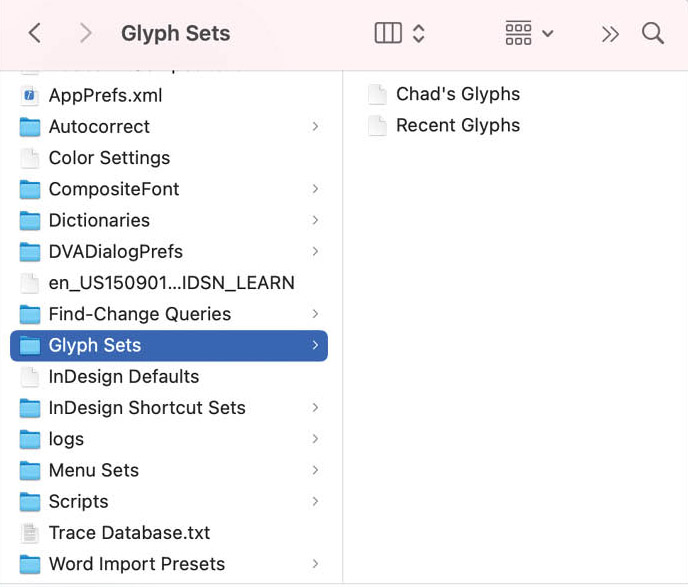
Figure 11: You can access previously saved glyph sets in the User folder.
The glyph set files are XML files, so you can open and read them, but it’s unlikely you’ll want to edit these as each glyph has unique id and Unicode values that you’d need to know in order to create each entry. But, knowing where these files reside gives you the ability to share them with your colleagues or save backups for yourself.
Scripts
Unlike most of the items I discuss in this article, script files aren’t auto-generated by InDesign; you need to install them yourself. Scripts have become so essential to modern InDesign workflows that you’ll find at least one mentioned in pretty much every issue of this magazine, including this one for formatting hyperlinks.
To load a script into InDesign, simply open the Scripts panel by choosing Window > Utilities > Scripts. Right-click the User folder and choose Reveal in Finder (macOS) or Reveal in Explorer (Windows). Drop the script in the resulting folder, and you’re all set. You don’t even need to quit and relaunch InDesign, the script will show up after dropping it in the folder.
Tip: As your script collection grows (and trust me, it will) consider organizing them into subfolders inside the Scripts folder. That same hierarchy will appear in the Scripts panel (Figure 12).
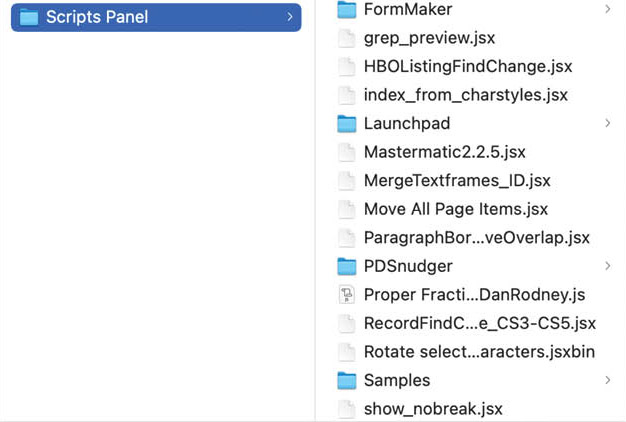
Figure 12: You can organize scripts within the Scripts panel by placing them in subfolders for clear and easy access.
Fonts
With all of the various ways we have for making fonts available to use in InDesign (including the trick of putting them in a folder called Document Fonts next to the INDD file on your computer), you may be wondering why InDesign has its own Fonts folder. This folder, found in the InDesign subfolder of the Applications folder (macOS) or Program Files folder (Windows), provides a quick and easy way to activate fonts for use in all your InDesign documents without activating them on your computer. This is great when someone sends you a document to work on, along with a bunch of fonts that you don’t want to load onto your system. Instead, just drop them into the InDesign Fonts folder, and you’re good to go. There’s no need to restart InDesign; the fonts will be available instantly. You can even activate Multiple Master fonts (which aren’t officially supported any more) and use Windows-only fonts with macOS in this manner.
Another great use for this folder is to circumvent problems with font activation. If you ever have a font that won’t activate, try dropping it in here. Just remember that any fonts you put here are available to InDesign only, so you won’t see them in the font menus of any other applications.
Tip: You can create an alias in macOS (or shortcut in Windows) to a folder of fonts and then put that file in InDesign’s Fonts folder (Figure 13). InDesign will instantly see all those fonts without you having to copy or move the actual font files!
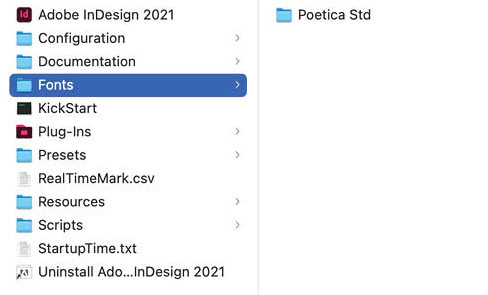
Figure 13: Fonts loaded into the InDesign fonts folder for activation within the InDesign application
Swatch libraries
When using the Swatches panel, you often need to access a specific color from one of the saved libraries (e.g. one of the Pantone libraries). Unfortunately, due to the alphabetization of the Libraries, the Pantone Libraries are towards the bottom of the list. That menu is also quite extensive with a lot of libraries that you might never use. To shorten list of Swatch libraries, you can move the ones you don’t need to a different location. You’ll find the libraries in the Applications/Program Files folder, in the Presets > Swatch Libraries folder. Simply move any unneeded libraries to any other folder on your computer and they’ll no longer appear in the list of available swatch libraries (Figure 14). Note that you will need administrative access to move files into or out of this folder.
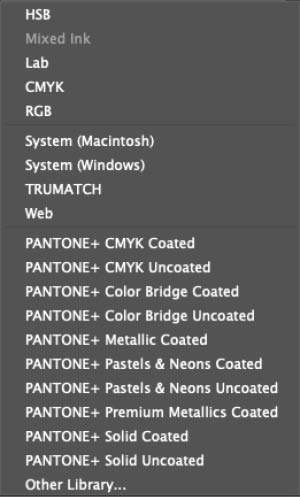
Figure 14: After you remove unneeded libraries from the Swatch Libraries folder, the list of libraries is much more manageable in the menu.
You can also add your own custom swatch libraries to the list. Here’s how: Start by selecting the swatches you want to save as a library in the Swatches panel, then choose Save Swatches from the panel menu. Give your new swatch library a name, and save as an ASE (Adobe Swatch Exchange file) in a handy spot like the Desktop. Then, move the file into the Swatch Libraries folder. (You can’t directly save the ASE file in the folder because you have to authenticate as an admin to make changes as noted above.) There’s no need to restart InDesign, your new swatch library will appear immediately as a choice when you’re creating a new swatch (Figure 15).
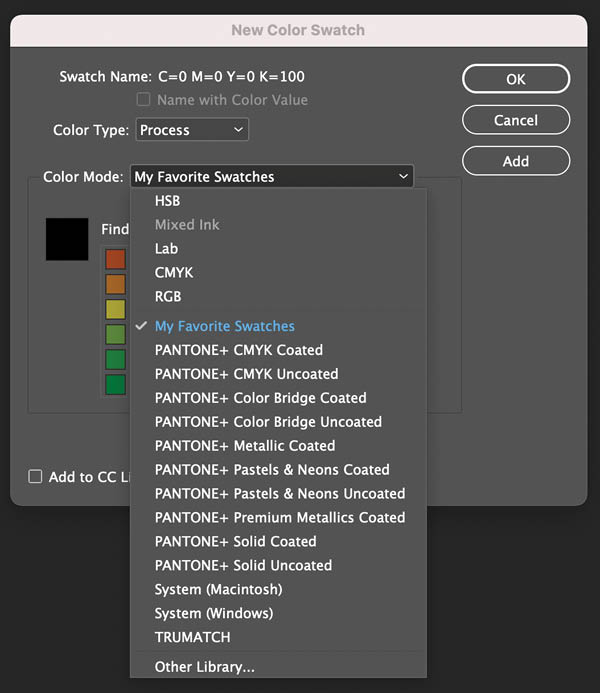
Figure 15: Save a custom swatch library of your favorite colors so you can access them in all your documents.
Keep Digging!
As you can see, the more you dig into InDesign’s hidden files, the more you can customize InDesign to your liking. Keep exploring on your own. Just remember to always make backups before editing any files. You never know what treasures might be found in the next folder!
Commenting is easier and faster when you're logged in!

Recommended for you

Book Excerpt: JavaScript for InDesign
Don’t wait for Adobe to create the features you want in InDesign—make them yours...
Optimizing Your Workspace
Learn how to make the most of your screen real estate by building the best custo...

InDesign Magazine Issue 122: Cross-Media Color
We’re happy to announce that InDesign Magazine Issue #122 (June 2019) is no...