

This tip was sent to Tip of the Week email subscribers on July 23, 2015.

Sign up now and every week you’ll get a new InDesign Tip of the Week and Keyboard Shortcut of the Week, along with roundups of new articles at InDesignSecrets and CreativePro, plus exclusive deals sent right to your Inbox!
Just scroll all the way down to the bottom of this page, enter your email address, and click Go! We’ll take care of the rest. Now, on with the tip!
Need to place an image so it’s a specific width or height in your layout? By default Smart Guides appear if you drag while placing an image. But the guides show you the percentage of the image size, not the size of the frame you’re drawing.

If you want to see the width and height of the frame, keep an eye on the Control panel. When you see the size you want, release your mouse button.
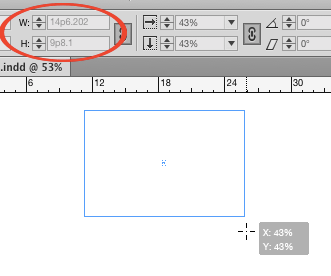
If you can’t get the exact values in the Control panel that you want, hold Shift as you drag the image frame. Now the Smart Guides will show you the width and height of the frame with more precise control.

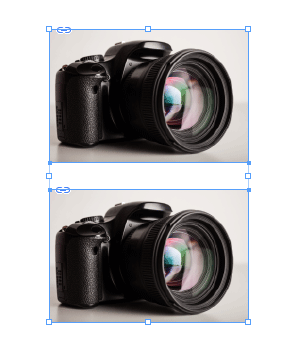
But there is one downside to holding Shift: the frame won’t automatically fit the image.

So to deal with that, release the mouse button when the frame is the desired width or height.
Then use the Control panel buttons to fill the frame proportionally and/or fit the frame to the content, as needed.

If using the Control panel buttons slows you down, try the keyboard shortcuts instead: Command+Shift+Option+C (Mac) Ctrl+Shift+Alt+C (Windows) for Fill Frame Proportionally and Command+Option+C (Mac) Ctrl+Alt+C (Windows) for Fit Frame to Content.
This article was last modified on July 25, 2019
This article was first published on July 28, 2015
Commenting is easier and faster when you're logged in!

Recommended for you
InDesign Magazine Issue 130: Accessible PDF
We’re happy to announce that InDesign Magazine Issue #130 (February 2020) i...

Tip of the Week: Corner Stroke Effects
This tip was sent to Tip of the Week email subscribers on October 23, 2014. Sign...
Tip of the Week: 5 Color Tricks
Sign up for the InDesign tip of the week to get a new tip, roundups of new artic...