

This tip was sent to Tip of the Week email subscribers on July 30, 2015.

Sign up now and every week you’ll get a new InDesign Tip of the Week and Keyboard Shortcut of the Week, along with roundups of new articles at InDesignSecrets and CreativePro, plus exclusive deals sent right to your Inbox!
Just scroll all the way down to the bottom of this page, enter your email address, and click Go! We’ll take care of the rest. Now, on with the tip!
InDesign’s Control panel puts many of the most important controls for positioning and formatting objects and text right in front of your eyeballs. But did you know you can customize it to suit your needs even better? To do so, click the menu at the far right side of the Control panel.

First, you can decide where the Control panel is positioned: docked at the top of the window, at the bottom, or floating by itself.

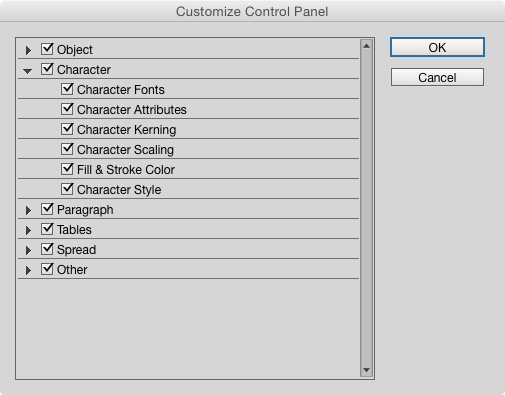
Then, at the bottom of the Control panel menu you can choose Customize to decide which items appear in the Control panel. There are six categories of controls.

You can show/hide all items in a category by clicking the box next to the category name. Or tip open the category by clicking the small triangle, and select individual items to show/hide.
Hiding items makes room for other ones when your screen is too narrow to fit everything at once. For example, if I’m working on a small laptop, there’s not enough room for my object styles to appear in the Control panel when I have a frame selected.

But if I use the customization options to turn off some items that I don’t need at my fingertips, I can make room for object styles.

This article was last modified on July 25, 2019
This article was first published on August 4, 2015
Commenting is easier and faster when you're logged in!

Recommended for you

InQuestion: Using InDesign’s Touch Workspace
Bob Levine shows how to use a unique InDesign workspace for Windows touch device...
Tip of the Week: No Sweat Notes
This tip was sent to Tip of the Week email subscribers on April 16, 2015. Sign u...