

This tip was sent to Tip of the Week email subscribers on December 31, 2014.

Sign up now and every week you’ll get a new InDesign Tip of the Week and Keyboard Shortcut of the Week, along with roundups of new articles at InDesignSecrets and CreativePro, plus exclusive deals sent right to your Inbox!
Just scroll all the way down to the bottom of this page, enter your email address, and click Go! We’ll take care of the rest. Now, on with the tip!
Adobe snuck a cool feature into InDesign CC 2014 called the Color Theme tool. You just select the ![]() tool in the Tool panel (it’s just above the Hand tool), then either click on an object (like an image) or drag the tool over a bunch of objects on the page. InDesign collects the most common colors from the selection and places them into the Color Theme panel that pops up. For example, in this image, I’ve dragged the tool over most of the page and its colors appear in the little floating panel:
tool in the Tool panel (it’s just above the Hand tool), then either click on an object (like an image) or drag the tool over a bunch of objects on the page. InDesign collects the most common colors from the selection and places them into the Color Theme panel that pops up. For example, in this image, I’ve dragged the tool over most of the page and its colors appear in the little floating panel:
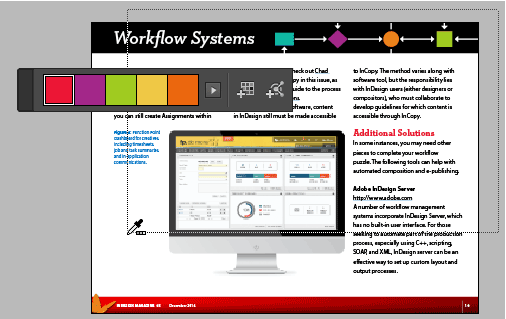
Once the colors are in the floating panel, you can click the Add This Theme to Swatches button to create a new color group with those five color swatches in it. But here’s a secret shortcut: If you hold down the Q key when you click or drag with the Color Theme tool, InDesign will automatically create a color group with five color swatches in it. No fuss, no muss!

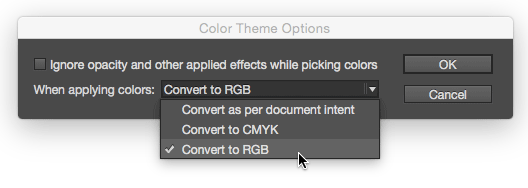
By the way, you may notice that in the image above, the colors are all defined as RGB. That is because the document was created with the Digital Publishing intent, which causes new swatches to be defined as RGB by default. If you create a document with Print intent, the Color Theme tool will add CMYK swatches by default. You can override these defaults and force swatches to be created in RGB or CMYK by double-clicking on the Color Theme tool and selecting the color space you want from the Color Theme Options dialog box.
This article was last modified on July 25, 2019
This article was first published on January 6, 2015
Commenting is easier and faster when you're logged in!

Recommended for you

InDesign’s Hidden Color Tools
Don’t let these powerful tools for picking, organizing, and sharing colors in In...
Tip of the Week: Drag and Drop Anchored Objects
This tip was sent to Tip of the Week email subscribers on December 17, 2015. Sig...

Tip of the Week: Finding Hidden Items With Preflight Profiles
This tip was sent to Tip of the Week email subscribers on June 12, 2014. Sign up...