

This InDesign tip on how to place one image into multiple frames was sent to Tip of the Week email subscribers on October 20, 2016.

Sign up now and every week you’ll get a new tip, keyboard shortcut, and roundups of new articles, plus exclusive deals sent right to your Inbox!
Just scroll down to the bottom of this page, enter your email address, and click Go! We’ll take care of the rest. Now, on with the tip!
You can create all kinds of fun, eye-catching design elements by placing an image into multiple frames. The trick is to use a compound path.
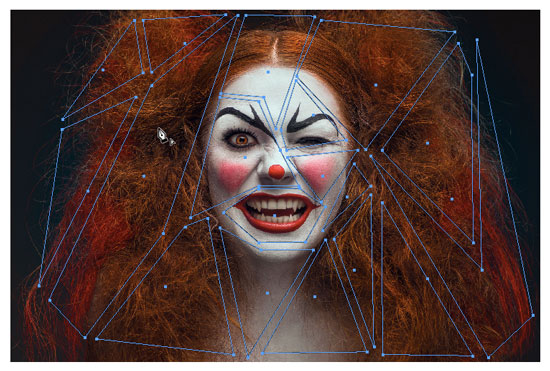
For example, this image of a scary clown lady just isn’t quite scary enough.

But if we put it in a bunch of jagged frames, we can heighten the feeling of unhinged danger that should accompany every scary clown image.
To do this, take the Pen tool and draw a bunch of jagged, random closed paths over the original image.
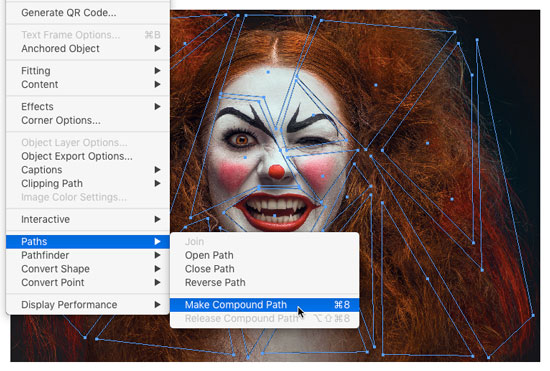
When you’re done, select them all and choose Object > Paths > Make Compound Path.
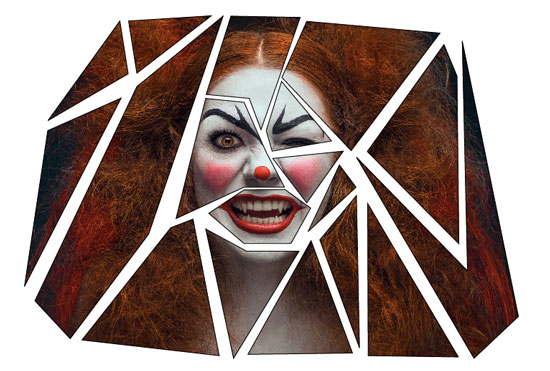
Then cut the original image and delete the empty frame.
Select your compound path, and choose Edit > Paste Into.
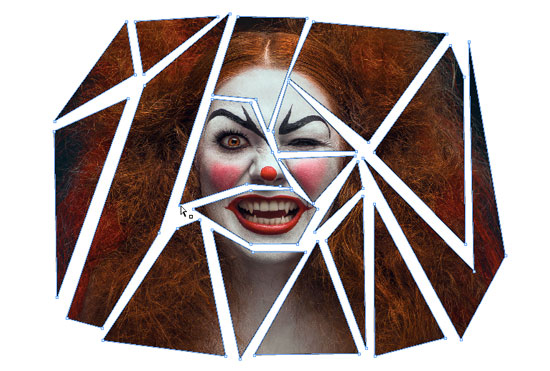
With the image in place, you can manipulate the individual points with the Direct Selection tool to modify the look.
This article was last modified on July 25, 2019
This article was first published on October 25, 2016
Commenting is easier and faster when you're logged in!

Recommended for you

InDesign 102
David Blatner is your guide for what to to tackle after you’ve mastered the basi...

A Closer Look at Obscure Features
Blink and you might miss these 20 obscure InDesign features worth knowing

Creating Patterned Shadows in InDesign
How to make alternatives to a traditional drop shadow in InDesign