
Now we simply choose Edit > Paste to paste the artwork we copied from our vector program into the Fontographer character window. If you are a recent version of Illustrator or FreeHand, however, you won’t see the artwork: Fontographer doesn’t know how to interpret the fills inside the paths with recent versions, so what shows up on the screen are white fills on a white background. (As any art school graduate will tell you, white objects on a white background are very difficult to see.)
To solve this little problem, with the paths still selected, choose Element > Selection Info. Then change the Fill from 0% to 100%. This allows you to see the artwork inside the character window.
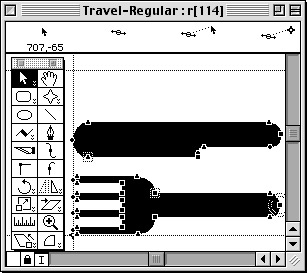
The artwork for the character appears inside the character window.
For each additional icon or other artwork you need, repeat the steps above, assigning each to a separate character. When you are finished you will see a small preview for each of the characters inside the main window.
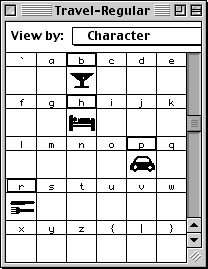
Each character square displays a preview of the artwork for that character.
At this point you can choose File > Generate Font Files. This dialog box lets you choose the platform, type of font, and size of the bitmap characters. For a quick, four-character font such as this one, you can keep the Easy settings. After choosing your settings, select File > Save to save your Fontographer file.
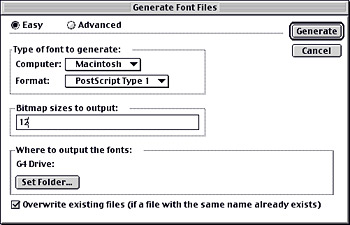
Use the Generate Font dialog box to create and save the final font files.
Fontographer creates three separate files for each font. The Suitcase and PostScript font files contain the actual font information for a Type 1 font. The native Fontographer (.fog) file should be kept if you want to make further changes to the font.
From this point on, it’s a snap to add the font to your system and use your custom characters. To insert the character assigned to the letter “r,” for instance, simply select the your font from the menu within your application (as you would any other font), then type the letter “r.”
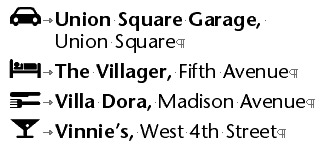
The four characters we used as they appear in a Word document.
Other Uses for Custom Fonts
Of course, you don’t have to be in the travel business to appreciate a custom font. One firm where I taught created a custom font of the company logo to make it easier for the company’s word processing staff to insert the logo in ordinary Word documents. All they had to do was choose the custom font and type a single character — much easier than inserting a graphic.
Also, if you convert an EPS logo into a font, it will print to a non-Postscript printer. That’s because ATM takes care of converting the PostScript outlines into information that the printer can understand.
I use a custom font in my books to display the white word TIP inside a black rounded rectangle. Rather than inserting a picture box, I can use the Find/Change command to insert the TIP character.
Crystal Ball
Sadly, the future for Fontographer doesn’t look bright. There has not been a major upgrade to Fontographer in years. And as Macromedia has focused on “What the Web Can Be,” Fontographer has been moved to the “Other Products” category at the bottom of Macromedia’s product list. And with each version of Illustrator and FreeHand, it has become more difficult to copy and paste directly into Fontographer. (It used to be that you could paste directly into Fontographer without having to change the fill tint.)
One can only hope that Macromedia will find renewed interest in upgrading this product, and in keeping it alive. At least some of us would sorely miss Fontographer were it to fade away entirely.
Read more by Sandee Cohen.
This article was last modified on March 12, 2022
This article was first published on February 14, 2001
Commenting is easier and faster when you're logged in!

Recommended for you

The Remote InCopy User
Specific InCopy workflows come in all different flavors, and because InCopy is s...
Magazine PIB Ad Revenue Increased 4.4% in November
Total magazine rate-card-reported advertising revenue for the month of November...

FontShop Offers Free Apple Products With the Purchase of Type Libraries on CD
The FontShop team (aka Santa’s helpers) has been working on a sweet offer...